Free cursor
On screens that contain many setpoints, a specific button may not be assigned to each setpoint
value. Instead, a button is assigned to enable the cursor arrow buttons below the numeric keypad,
which are used to highlight the setpoint field. At this point, press the enter (✓) button to open a
dialog box where you can enter a new setpoint value. The X button cancels cursor mode. See the
Schedule screen for an example.
Navigation
In order to maximize the amount of values that the panel can display to the user, and in order
to place those values in context, multiple screens have been designed to describe the chiller
operation. In order to move from one screen to the next, navigation buttons have been defined.
These buttons allow the user to either move forward to a subscreen of the present screen, or move
backward to the previous screen. Except for the home screen display, the upper-right button always
returns the user to the home screen. Navigating with soft buttons is as simple as pressing the
button next to the label containing the name of the preferred screen. The system immediately
refreshes the display with the graphics for that screen. The following table shows a layout of all the
screens and how they are connected.
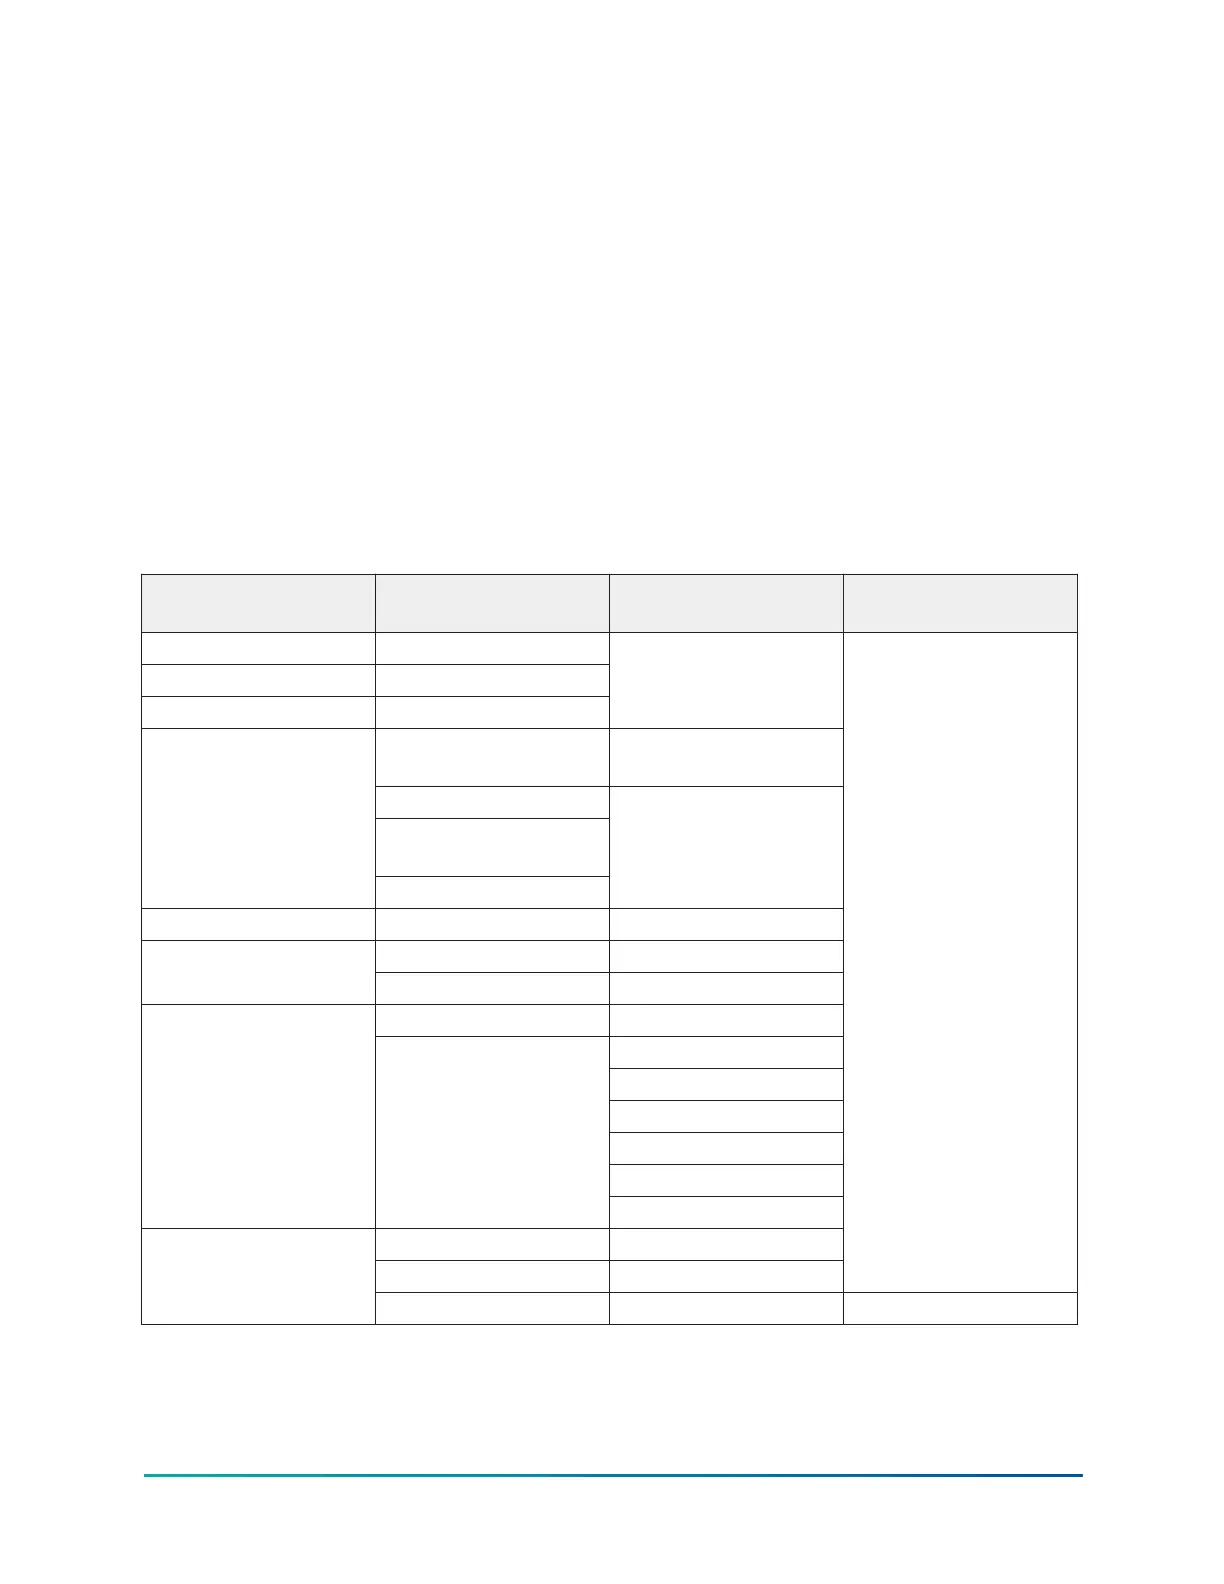
Table 12: Screen layout and navigation
Available from the
home screen
Second level screens Third level screens Additional screens
System screen —
Evaporator screen —
Condenser screen —
Magnetic bearing
controller screen
MBC details screen
Surge screen
Variable geometry
diffuser screen
Compressor screen
Power panel screen
Capacity control screen —
VSD details screens
VSD screen
Motor details screen VSD cooling screen
Remote control screen
Schedule screen
User screen
COMMS screen
Printer screen
Sales order screen
Setpoints screen
Setup screen
Operations screen
History details screen
Customer screen Custom setup screen
History screen
Trend screen Trend setup screen Common slots screen
35
YMC
2
Mod B with OptiView Control Center
 Loading...