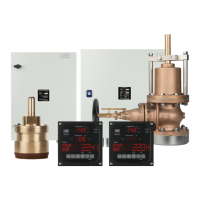
5-7
Connect terminals 37 – 54 to the BT connectors numbered 37 – 54.
Connect the two shield wires (red and blue) to the ground bolt (M5) in the
Sig.Processor.
Connect the shield in the cable gland.
x The NMEA output cables and any other signal outputs/input should be brought through
appropriate cable glands to other users.
Main NMEA output is found on terminals 108 (A) and 109 (B).
Main NMEA input is found on terminals 105 (A) and 106 (B).
x One additional NMEA out (Redundant WT) shall be connected from terminals 120 (A)
and 121 (B) to the redundancy NMEA input 5 in the Sig. Distributor, described in the
JLN-900 system drawing chapter if applicable.
The following additional connections shall be made to increase redundancy between STW /
SOG speed log parts of the Sig.Processor.
This additional connection shall also be made on the JLN-900 to separate power between the
STW and SOG part of the Sig.Processor.
x One separately fused additional AC power intake shall be brought to the 100 / 230 V AC
terminals at the MAIN_2 (BACKUP) intake located just below the MAIN_1 intake.
Connect to L1, L2 and GND.
The cable shields for the NMEA output/input cables should be connected firmly in the Sig.
Distributor and not in the
Sig.Processor.
All supplied cable glands are designed to terminate the cable shield directly to the outer
enclosure in the cable gland. This is necessary precaution to maintain the EMC protection
performance as verified in type approval testing. If more cable glands than those supplied are
needed, types designed for cable screen termination must be used!
Correct mounting of cable gland on Transducer cable:
1. Remove the protecting cover to expose the outer shield and outer insulation of the
cable.
2. Push the parts over the cable in the order shown.
3. “Push” down the screen over the top of part “B”
4. Push Cable/B part firmly into the fixed part of the cable gland.
5. Tighten nut “A” firmly.
D
C
B
A
 Loading...