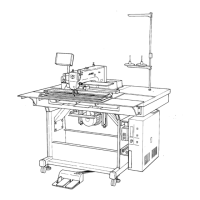
✩ The knife is driven by the air cylinder. Therefore, relieve the air
pressure before adjustments.
1. Loosen two setscrews and maintain the clearance toward the
throat plate at 5mm in the state that the moving knife is advanced
to the extreme front. Adjust the distance toward the needle to 30
to 32 mm and tighten the two setscrews .
In this case, confirm that a proper clearance is secured between the
center knife and the spreader .
– 8 –
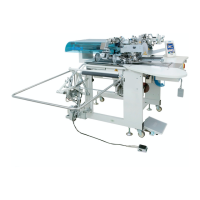
1. Loosen two setscrews of the counter knife and push both right
and left blades of the counter knife uniformly against the moving
knife . Then tighten the two setscrews again.
2. Check the motion of the cylinder shaft . Confirm that it can work to
accomplish cutting assuredly at 17.6N (1.8kgf) or less.
3. After thread cutting, the holding force for needle thread clamp is
more than 2.9N (300g) both right and left.
In the case when this force is not secured, select an adequate spacer
.
[The spacer has four types of thickness: 0.2mm, 0.4mm, 0.6mm,
and 0.8mm]
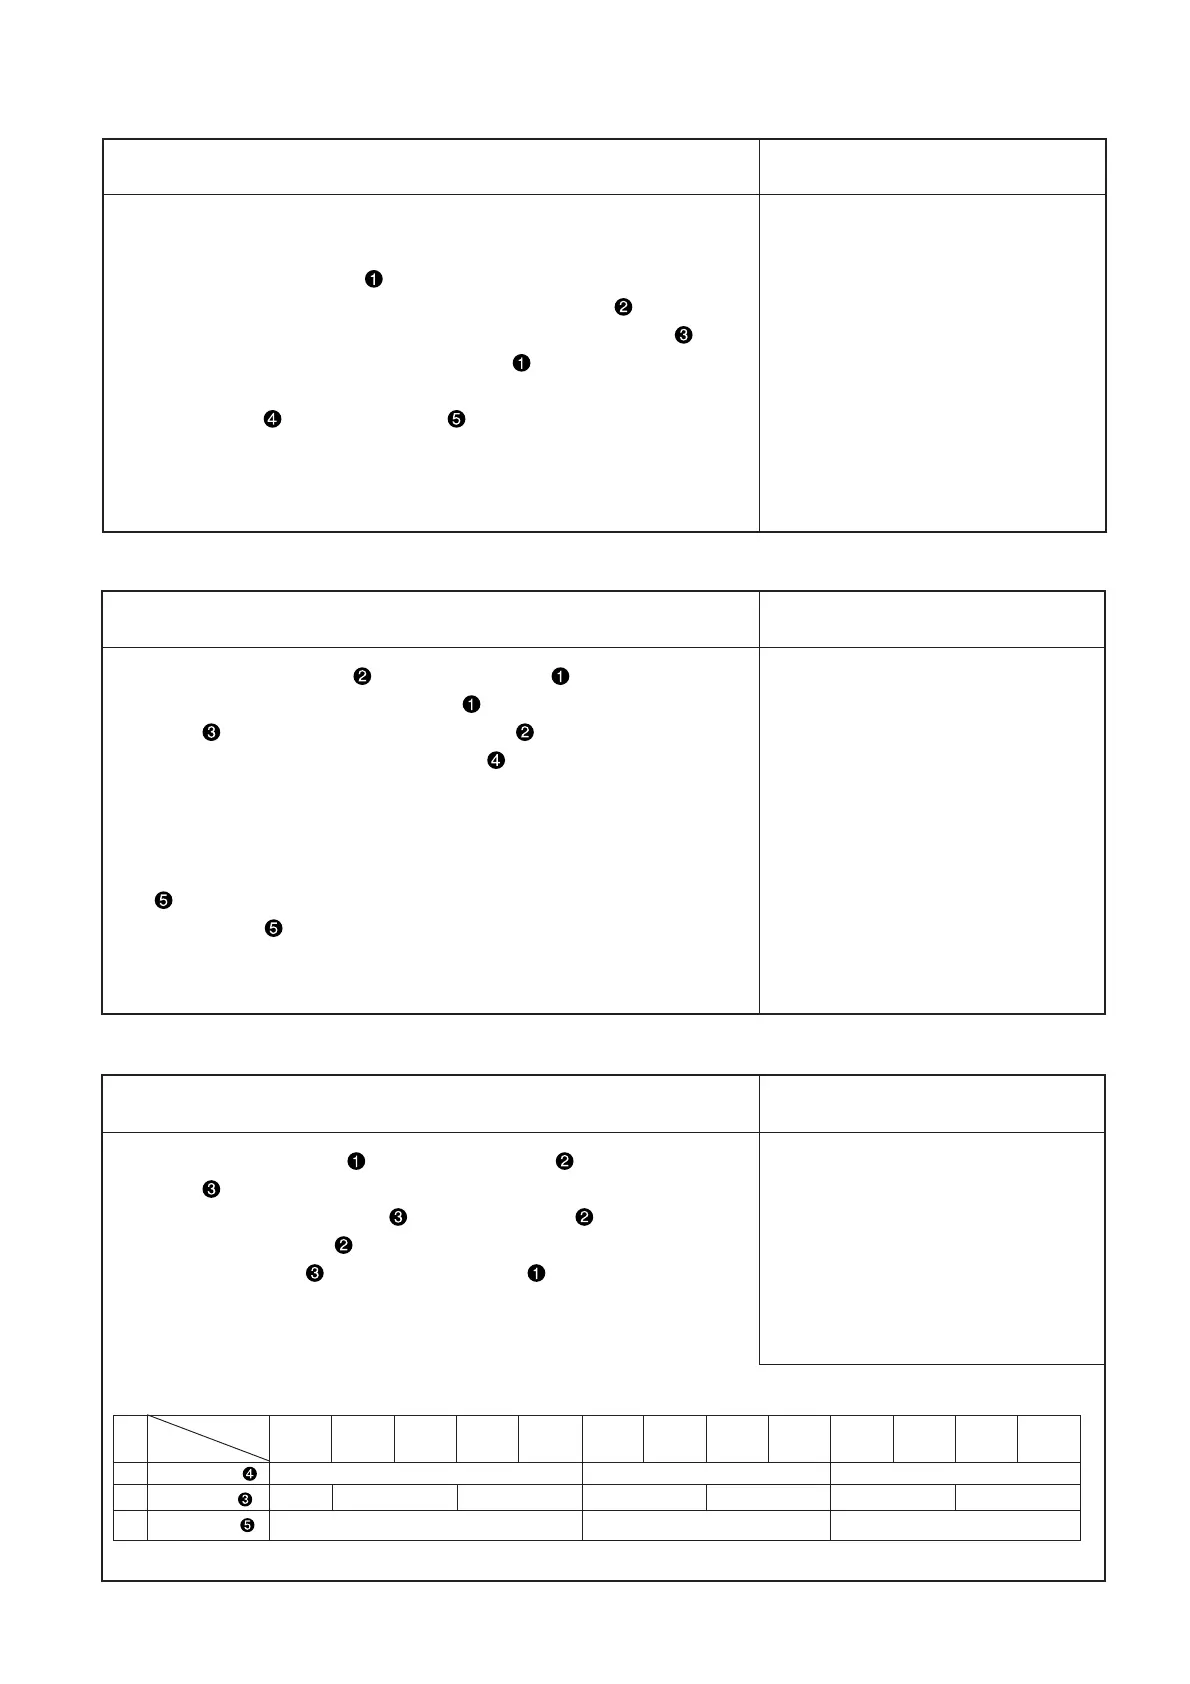
1. Loosen the setscrew and remove the pin . Then, the moving
knife can be pulled off downwards.
2. Install a new moving knife and insert the pin .
At that time, the pin should be held almost in the same plane of
the moving knife . Tighten the setscrew .
* The needle thread trimming unit has some mounting parts that can
change with the gauge size. Refer to the table below for details.
No. 8mm 10mm 12mm 14mm 16mm 18mm 20mm 22mm 24mm 26mm 28mm 30mm 32mm
1 Counter knife 16409906 16411308 40039788
2 Moving knife
40033814
40023020 40033809 40033810 40033811 40033812 40033813
3 Clamp plate 40033815 16411407 40039783
Size
Name of parts
Adjustment Procedures Results of Improper Adjustment
Adjustment Procedures Results of Improper Adjustment
Adjustment Procedures Results of Improper Adjustment
 Loading...