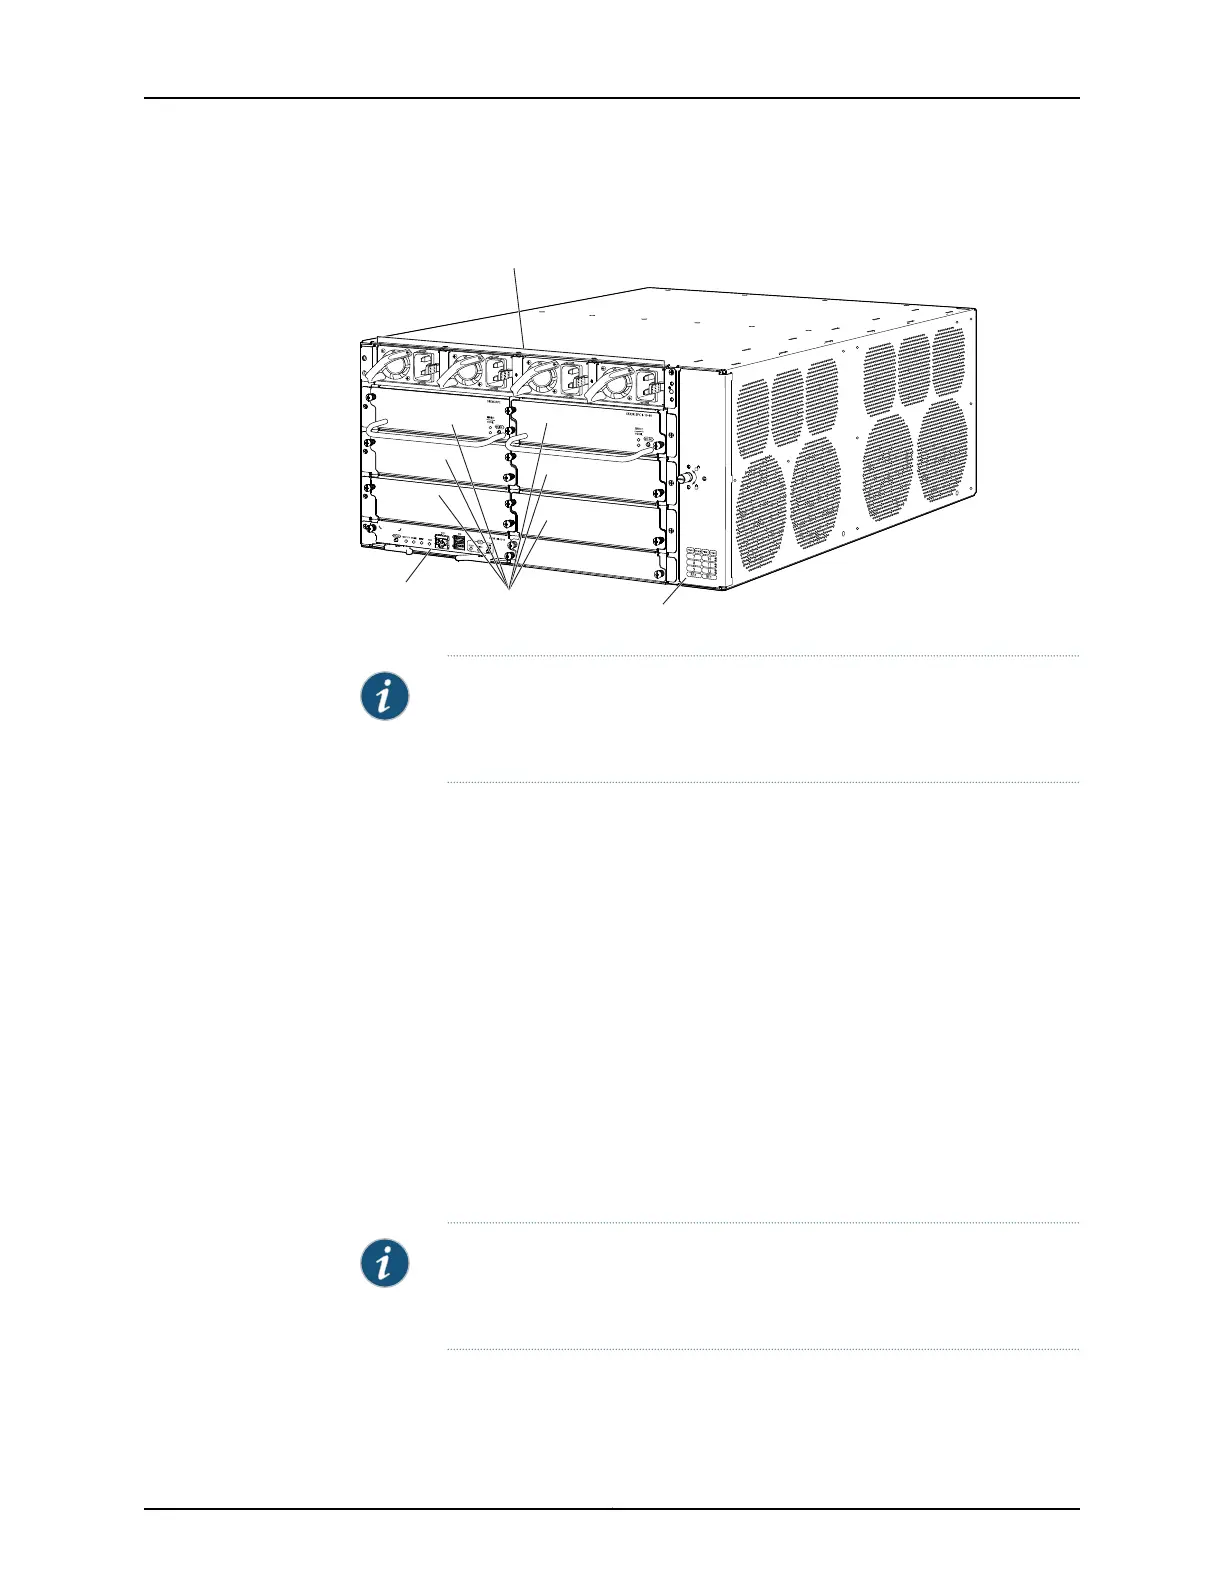
Figure 10: Components to Remove from the Rear of the Services Gateway
g030266
Fan tray
(behind door)
Routing
Engine
Power
supplies
Cards in
CFM slots
NOTE: The procedure in this section for removing components from the
chassis is for initial installation only and assumes that you have not connected
power cables to the services gateway.
To remove the components from the services gateway:
1. Attach an electrostatic discharge (ESD) grounding strap to your bare wrist, and connect
the strap to one of the ESD points on the chassis. For more information about ESD,
see the SRX3600 Services Gateway Hardware Guide.
2. Release each component by loosening its retaining screws and unlatching its ejector
handles as appropriate. For full instructions on removing services gateway components,
see the SRX3600 Services Gateway Hardware Guide.
3. Slide each component out of the chassis evenly so that it does not become stuck or
damaged.
4. Label each component as you remove it so that you can reinstall it in the correct
location.
5. Immediately store each removed component in an antistatic bag.
6. Do not stack removed components. Set each one on a flat surface.
NOTE: For complete instructions on removing services gateway components,
see “Installing the Services Gateway Without a Mechanical Lift” in the
SRX3600 Services Gateway Hardware Guide.
11Copyright © 2011, Juniper Networks, Inc.
Remove Components