19
If you’re putting in ceiling speakers, do the following:
a. Take down the ceiling tiles you marked in Step 3.
b. Cut ceiling tiles
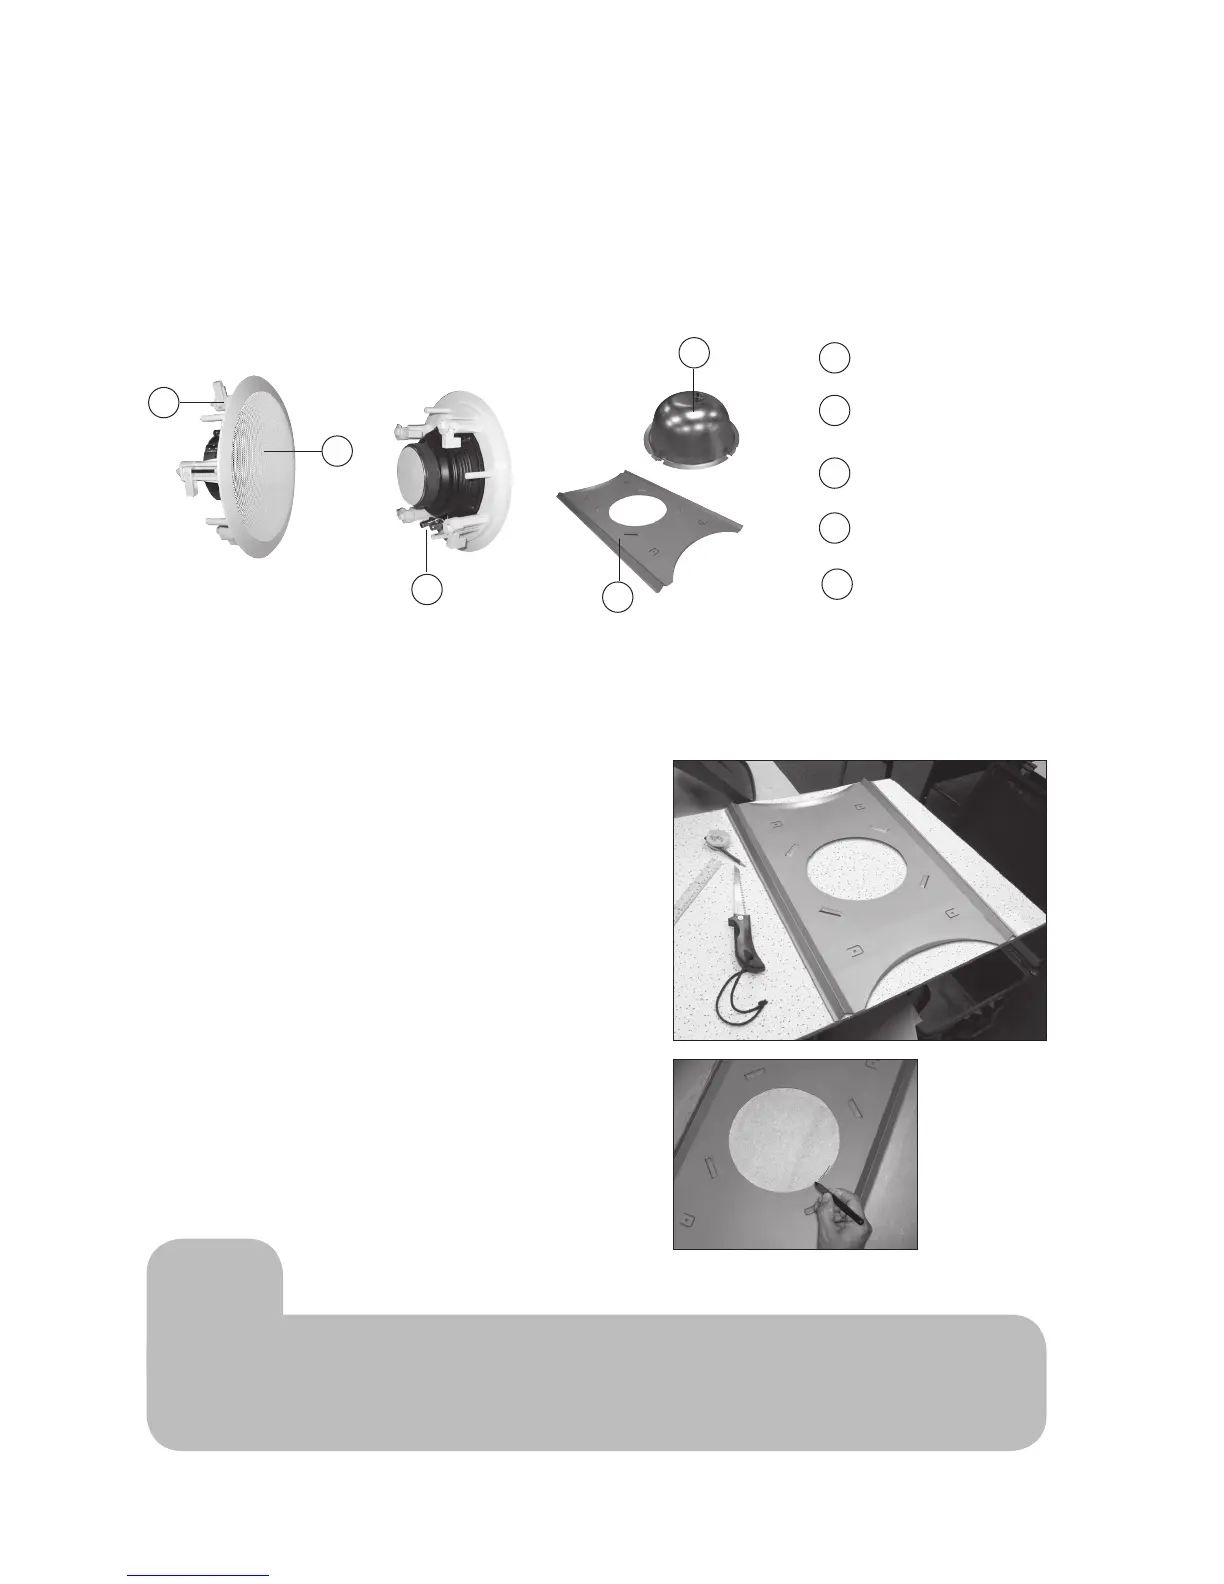
Lay each bridge on its tile so that the ends of the bridge
are flush with both edges of the tile.
Use the bridge as a template to trace a circle on the
ceiling tile.
Using a keyhole saw, cut the traced circle out of the tile.
Repeat for your other speaker tiles.
Installing speakers
1. Plenum-rated listed ceiling speaker
3 speaker input terminals
front
1 speaker support tabs
back
2 speaker grill
4 metal tile bridge
1
2
3
4
5
5 speaker back can
Estimated time for this step: 30 minutes
Now that your cables are in place, you’re ready to install your speakers.
Tip
Local building codes may require a safety line attached to speaker/tile
bridge assembly.