4
Estimated time for this step: 15 minutes
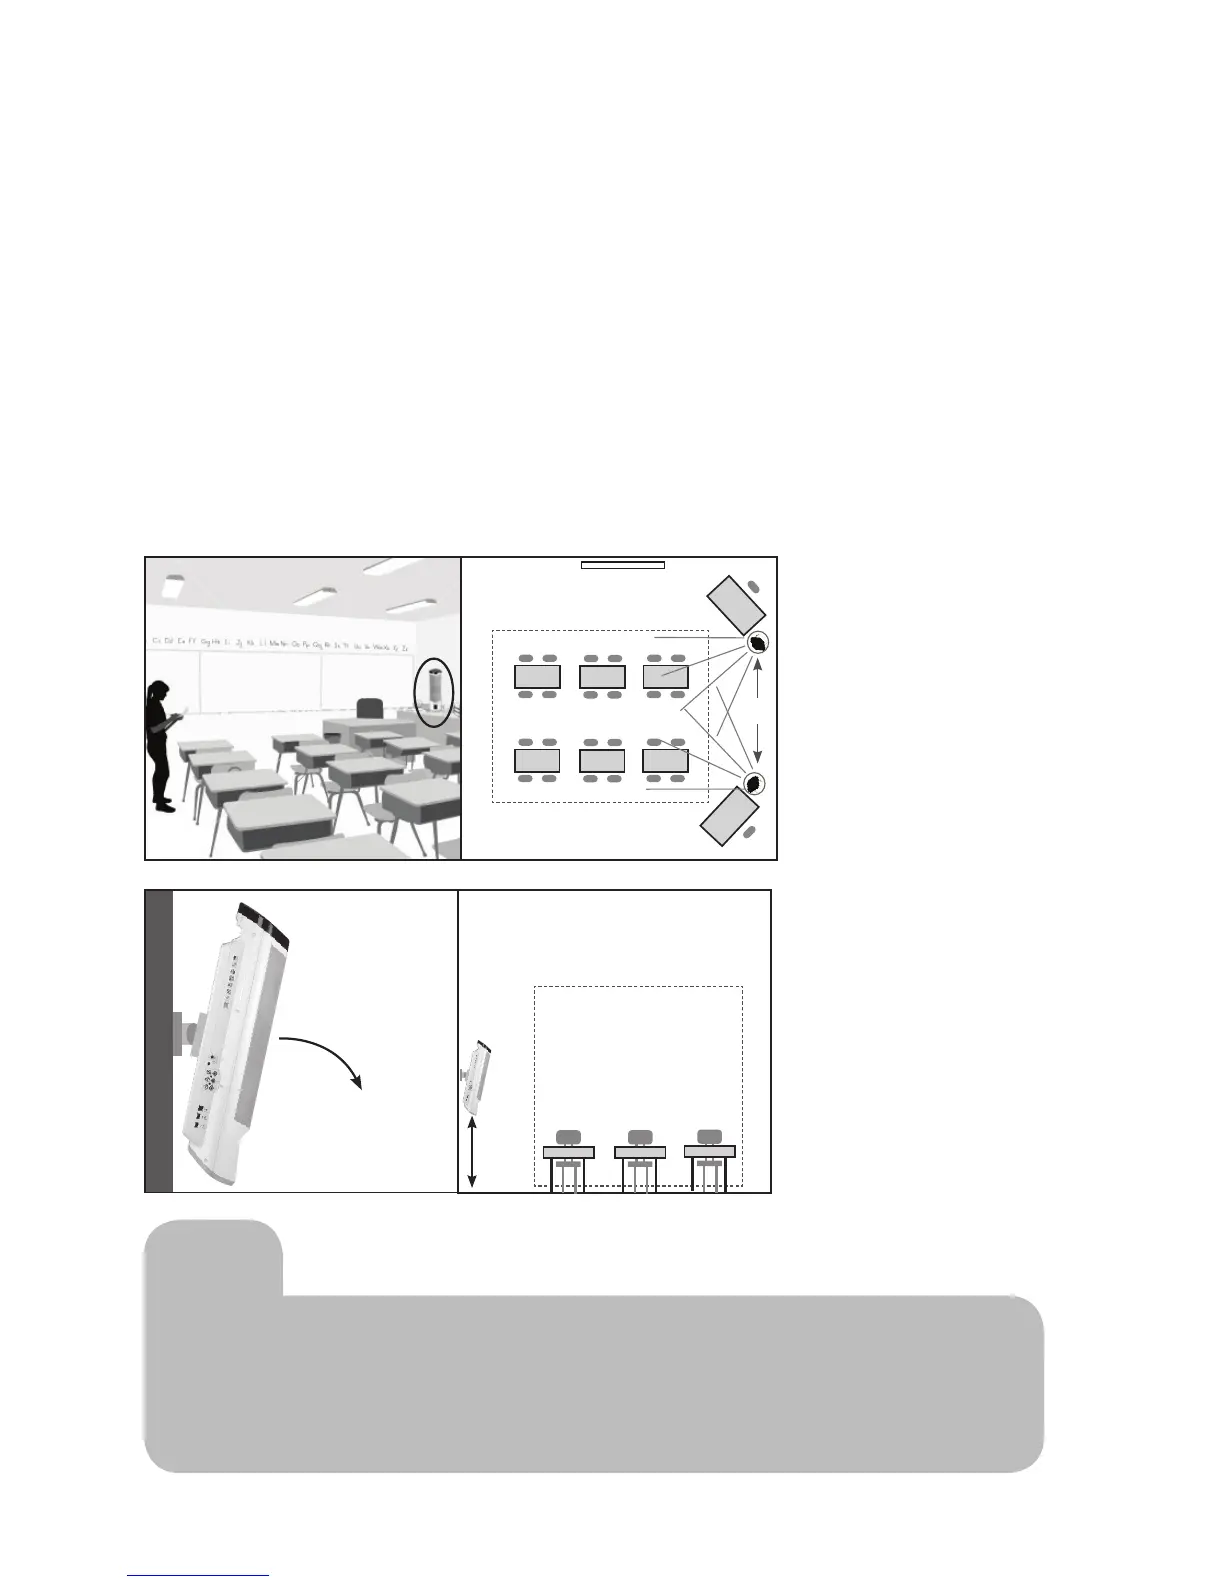
Your Juno Tower will perform best when you place it:
•Evenwitheitherthefrontorrearedgeofthemainlisteningarea(i.e.wherestudentssit)
and
•Withthespeakerfacingthecenterofthelisteningarea.
Choose the location that allows connection to the teaching computer (4m USB cable provided) and other audio
sources (e.g. DVD player)
You can either mount the Juno Tower on a wall using a standard 100mm VESA mount (recommended) or simply
place it on a table using the stand provided. In any case, the bottom edge of the Tower should be at least 4.5 feet
(1.3m) from the floor.
If wall mounting, angle the tower down to point at the center of the listening area.
Tip
If you are installing any of the optional expansion modules, do that first.
•SpeakerExpansionModule–Page13
•ChannelExpansionModule–Page31
•PageOverrideModule–Page33
Wall
Top View
OR
Listening Area
Side View
Listening Area
4.5 ft
(1.3m)
minimum
Setup and placement of the Juno Tower