5
With the optional Vesa Wall Mount (FrontRow part number
320-1000-110) the Juno Tower can be easily mounted to a wall.
•Verifythatthesupportingsurfacewillsafelysupportthe
combined load of the equipment and all attached hardware
and components. Drill a pilot hole prior to installing the big
wood screw (Lag Screws).
WARNING: Only mount to walls made of stone, concrete,
hollow blocks, solid wood or wood supports.
•Tightenwoodscrewssothatthewallplateisfirmly
attached, but do not overtighten. Overtightening can
damage the screws, greatly reducing their holding power.
•Makesurethatmountingscrewsareanchoredintothe
center of the stud.
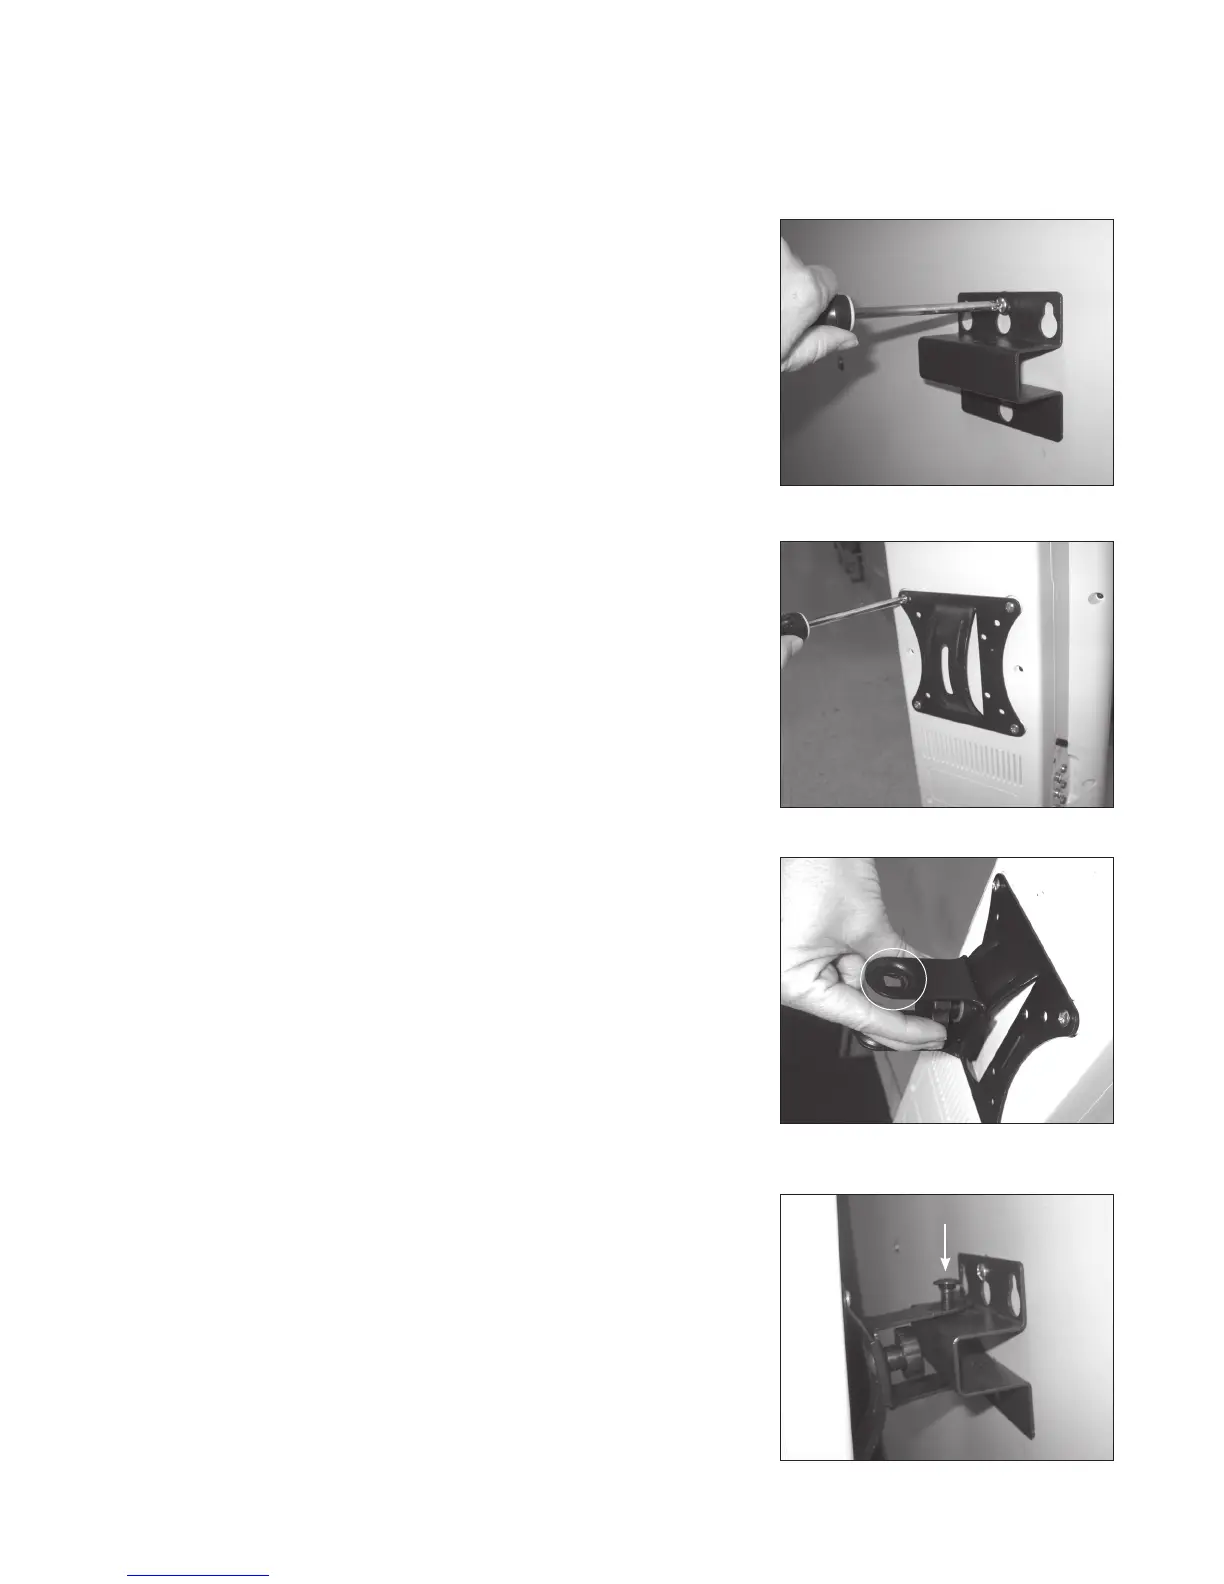
1. Mount the wall attachment plate to the wall using the
appropriate screw type for the wall type (i.e. concrete,
masonry black, wood stud). (See Image 1)
2. Using the screws included with your Juno Tower, attach the
mounting plate to the back of the Juno Tower (See Image 2)
3. Attach the swivel arm to the mounting plate using the
short screw with nylon washer, and black tightening knob
(See Image 3). NOTE: Make sure the square hole is on
the top.
4. Attach the swivel arm to the wall attachment using the long
screw and nut (See Image 4).
Wall mounting
Image 1
Image 2
Image 3
Image 4