26
Install sensors
(If you are using IR Speakers, you may be able to skip this step)
Estimated time for this step: 10 minutes
You’re almost done.
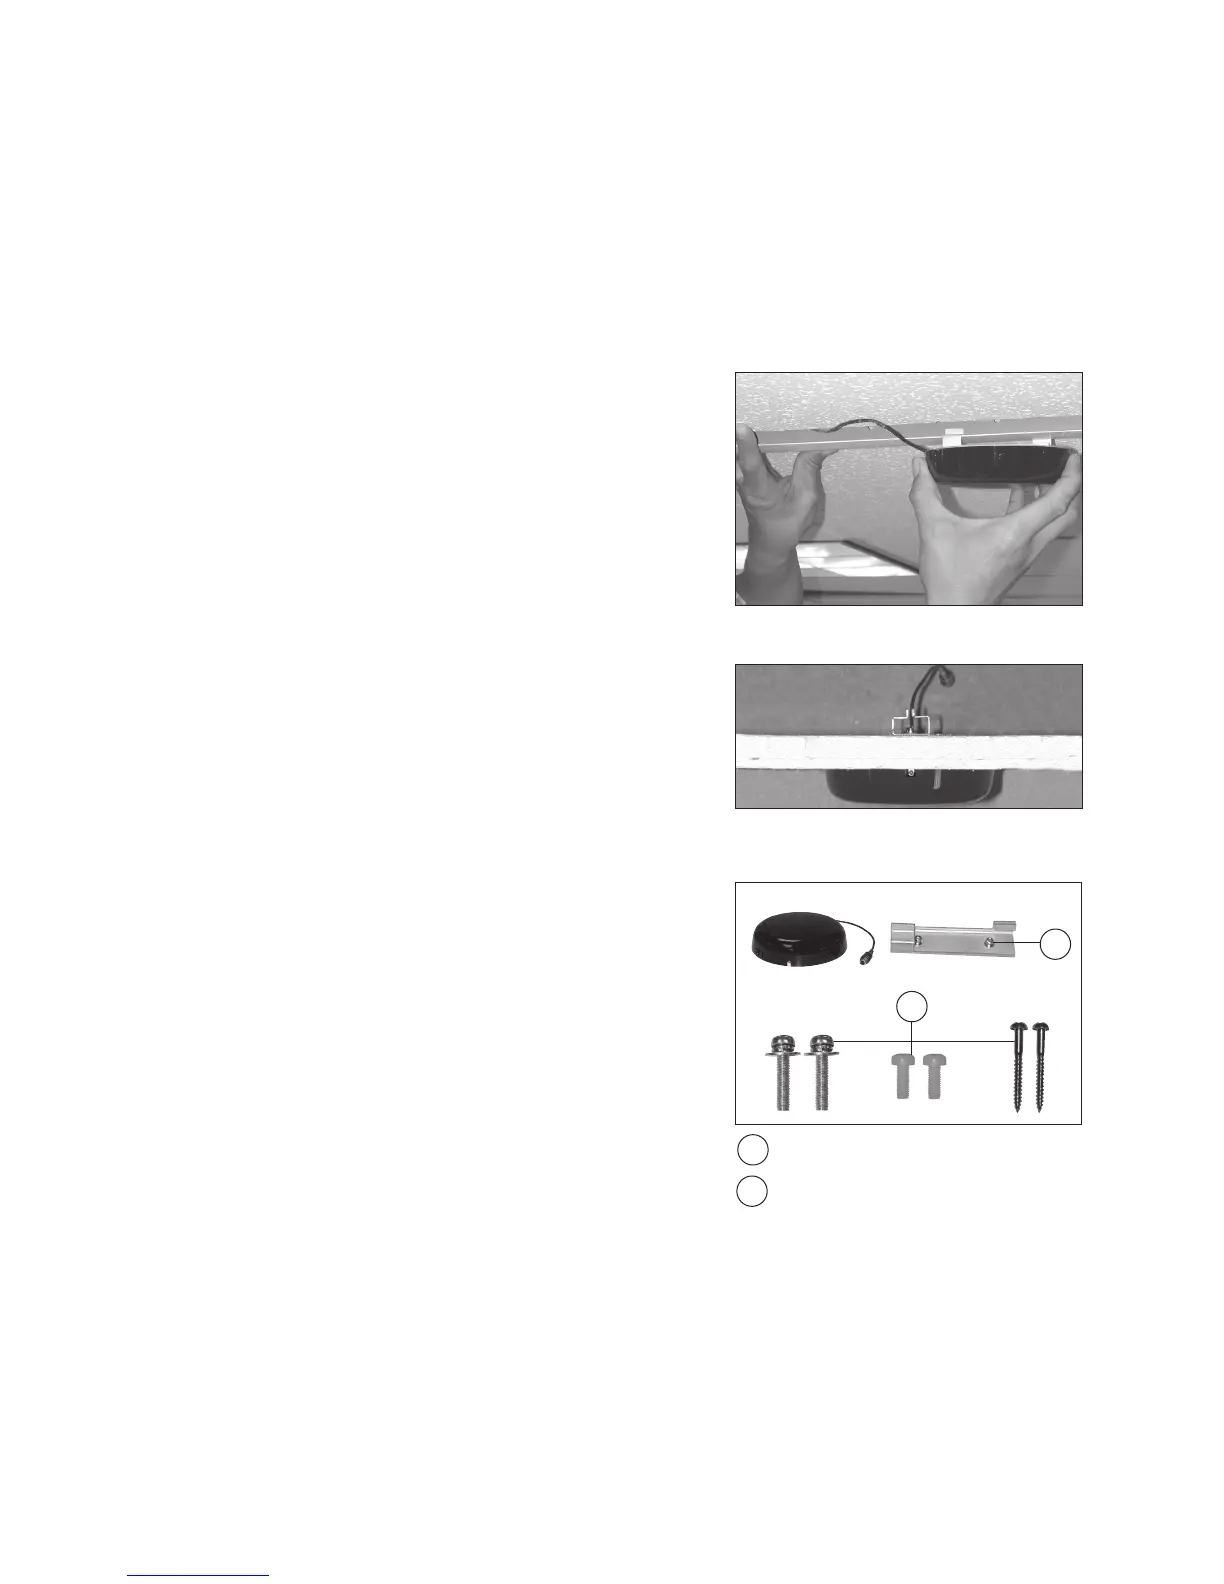
1. CEILING SENSOR
a. If you’re installing a ceiling sensor and have an
acoustic tile ceiling (or “drop ceiling”):
1. Slide and twist the ceiling sensor bracket onto the
T-bar rail until it rests on the rail or mount directly
to the ceiling tile if not using the T-bar supports.
2. Attach the sensor to the cable leading to the receiver.
3. Replace the ceiling tile, making sure that the sides
of the tiles prevent the sensor bracket from twisting.
b. If you’re installing a ceiling sensor and have a
sheetrock ceiling:
1. Mount the ceiling sensor directly to the sheetrock
ceiling using the screws provided.
2. Attach the sensor to the cable leading to the receiver.
NOTE: The ceiling sensor bracket comes pre-installed
with non-metallic screws and washers to electrically
isolate the sensor from the T-bar. Do not replace with
metal screws as system performance may be reduced.
ceiling sensor features
1
2 mounting screws
1 ceiling tile mount bracket
2
T-bar support rail
ceiling tile mount