34
Image 5
Image 6
Image 7
Image 4
Test and Adjust
1. Reconnect the power supply to the Juno Tower and turn the power on.
2. Play music or some other continuous audio source through the Juno Tower.
3. While the music is playing, have your assistant make a long announcement over the PA system. Adjust the sensitivity
control until you just mute the music. When your assistant’s announcement stops, the music should return to full volume.
4. While the music is playing, have your assistant make several brief announcements over the PA system. Adjust the delay
control so that the music is quickly muted when a PA announcement begins and returns after the announcement is
complete. The delay range is approximately 1/2 second to 5+ seconds.
Installation - continued
5. Remove terminal block from the module (See Image 4).
6. Connect the 6-pin connector on the Page Override module to the 6 pins on the Tower PCB. Make sure the
module board is seated all the way down. Verify that the 6-pin connector and the 4 mounting holes are properly
aligned. Attach the module to the Tower PCB using the four included screws (See Image 5).
7. Remove the access panel from the back panel by pressing in on the two tabs (see image 6) and replace with the Page
Override module access panel (See Image 7). Then replace the back panel and screws.
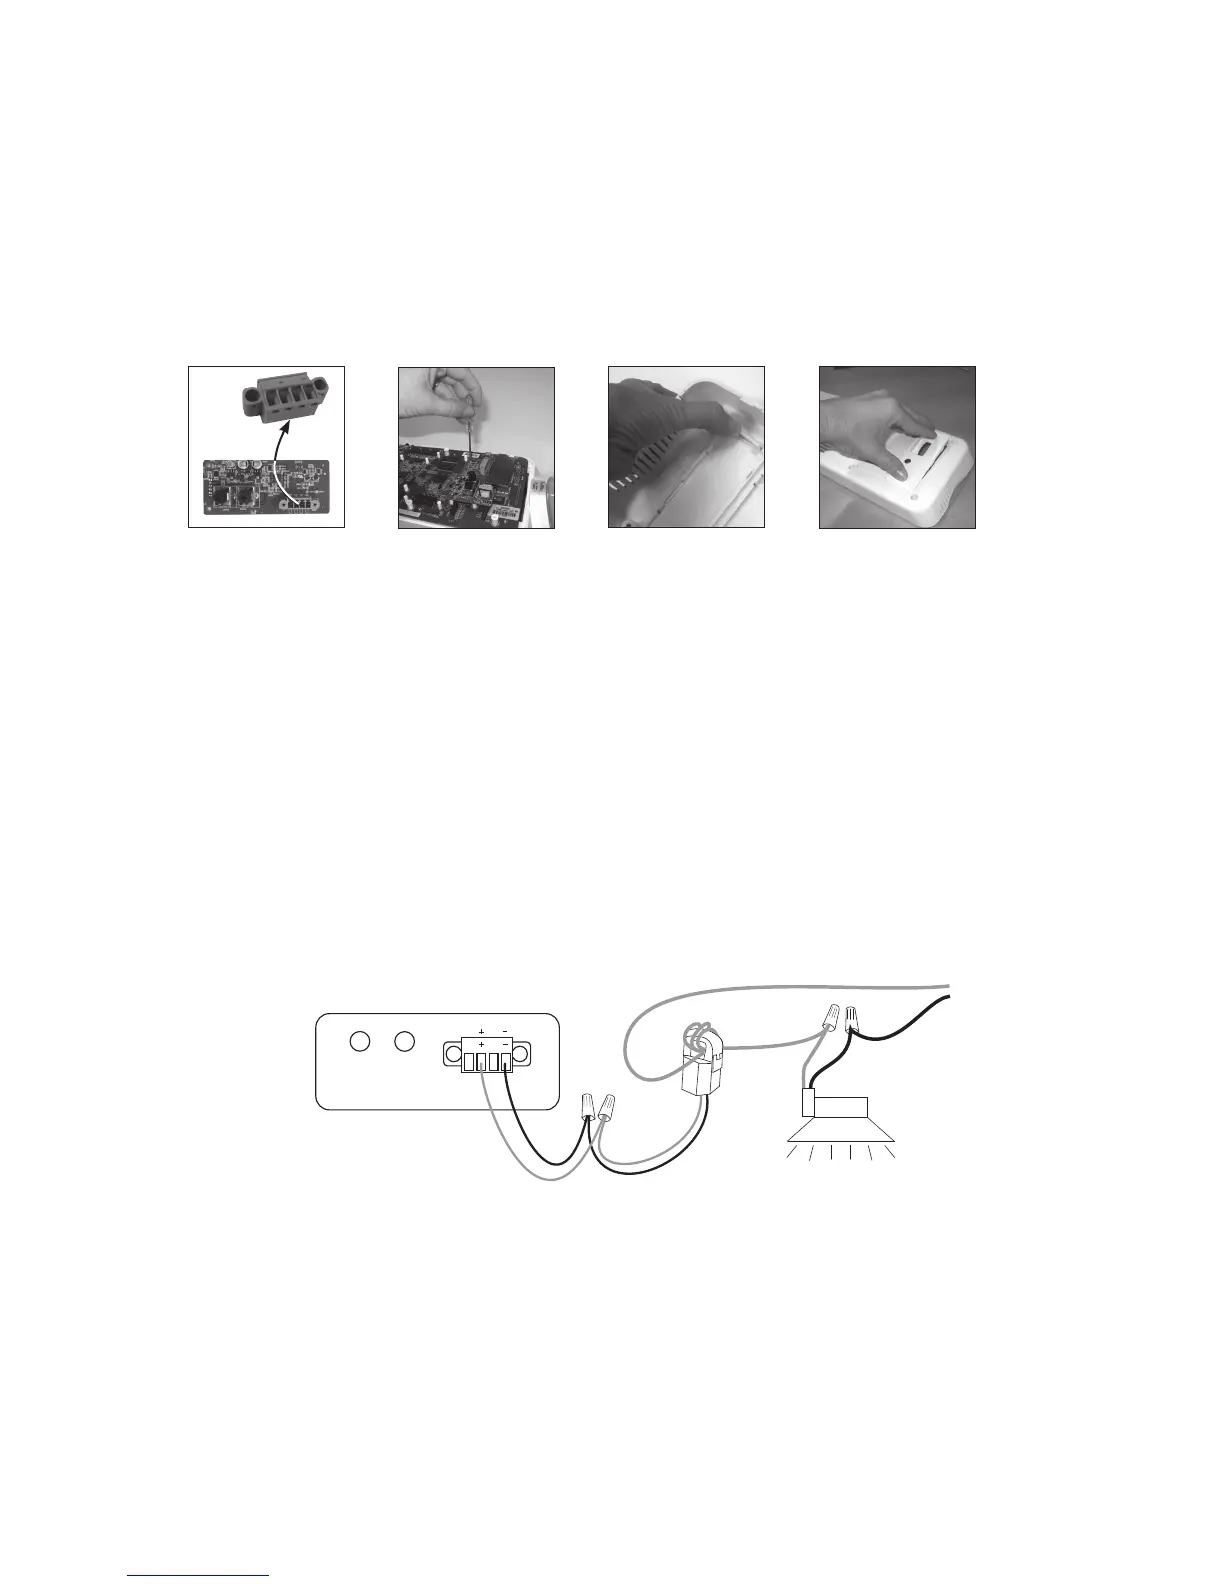
Image 8
Confirm voltage of your PA system. Do not install this module unless you have a 25-, 70-, or 100-volt
PA system.
1. Using wire nuts, extend the white and black wires from the split core transformer with enough 18 - 22 AWG wire to reach
from the PA speaker to the installed module. Connect the white wire from the split core transformer to the “+” slot in the
page input terminal and secure with the connector screw. Connect the black wire from the split core transformer to the
“–”slotinthepageinputterminalandsecurewiththeconnectorscrew(SeeImage8).
2. Open the split core transformer
3. Wrap the primary side (the side that connects to the PA amplifier) wire from the PA speaker around the split core trans-
former. Depending on the voltage of your PA system, follow the guide below for how many times to wrap wire around
split core transformer (See Image 8).
IMPORTANT! Wrap ONLY the primary wire around the split core transformer.
•100-volt:Wrap1–2times•70-volt:Wrap2–3times•25-volt:Wrap3–4times
4. Close the split core transformer
Page Input
0
1
2
3
4
5
6
7
8
0
1
2
3
4
5
6
7
8
Delay Sensitivity
Black
–
White +
Com
Prim
Transfomer
PA Speaker
To amplier
Split core
transformer
Page Override Module