1-12 (No.MB080)
3.3 CD changer unit
• Prior to performing the following procedure, remove the CD
changer unit.
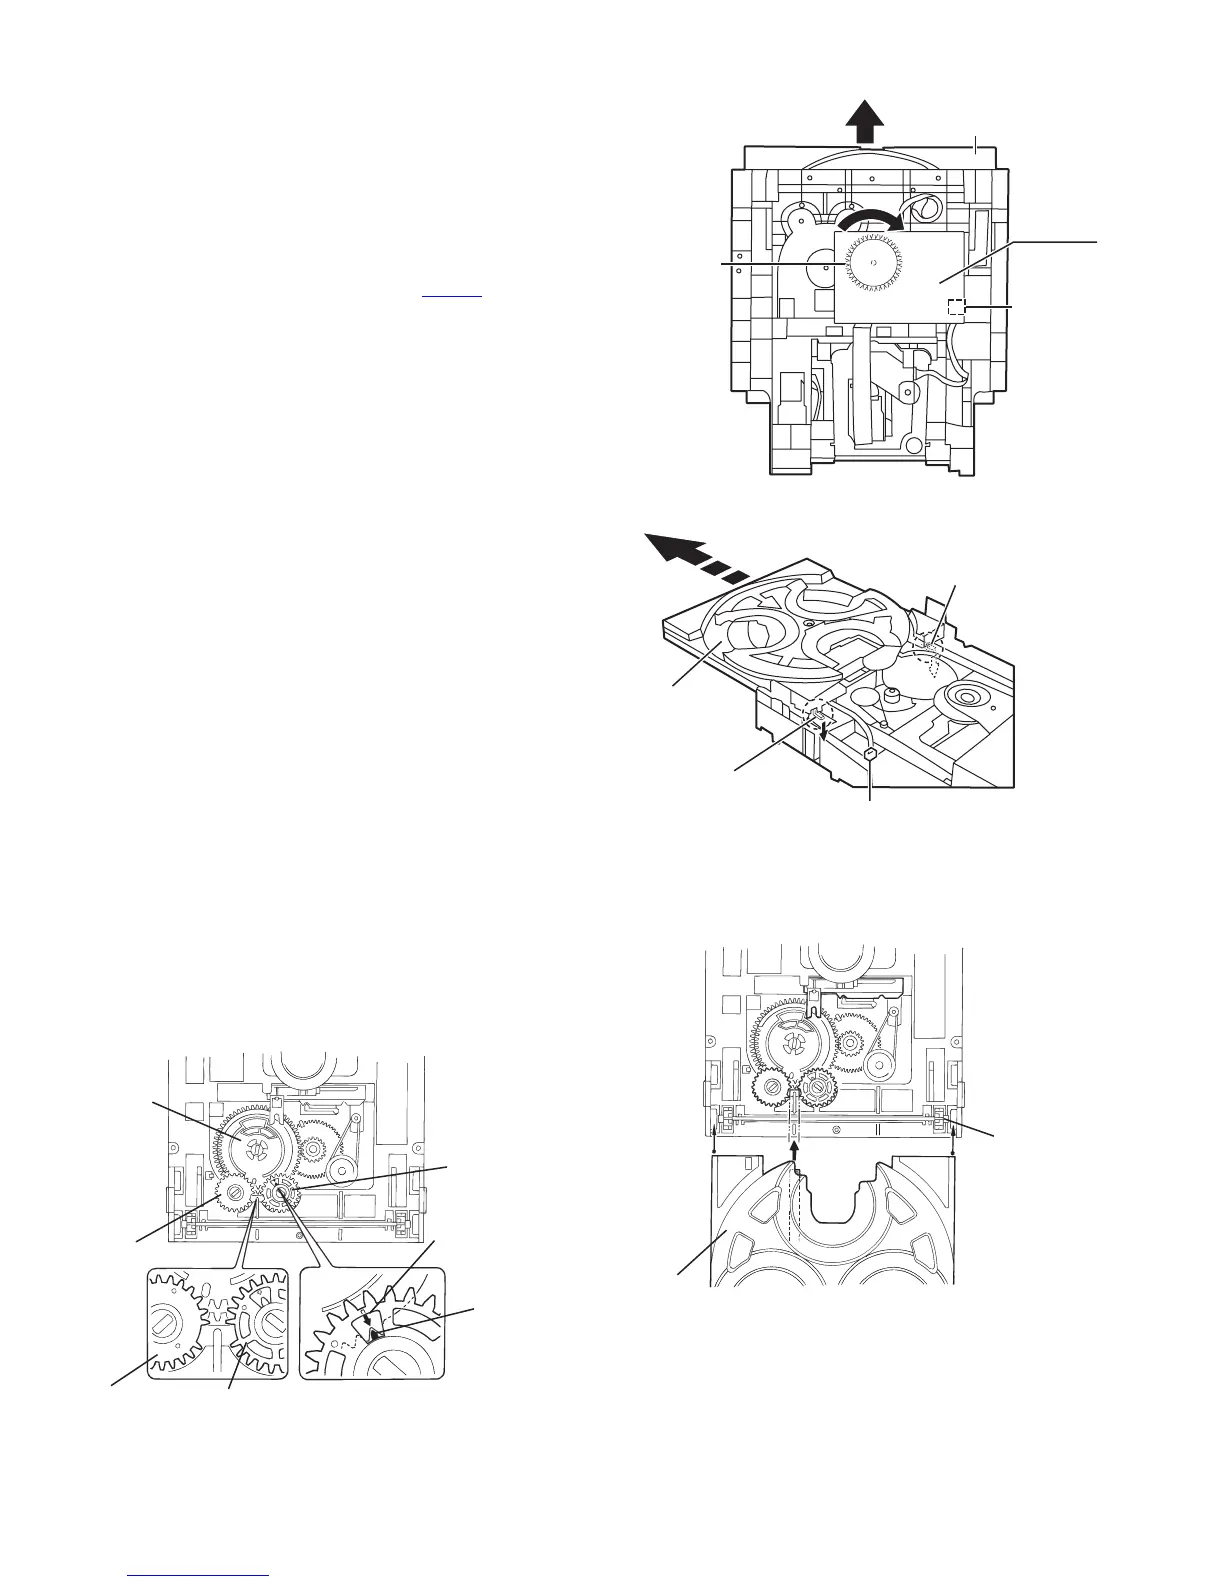
3.3.1 Removing the CD tray
(See Fig. 1 and 2)
(1) Turn the black loading pulley gear on the under side of the
CD changer unit in the direction of the arrow and draw the
CD tray toward the front until it stops.
(2) Disconnect the card wire from connector CW103
on the CD
board.
(3) Push down the two tray stoppers marked a and pull out the
CD tray.
Fig.1
Fig.2
3.3.2 Reinstall the CD tray
(See Fig. 3 and 4)
(1) Align the gear-cam with the gear-tray as shown fig.3, then
mount the CD tray.
(2) When assembling the CD tray, take extreme care not en-
gage with gear - synchro.
Fig.3
Fig.4
Loading pulley
gear
CW103
CD tray
CD board
CD tray
CW103
(on the CD board)
a
(Tray stopper)
a (Tray stopper)
Gear-convert
Gear-convert
Gear-cam
Gear-tray
Gear-tray
Gear-tray
Gear-cam
timing point
Gear-synchro
CD tray
 Loading...