TABLE OF CONTENTS
Exploded Install Parts . . . . . . . . . . . . . . . . . . . . . . . . . . . . . . . . . . . . . . . . . . . . . . . . . . . . . . . . . . .3
Tools Required . . . . . . . . . . . . . . . . . . . . . . . . . . . . . . . . . . . . . . . . . . . . . . . . . . . . . . . . . . . . . . . . .3
A. Door Preparation . . . . . . . . . . . . . . . . . . . . . . . . . . . . . . . . . . . . . . . . . . . . . . . . . . . . . . . . . . .4
B. Lock Handing . . . . . . . . . . . . . . . . . . . . . . . . . . . . . . . . . . . . . . . . . . . . . . . . . . . . . . . . . . . . . .4
C. Door Thickness . . . . . . . . . . . . . . . . . . . . . . . . . . . . . . . . . . . . . . . . . . . . . . . . . . . . . . . . . . . . .5
D. Installing The Passage Set . . . . . . . . . . . . . . . . . . . . . . . . . . . . . . . . . . . . . . . . . . . . . . . . . . .5
E. Installing Outside Unit Assembly . . . . . . . . . . . . . . . . . . . . . . . . . . . . . . . . . . . . . . . . . . . . .6
F. Installing Inside Unit Assembly . . . . . . . . . . . . . . . . . . . . . . . . . . . . . . . . . . . . . . . . . . . . . . .6
G. Installing The Inside Lever/Knob . . . . . . . . . . . . . . . . . . . . . . . . . . . . . . . . . . . . . . . . . . . . . .7
H. Changing Key-In-Lever/Knob (KIL/KIK) Cylinder . . . . . . . . . . . . . . . . . . . . . . . . . . . . . . . .7
I. Installing/Removing Outside Lever/Knob (KIL/KIK models only) . . . . . . . . . . . . . . . . . .8
J. Installing/Removing Outside Lever/Knob . . . . . . . . . . . . . . . . . . . . . . . . . . . . . . . . . . . . . .9
(Interchangeable/Removable Core models)
K. Testing The Operation Of The Lock . . . . . . . . . . . . . . . . . . . . . . . . . . . . . . . . . . . . . . . . . . .15
L. Installing The Strike . . . . . . . . . . . . . . . . . . . . . . . . . . . . . . . . . . . . . . . . . . . . . . . . . . . . . . . .16
M. Changing Combinations . . . . . . . . . . . . . . . . . . . . . . . . . . . . . . . . . . . . . . . . . . . . . . . . . . . . .16
N. Installing Rubber Bumpers . . . . . . . . . . . . . . . . . . . . . . . . . . . . . . . . . . . . . . . . . . . . . . . . . .18
O. How To Reset A Lost Or Unknown Combination . . . . . . . . . . . . . . . . . . . . . . . . . . . . . . . .18
P. Trouble Shooting . . . . . . . . . . . . . . . . . . . . . . . . . . . . . . . . . . . . . . . . . . . . . . . . . . . . . . . . . . .21
Notes . . . . . . . . . . . . . . . . . . . . . . . . . . . . . . . . . . . . . . . . . . . . . . . . . . . . . . . . . . . . . . . . . . . .23
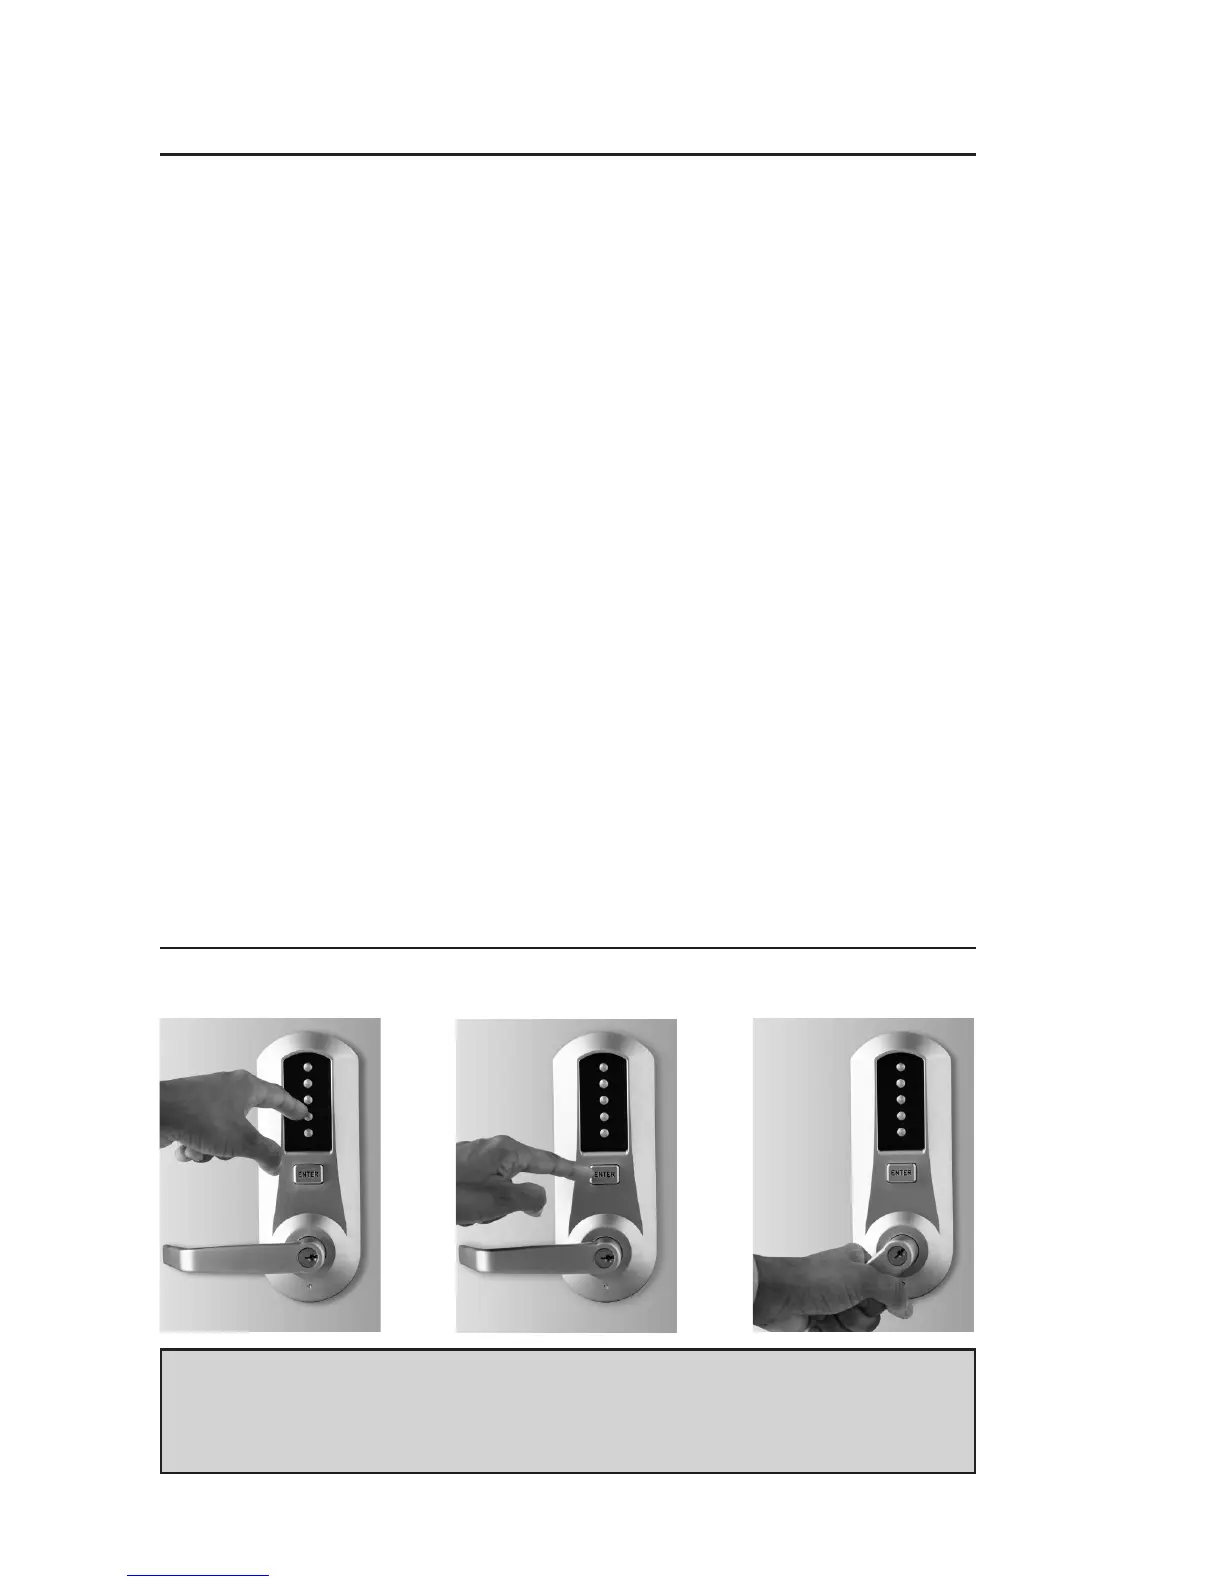
1) 2) 3)
Warning
The combination of this lock has been factory preset; 2 and 4 depressed at
the same time, then 3 and then ENTER. For your security, the combination
must be changed at time of installation.
OPERATION
2