8
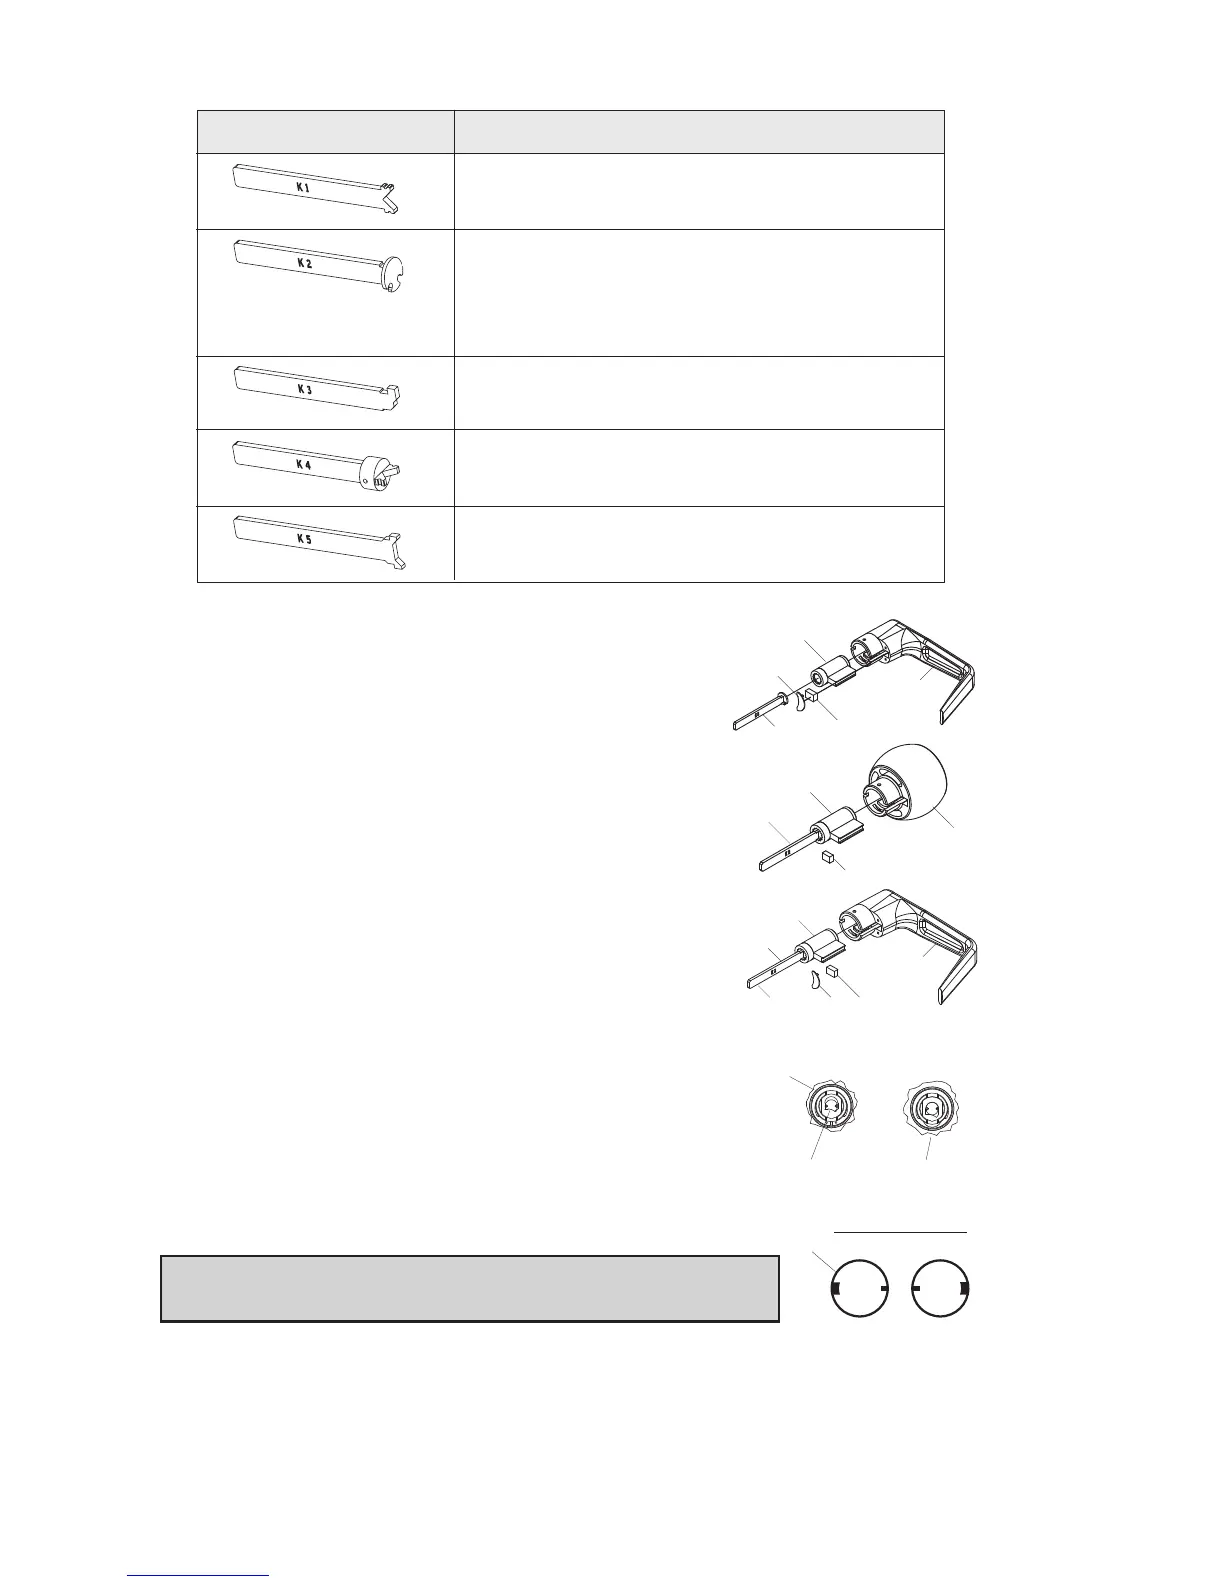
H-2 Determine the proper tailpiece (d) needed for
your KIL/KIK cylinder from the chart above.
You must use a KABA tailpiece. The K-2 tailpiece
is preassembled with the 1599 cylinder.
H-3 Assemble the required tailpiece (d) supplied with
your KIL/KIK cylinder. All tailpieces must be
installed vertically as shown for proper
installation.
H-4 Insert the KIL/KIK cylinder (a) into the outside
lever/knob (b) and secure it with the cylinder
retainer (c) and lever insert (e) (no insert on the
knob). The KIL/KIK cylinder should be snug and
unable to move freely.
I. INSTALLING/REMOVING
OUTSIDE LEVER/KNOB
(Key-in-Lever/Knob Models only) (For
interchangeable and removable cores,
proceed to section J)
Note: Installing lever/knob to the unit assemblies before
mounting the unit assemblies, may ease initial installation.
b
a
e
d
c
KIL Lever Sleeve
LH RH
c
Correct
Position
Incorrect
Position
f
b
a
d
c
b
a
d
e
c
vertical
Assa 65611, Australian: Kaba experT 107K5 &
Boyd KC286, Corbin-Russwin 2000-03, Kaba
1599, Schlage 23-001, Schlage Primus 20-760,
Kaba Peaks 1099
Medeco 20W200H1
Arrow C100, Sargent 10 LINE
Marks
Abloy 5277, Abloy 5477, Assa 65691,
Kaba 15396, Kaba Gemini 4730
KIL/KIK CYLINDERTAILPIECE
K1
K3
K2
K4
K5