KACO blueplanet 3.0 NX3 M2 KACO blueplanet 5.0 NX3 M2 KACO blueplanet 8.0 NX3 M2 KACO blueplanet 10.0 NX3 M2
KACO blueplanet 15.0 NX3 M2 KACO blueplanet 20.0 NX3 M2 Page 12
6.3 Fastening the mount
CAUTION
Hazard when using unsuitable fixing materials!
If unsuitable fixing materials are used, the device could fall and persons in front of the device may be
seriously injured.
› Use only fixing materials that are suitable for the mounting base. The fastening materials supplied are
only suitable for masonry and concrete.
› Only install the device in an upright position.
NOTE
Power reduction due to heat accumulation!
If the recommended minimum clearances are not observed, the device may go into power regulation mode
due to insufficient ventilation and the resulting heat build-up.
› Observe minimum clearances and provide for sufficient heat dissipation.
› All objects on the device housing must be removed during operation.
› Ensure that no foreign bodies prevent heat dissipation following device installation.
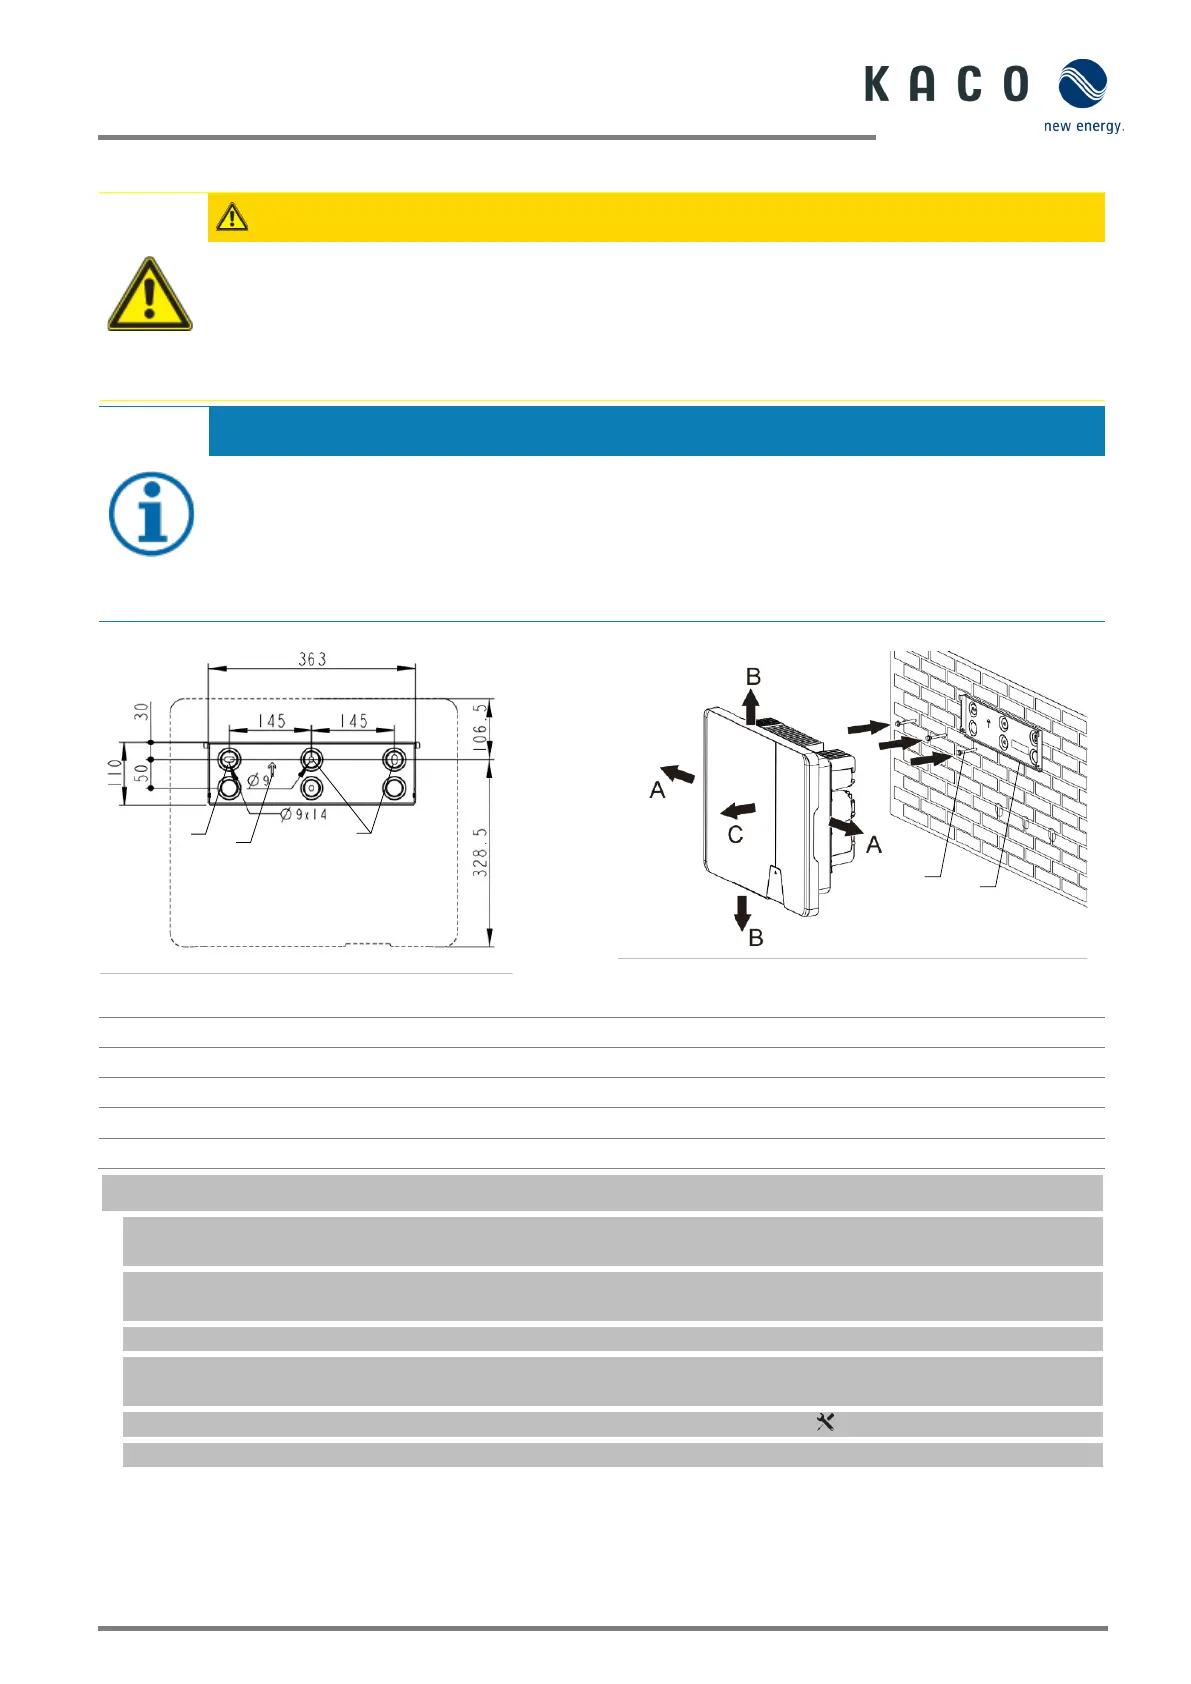
1 Drill three holes [Ø 10mm depth 70mm]
5 Screw for securing purposes
A Minimum clearance: 300 mm
3 Insert screws and anchors
B Minimum clearance: 500 mm
4 Install the wall holder
C Minimum clearance: 500 mm
Cardboard packaging with mount and mounting kit removed from the packaging and opened.
1. Mark the mounting position on the wall surface according to the position of the mount plate by drawing three
marks.
NOTE: The arrow must point upwards and be visible when the mount is attached to the wall. Also make sure that
the mount is oriented correctly.
2. Mark the positions of the drill holes using the slot in the mount.
NOTE: The minimum clearances between two devices, or the device and the ceiling or floor have must be taken
into account.
3. Fix the mount to the wall using suitable mounting fixtures from the mounting kit [ W-10].
NOTE: Make sure that the mount is oriented correctly.
» Proceed with the installation of the device.
Fig. 8. Drill holes for wall mounting
Fig. 9. Mounting the wall bracket
 Loading...