18
• IR Output to IR Input Routing: To connect an IR output to an IR input, click and
drag the IR output’s button on the right to the preferred IR input on the left side,
then release the mouse button. If the routing was completed successfully, the newly
routed IR output’s name will appear below the IR input’s name within its button.
Clicking on any IR output button will change the color of itself, and all IR inputs
currently routed to it.
Note: IR inputs may also be drag and dropped onto IR outputs to activate a new route.
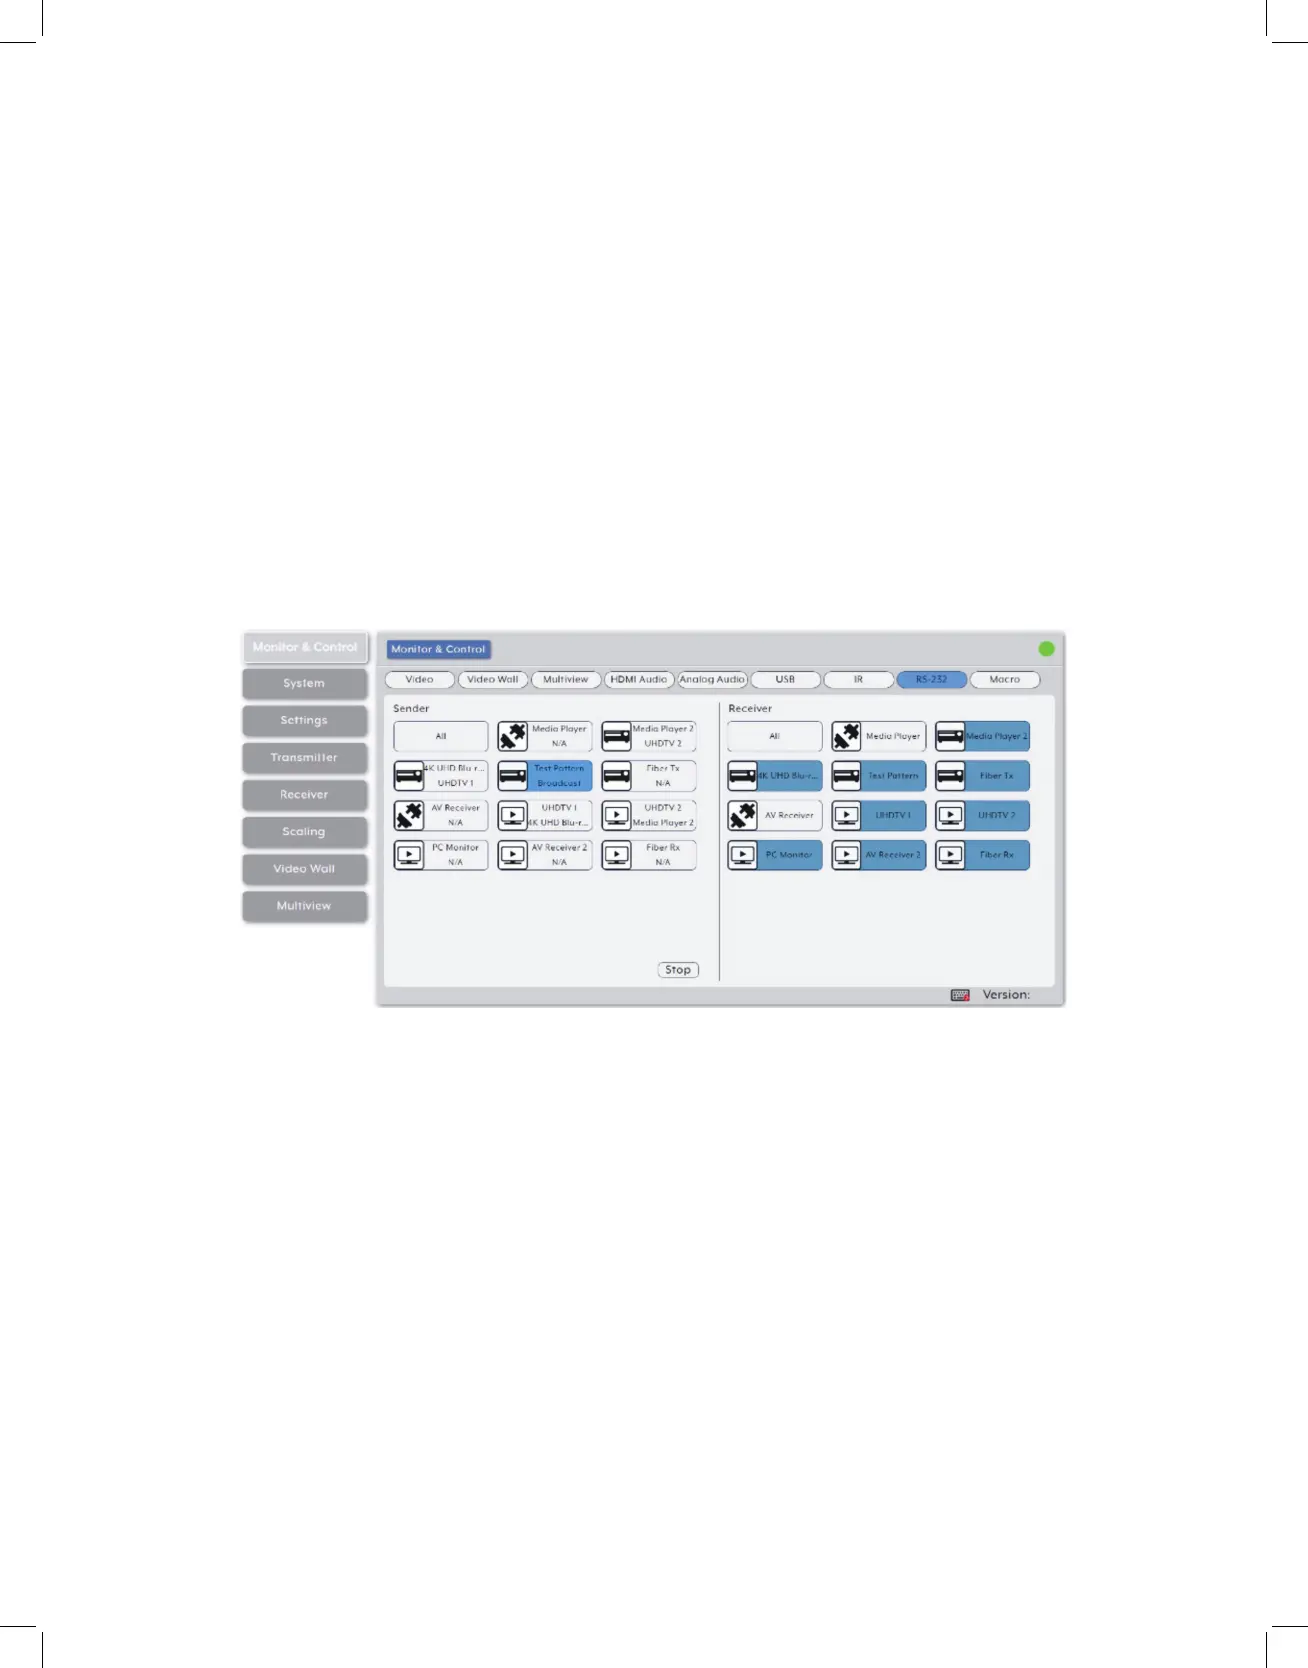
7. RS-232 Routing: Provides drag-and-drop control over the routing of the RS-232
senders and receivers detected on all transmitters and receivers. The RS-232 port on
a standard extension unit contains one sender (Rx pin) and one receiver (Tx pin).
Note: An RS-232 receiver can be routed to by multiple RS-232 senders, however each RS-232
sender may only be directly routed to a single RS-232 receiver. If an RS-232 sender needs to be
sent to more than one receiver, the Global Broadcast option must be used.
• RS-232 Sender: This section provides drag-and-drop buttons for all RS-232 senders
detected by the system as well as a button target to stop one or all RS-232 streams
from being transmitted.
• RS-232 Sender Global Broadcast: To broadcast an RS-232 sender to all available RS-
232 receivers, click and drag the RS-232 sender’s button on the left to the “All” button on
the right side, then release the mouse button. If the routing was completed successfully,
the word “Broadcast” will appear within the appropriate RS-232 sender’s button.
• Stop Stream: To stop the broadcast of an RS-232 signal from a single RS-232 sender,
drag the RS-232 sender down to the “Stop” button at the bottom of the window,
then release the mouse button. To stop the transmission of ALL RS-232 signals, drag
the “All” button down to the “Stop” button.