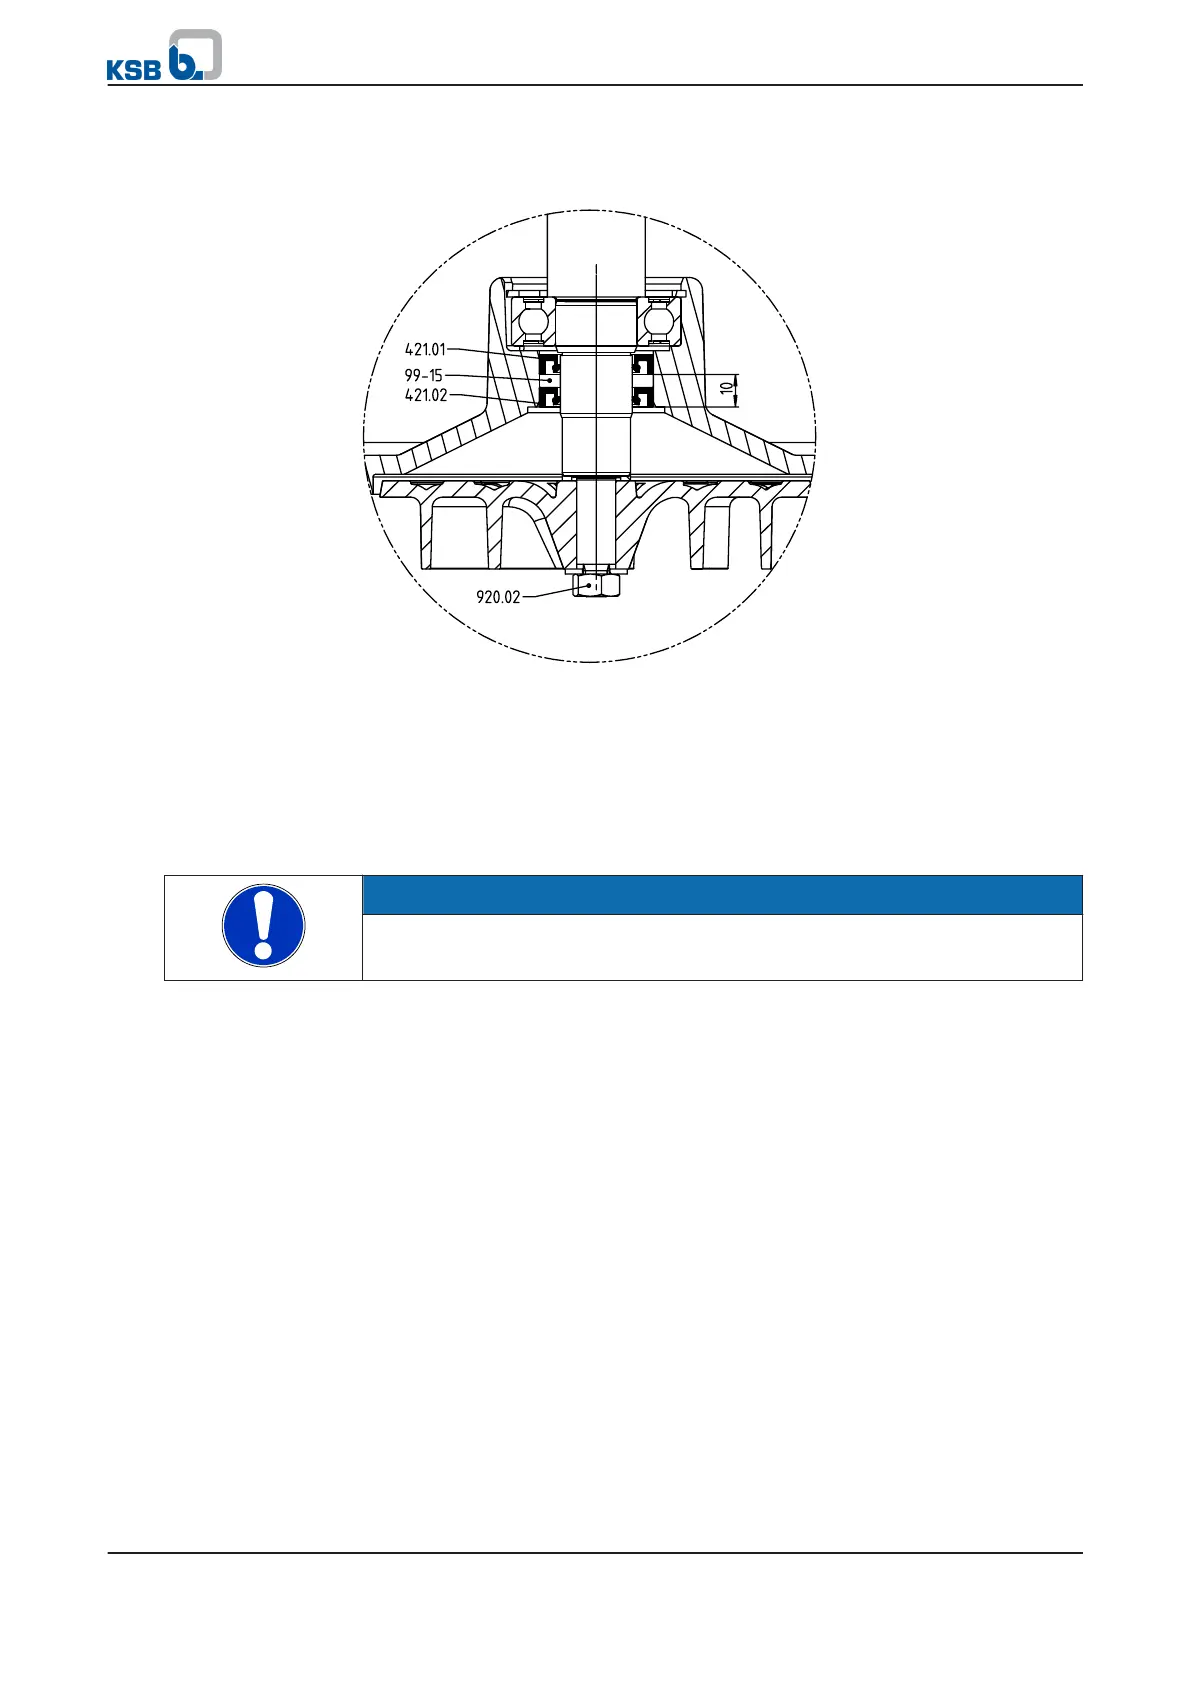
1. Press in lip seals 421.01 and 421.02, making sure the sealing lips point towards
the impeller. When pressing in the motor-side shaft seal ring 412.01, observe
the installation depth of 10 mm (see Fig.).
Fig. 30: Fitting the shaft seal
2.
Fill the grease reservoir with multi-purpose grease 99-15 (DIN 51 825).
3. Secure hexagon impeller nut 920.02 with a suitable metal adhesive (e.g.
Loctite
®
).
8.4.3 Fitting the bearing assembly/shaft seal
mini-Compacta US100, UZS150 and variant C
NOTE
We recommend fitting new bearings/shaft seals whenever the motor section has
been dismantled.
Observe the following to ensure trouble-free operation of the mechanical seal:
▪ The protective wrapping of the contact faces shall only be removed immediately
before assembly takes place.
▪ Extreme care and cleanliness during installation are of overriding importance for
trouble-free operation of the mechanical seal.
▪ The shaft surface in the mechanical seal area must be absolutely clean and
smooth.
1.
Press in lip seal 421.01, making sure the sealing lip points towards the impeller.
2. Fit mechanical seal 433.
3. After reassembly fill the oil reservoir with oil again. (⇨ Section 8.2.4 Page 43)
8.4.4 Fitting the rotating assembly
mini-Compacta US100, UZS150
1.
Check the impeller clearance.
To do so, loosen both hexagon socket head cap screws 914.03 by approx. three
turns.
8 Servicing/Maintenance
48 of 86
mini-Compacta