Installation and ConnectionInstallation and Connection
Installation procedure
1 Remove the key from the ignition and
disconnect the
· battery.
2 Make the proper input and output wire
connections for each unit.
3 Connect the speaker wires of the wiring
harness.
4 Connect the wires of the wiring harness
in the following order: ground, battery,
ignition.
5 Connect the wiring harness to the unit.
6 Install the unit in your car.
Make sure that the unit is installed securely in place.
If the unit is unstable, it may malfunction (eg., the
sound may skip).
7 Reconnect the · battery.
8 Initialise the unit (page45).
9 Configure <Initial Setup> (page4).
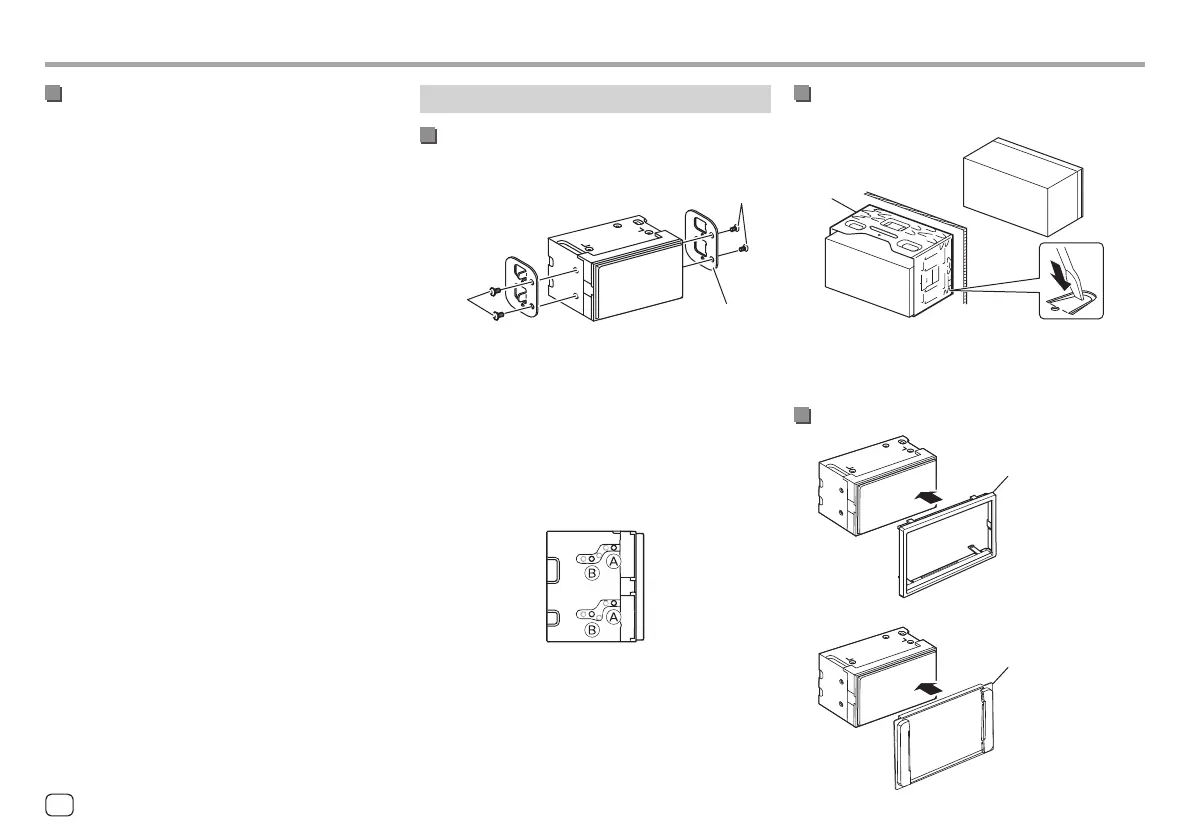
Installing the unit
Installing the unit using the mounting
bracket removed from the car
π / [
/ [
Car bracket*
Note: Select the appropriate screws (supplied) for the
mounting bracket.
* Shape of your car brackets may differ.
For Toyota cars
Install onto the car bracket using the supplied screws
([). Use the mounting holes (A or B) that fit the car
bracket.
Side view
Installing the unit using the mounting
sleeve
\
Bend the tabs of the mounting sleeve with a
screwdriver or similar utensil and attach it in place.
Installing the trim plate
‘
For Toyota cars
]
50 ENGLISH
00DMX7522DABSX.indb5000DMX7522DABSX.indb50 2022/11/1513:312022/11/1513:31

 Loading...