Section 2
Installation
20412922
8-2012/Rev 10
2-11
Hand Coning
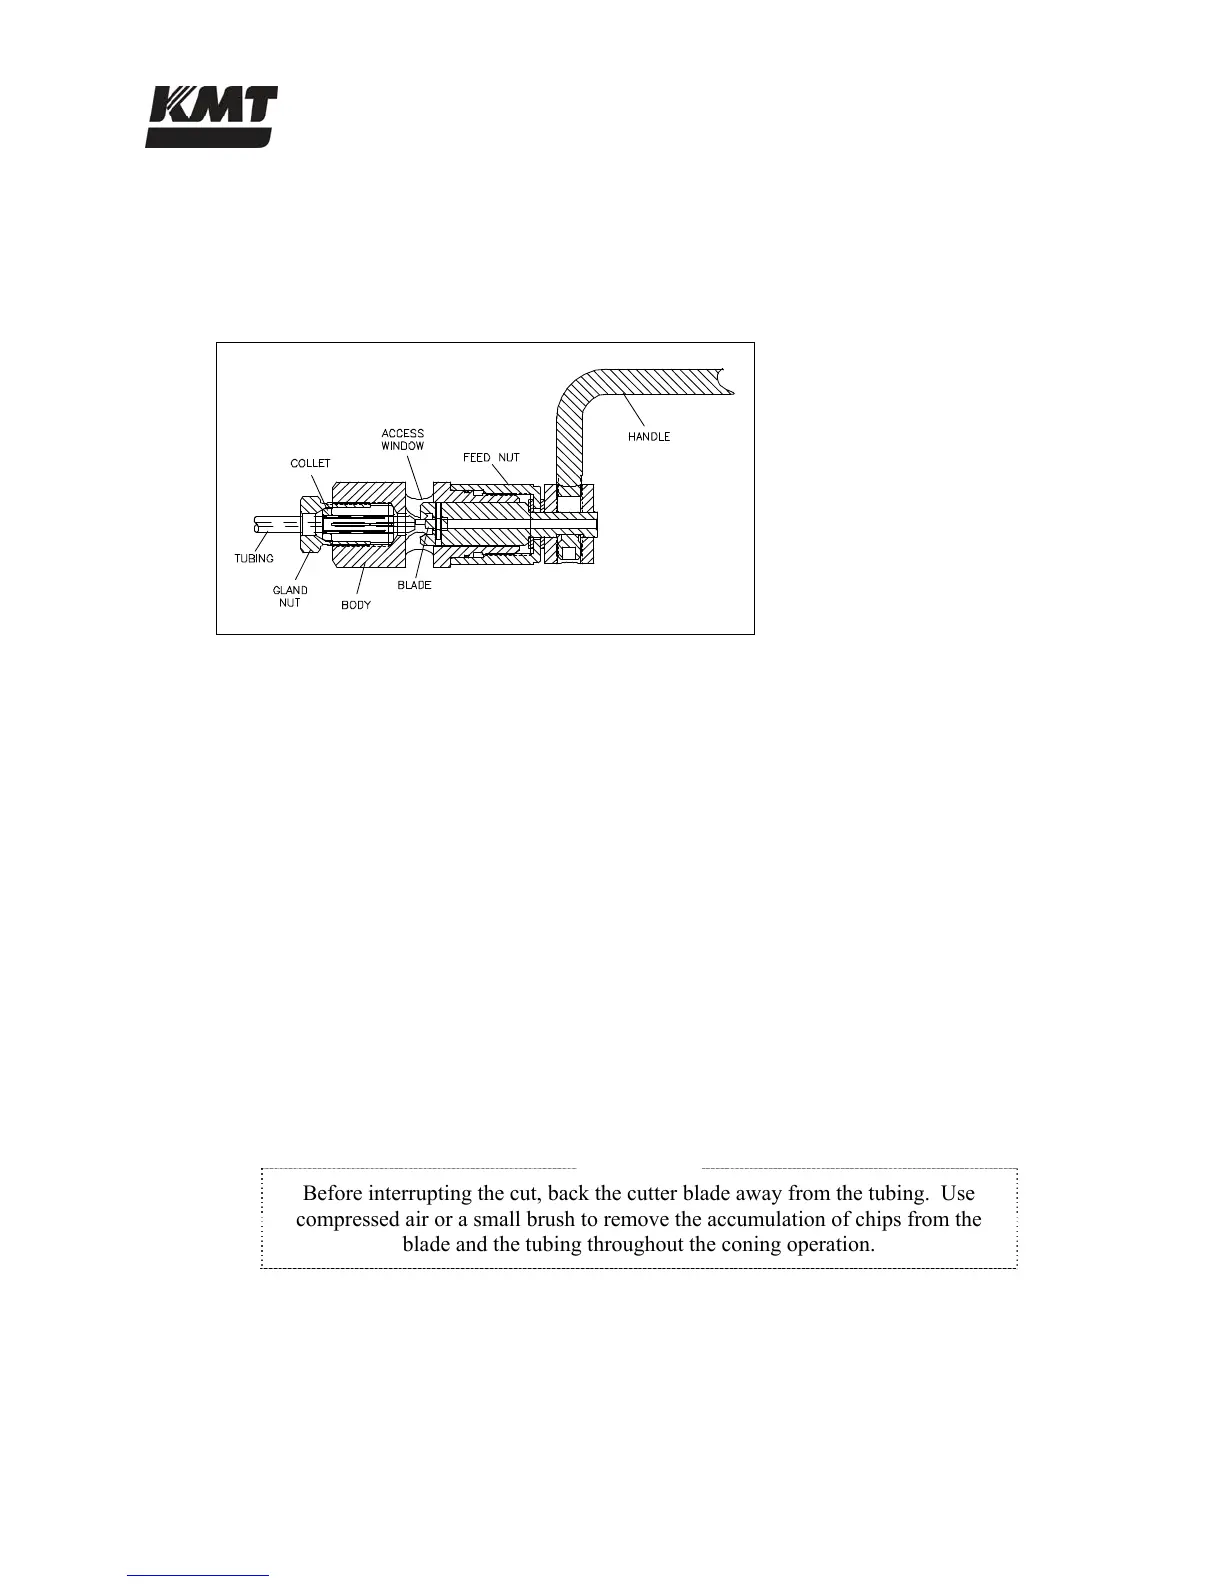
1. Place the body of the coning tool in a vise allowing adequate clearance for the rotation of
the cutter handle. Position the tool so the cutter handle is elevated slightly so the lubricant
will flow to the cutting blade.
Figure 2-7: Hand Coning Tool
2. Turn the feed nut counter-clockwise to retract the cutting blade past the access window.
3. Loosen the gland nut and insert the tubing through the collet. The end of the tubing
should just make contact with the cutting blade. Loosely tighten the gland nut to slightly
grip the tubing.
4. Turn the feed nut counter-clockwise 1/4 turn to retract the cutting blade away from the
tubing, and tighten the gland nut with a wrench.
5. Apply a liberal amount of cutting oil to the exposed end of the tubing, the cutting blade
and through the lubrication channel at the cutter handle.
6. Apply cutting oil frequently and liberally throughout the cutting operation. A medium
weight cutting oil with high sulfur content is recommended.
7. Turn the feed nut clockwise until the cutting blade contacts the end of the tubing.
8. In a smooth, continuous motion, turn the cutter handle in a clockwise direction.
Simultaneously turn the feed nut in a clockwise direction to establish a constant feed. Do
not remove too much material at once; the cutting blade should make light, uninterrupted
cuts.
NOTE
Before interrupting the cut, back the cutter blade away from the tubing. Use
compressed air or a small brush to remove the accumulation of chips from the
blade and the tubing throughout the coning operation.
9. Continue the operation until the feed nut bottoms on the housing. Turn the cutter handle
several more rotations to face-off the end of the cone.
10. Retract the cutter blade, loosen the gland nut and remove the tubing. Inspect the cone for
surface finish and completeness.
 Loading...