Why won't my Kodak PIXPRO AZ401 Digital Camera turn on?
- JJeffery FloydAug 20, 2025
If your Kodak Digital Camera isn't turning on, the batteries may be depleted or not inserted correctly. Replace the batteries or correctly reinstall them.
Why won't my Kodak PIXPRO AZ401 Digital Camera turn on?
If your Kodak Digital Camera isn't turning on, the batteries may be depleted or not inserted correctly. Replace the batteries or correctly reinstall them.
What to do if my Kodak PIXPRO AZ401 cannot write to the memory card?
If your Kodak Digital Camera cannot write to the memory card, the memory card may be locked. Release the write lock or replace it with another card.
Why my Kodak Digital Camera does not turn on?
If your Kodak Digital Camera is not turning on, the battery may be depleted or not correctly installed. Recharge the battery or correctly reinstall it.
How to fix blurry pictures on Kodak Digital Camera?
If your pictures are blurry when using a Kodak Digital Camera, it might be due to camera shake. Try turning on the OIS (Optical Image Stabilization) feature. If you're using high magnification (above 15X) optical zoom, use a tripod.
Why Kodak Digital Camera turns off suddenly?
If your Kodak Digital Camera turns off suddenly during operation, the batteries may be depleted. Recharge the battery.
How to fix blurred picture on Kodak PIXPRO AZ401 Digital Camera?
If your Kodak Digital Camera picture is blurred, it may be due to camera shake. Turn on the OIS (Optical Image Stabilization) feature. Also, for high magnification (above 15X) optical zoom, please use a tripod.
What to do if my Kodak PIXPRO AZ401 Digital Camera images and video files cannot be saved?
If your Kodak Digital Camera isn't saving images or videos, it could be due to a full or locked memory card. Try using another memory card or deleting unnecessary files. Also, make sure the memory card is unlocked.
Why does my Kodak PIXPRO AZ401 turn off suddenly?
If your Kodak Digital Camera is turning off suddenly, the batteries may be depleted. Replace the batteries.
Why is saving data to memory card slow on my Kodak Digital Camera?
If saving data to the memory card is slow on your Kodak Digital Camera, it may be due to using a memory card below Class 4. Use a memory card with write Class 4 or higher to improve performance.
Why won't images print from my Kodak PIXPRO AZ401?
If images won't print from your Kodak Digital Camera, check the connection between the camera and the printer. Ensure you are using a PICTBRIDGE™ compatible printer. Also, check if the printer is out of paper or ink, and remove any jammed paper.
Digital zoom | 4 x |
---|---|
Optical zoom | 40 x |
Combined zoom | 160 x |
Focal length range | 4.3 - 172 mm |
Maximum aperture number | 6.8 |
Minimum aperture number | 3 |
Lens structure (elements/groups) | 15/11 |
Maximum focal length (35mm film equiv) | 960 mm |
Minimum focal length (35mm film equiv) | 24 mm |
Megapixel | 16.15 MP |
Camera type | Bridge camera |
Sensor type | CCD |
Image stabilizer | Yes |
Total megapixels | 16.44 MP |
Image sensor size | 1/2.3 \ |
Image formats supported | JPEG |
Supported aspect ratios | 3:2, 4:3, 16:9 |
Maximum image resolution | 4608 x 3456 pixels |
Still image resolution(s) | 4608x3456, 3648x2736, 2592x1944, 2048x1536, 640x480, 4608x3072, 4608x2592, 1920x1080 |
Focus | TTL |
Focus adjustment | Auto |
Auto focusing (AF) modes | Multi Point Auto Focus, Single Auto Focus |
Macro focusing range (wide) | 0.016 m |
Normal focusing range (tele) | 2 m |
Normal focusing range (wide) | 0.5 m |
HD type | HD-Ready |
Video resolutions | 640 x 480, 1280 x 720 pixels |
Motion JPEG frame rate | 30 fps |
Video formats supported | H.264, MOV |
Maximum video resolution | 1280 x 720 pixels |
Scene modes | Children, Fireworks, Night landscape, Night portrait, Party (indoor), Pet, Portrait, Snow, Sports, Sunset, Landscape (scenery) |
Photo effects | - |
White balance | Auto, Cloudy, Daylight, Fluorescent, Incandescent, Manual |
Shooting modes | Auto, Movie |
Camera playback | Single image, Slide show |
Self-timer delay | - s |
Camera file system | DCF, DPOF 1.1 |
Audio system | Mono |
Audio formats supported | LPCM |
Flip-out screen | No |
Display diagonal | 3 \ |
Display diagonal (metric) | 7.62 cm |
Display resolution (numeric) | 460000 pixels |
Light metering | Centre-weighted, Spot |
ISO sensitivity | 80, 100, 200, 400, 800, 1600, 3200 |
Light exposure correction | ± 2EV (1/3EV step) |
Fastest camera shutter speed | 1/2000 s |
Slowest camera shutter speed | 30 s |
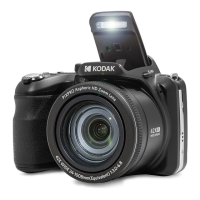
Flash modes | Auto, Fill-in, Forced off, Red-eye reduction, Slow synchronization |
Flash range (tele) | 1.2 - 3.7 m |
Flash range (wide) | 0.5 - 7.5 m |
Internal memory | 8 MB |
Compatible memory cards | SD, SDHC |
Maximum memory card size | 32 GB |
USB version | 2.0 |
USB connector | Micro-USB |
HDMI connector type | Micro |
Power source type | Battery |
Battery type | AA |
Battery life (CIPA standard) | 280 shots |
Number of batteries supported | 4 |
Operating temperature (T-T) | 0 - 40 °C |
Operating relative humidity (H-H) | 0 - 90 % |
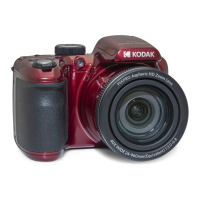
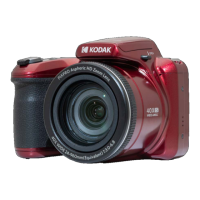
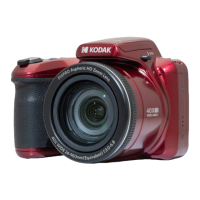
Product color | Red |
Depth | 84.4 mm |
---|---|
Width | 114.3 mm |
Height | 81.6 mm |
Weight | 436 g |
States compliance with regulations and addresses customer requirements for US and European markets.
Crucial precautions for handling and operating the digital camera safely to prevent damage or injury.
Essential guidelines for safe handling, disposal, and use of camera batteries to prevent hazards.
Precautions for proper use, handling, and storage of memory cards to ensure data integrity.
Additional safety instructions concerning LCD, product updates, and environmental factors.
Lists the items provided in the camera box upon purchase.
Step-by-step instructions for attaching the lens cap and neck strap to the camera.
Identifies and labels the different physical parts of the camera.
Guides on how to properly install the battery and memory card into the camera.
Instructions for turning the camera on/off and the fundamental steps to take pictures.
Initial setup for language and date/time settings upon first use of the camera.
Instructions for adjusting the camera's date and time settings after initial setup.
Options for customizing the camera's display parameters like classic, full, or off.
Explains screen icons for photo, movie, and playback modes.
Guide to selecting shooting modes like Auto, Program AE, and Manual via the mode dial.
Details of primary shooting modes like Auto, Program AE, Shutter Priority, and Manual.
Instructions on utilizing optical and digital zoom for framing shots.
How to select and adjust camera focus modes like Single-AF, Multi-AF, and Object Tracking.
Guide to using macro mode for close-up photography of small objects.
Configuring the self-timer for delayed shots or smile detection.
Options for controlling the camera's flash behavior like Force Off, Auto, and Slow Sync.
Adjusting color temperature for different lighting conditions using modes like AWB and Daylight.
How to enable single, continuous, or time-lapse shooting modes.
Adjusting exposure value to control picture brightness.
Adjusting light sensitivity (ISO) and shutter speed for optimal shots.
Adjusting aperture size for depth of field and initiating video recording.
Customizing image color settings via the i-button.
How to display and navigate through captured photos and videos on the LCD.
Displaying multiple images or videos in a grid format for quick selection.
Magnifying still images to review details during playback.
Procedures for removing unwanted photos and video clips from the camera.
Setting up and viewing automatic playback of images.
Configuration options for capturing photos, including exposure metering and image size.
Configuration options for recording videos, including video quality and OIS.
Options for viewing and managing photos/videos, including touch-up, rotate, and resize.
General settings, file operations, and connectivity options like power saver and format.
Instructions for transferring files via USB connection.
Connecting the camera to a TV for video output using AV cables.
Enabling wireless connection using an Eye-Fi card for photo transfer.
Connecting the camera to an HDMI-ready TV for high-resolution output.
Direct printing from the camera to a compatible PictBridge printer using USB.
Technical details and features of the camera, including sensor, lens, and performance.
Explains common messages displayed on the camera and their solutions.
Solutions for common camera problems and issues like power, picture blur, and connectivity.