Disassembly/Inspection and Service
50 62 690 02 Rev. DKohlerEngines.com
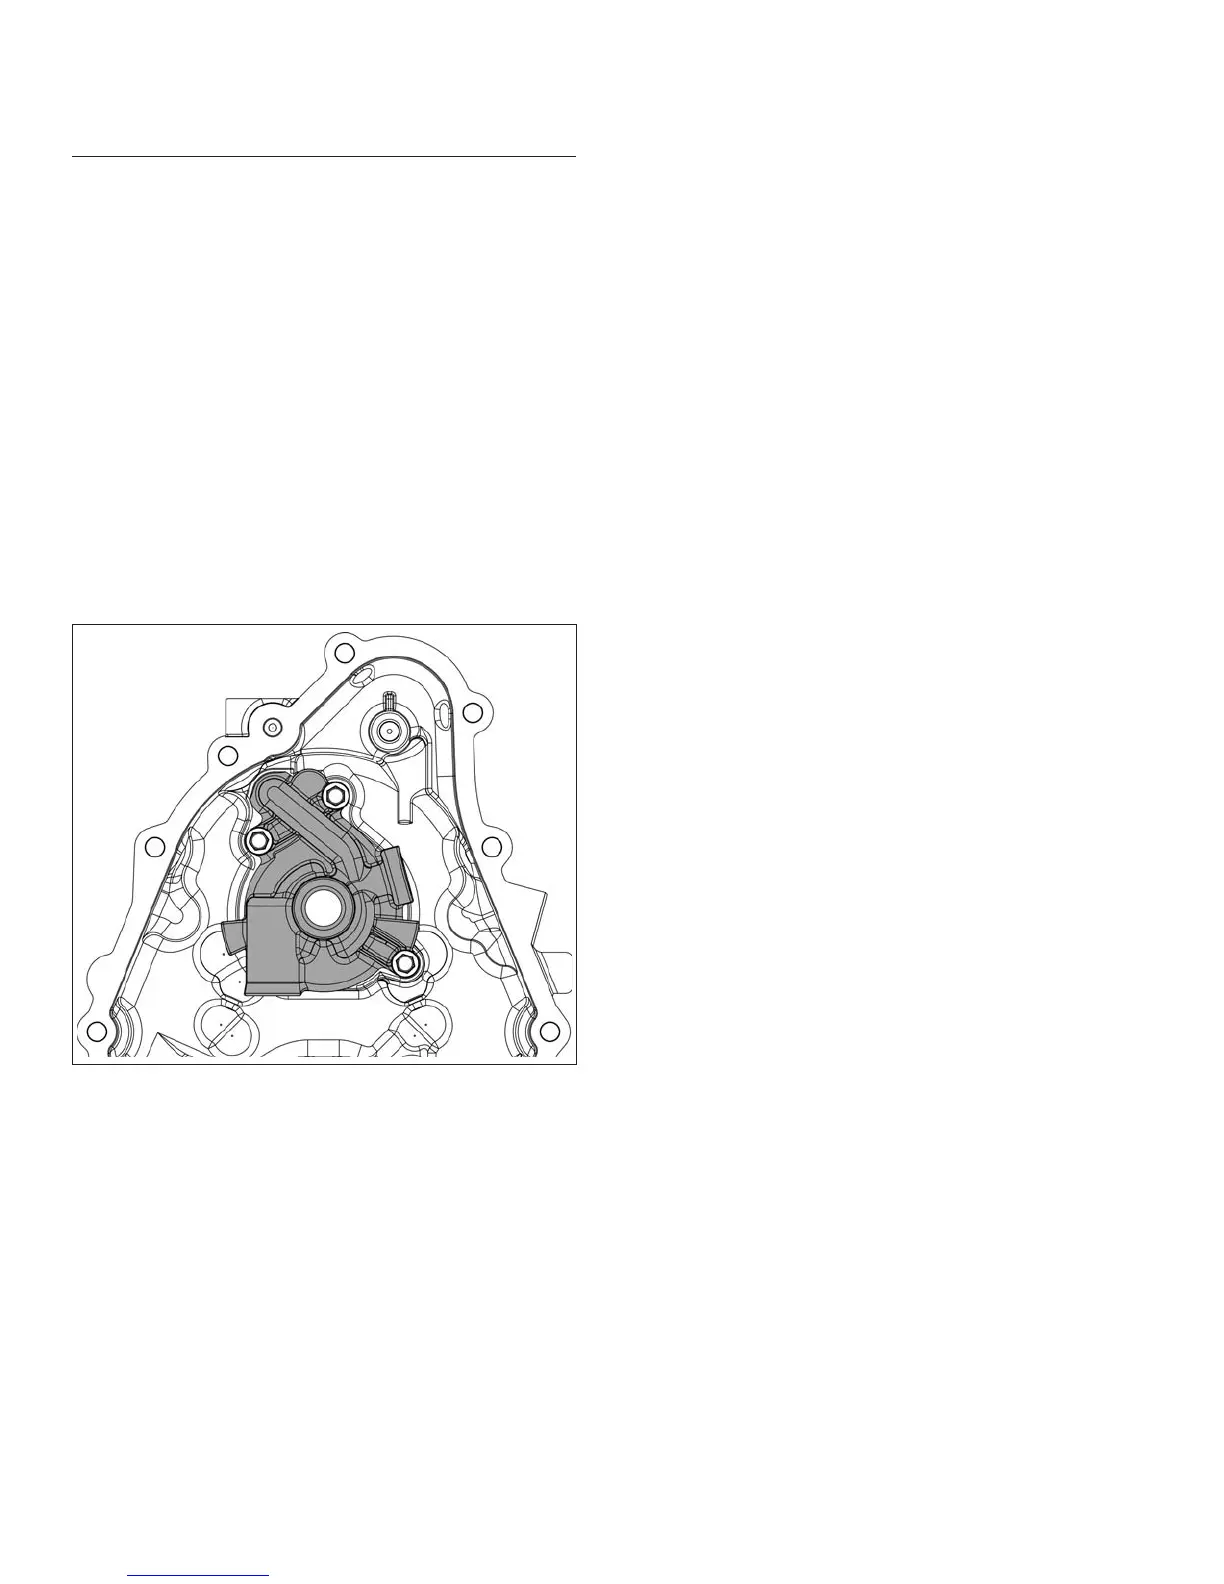
Oil Pump Assembly
Disassembly
1. Remove screws securing oil pump housing including
relief valve baffl e and screw for pickup tube.
2. Remove oil pump housing and pickup tube from oil
pan.
3. Remove oil pump gerotor gears from oil pan recess.
4. Remove oil pickup by pulling it free from oil pump
body.
5. Relief valve is a one-piece style, staked to oil pump
housing; removal should not be attempted, nor is
internal servicing possible. If a problem with relief
valve is encountered, oil pump should be replaced.
Inspection
Inspect oil pump housing, gerotor gears, and oil pan
recess for nicks, burrs, wear, or any visible damage.
Inspect inlet seal for pickup tube in housing. If any parts
are worn or damaged, replace seal, oil pump or oil pan
as required.
Reassembly
Torque Sequence
1,4
3
2
1. Make sure recess in oil pan for oil pump gerotor
gears is clean.
2. Lubricate oil pump gerotor gears with grease
(Lubriplate
®
100 or equivalent), and install into
recess.
3. Lightly lubricate with oil and install inlet seal into oil
pump housing until it is fully seated.
4. Install O-ring in groove of oil pump housing. Use a
small quantity of grease to hold it in place.
5. Lightly lubricate I.D. of inlet seal with oil and carefully
insert end of pickup tube through seal into oil pump
housing.
6. Install oil pump housing with pickup tube, over oil
pump boss and gears. Position relief valve baffl e on
location 2 and location 3. Align all 3 screw locations.
7. Check alignment of parts and torque oil pump
housing screws as specifi ed using sequence below:
a. Install fastener into screw location 1 and lightly
tighten to position pump.
b. Install fastener into screw location 2 and fully
torque to recommended value.
c. Install fastener into screw location 3 and fully
torque to recommended value.
d. Finish torquing fastener in screw location 1 to
recommended value.
First Time Installation: 10.7 N·m (95 in. lb.).
All Reinstallations: 6.7 N·m (60 in. lb.).
8. Install and torque pickup screen mounting screw to
10.7 N·m (95 in. lb.) into new hole or 7.3 N·m (65 in.
lb.) into used hole.