Reassembly
5962 690 02 Rev. D KohlerEngines.com
Several color coded shims are available:
White: 0.69215/0.73025 mm (0.02725/0.02875 in.)
Blue: 0.74295/0.78105 mm (0.02925/0.03075 in.)
Red: 0.79375/0.83185 mm (0.03125/0.03275 in.)
Yellow: 0.84455/0.88265 mm (0.03325/0.03475 in.)
Green: 0.89535/0.99345 mm (0.03525/0.03675 in.)
Gray: 0.94615/0.98425 mm (0.03725/0.03875 in.)
Black: 0.99695/1.03505 mm (0.03925/0.04075 in.)
4. Reinstall end play checking tool and recheck end
play.
Install Oil Pan Seal and Crankshaft Bearing (PTO)
If bearing was removed in servicing, install a new
bearing using an arbor press and driver.
1. Make sure oil pan bore for bearing is clean, dry and
free of nicks or burrs.
2. Press crankshaft bearing (PTO) in place with notch
oriented in 12 o’clock position using an arbor press
and driver. Make sure bearing is fully seated against
fl ange.
3. Apply a light coat of clean engine oil to inner surface
of bearing.
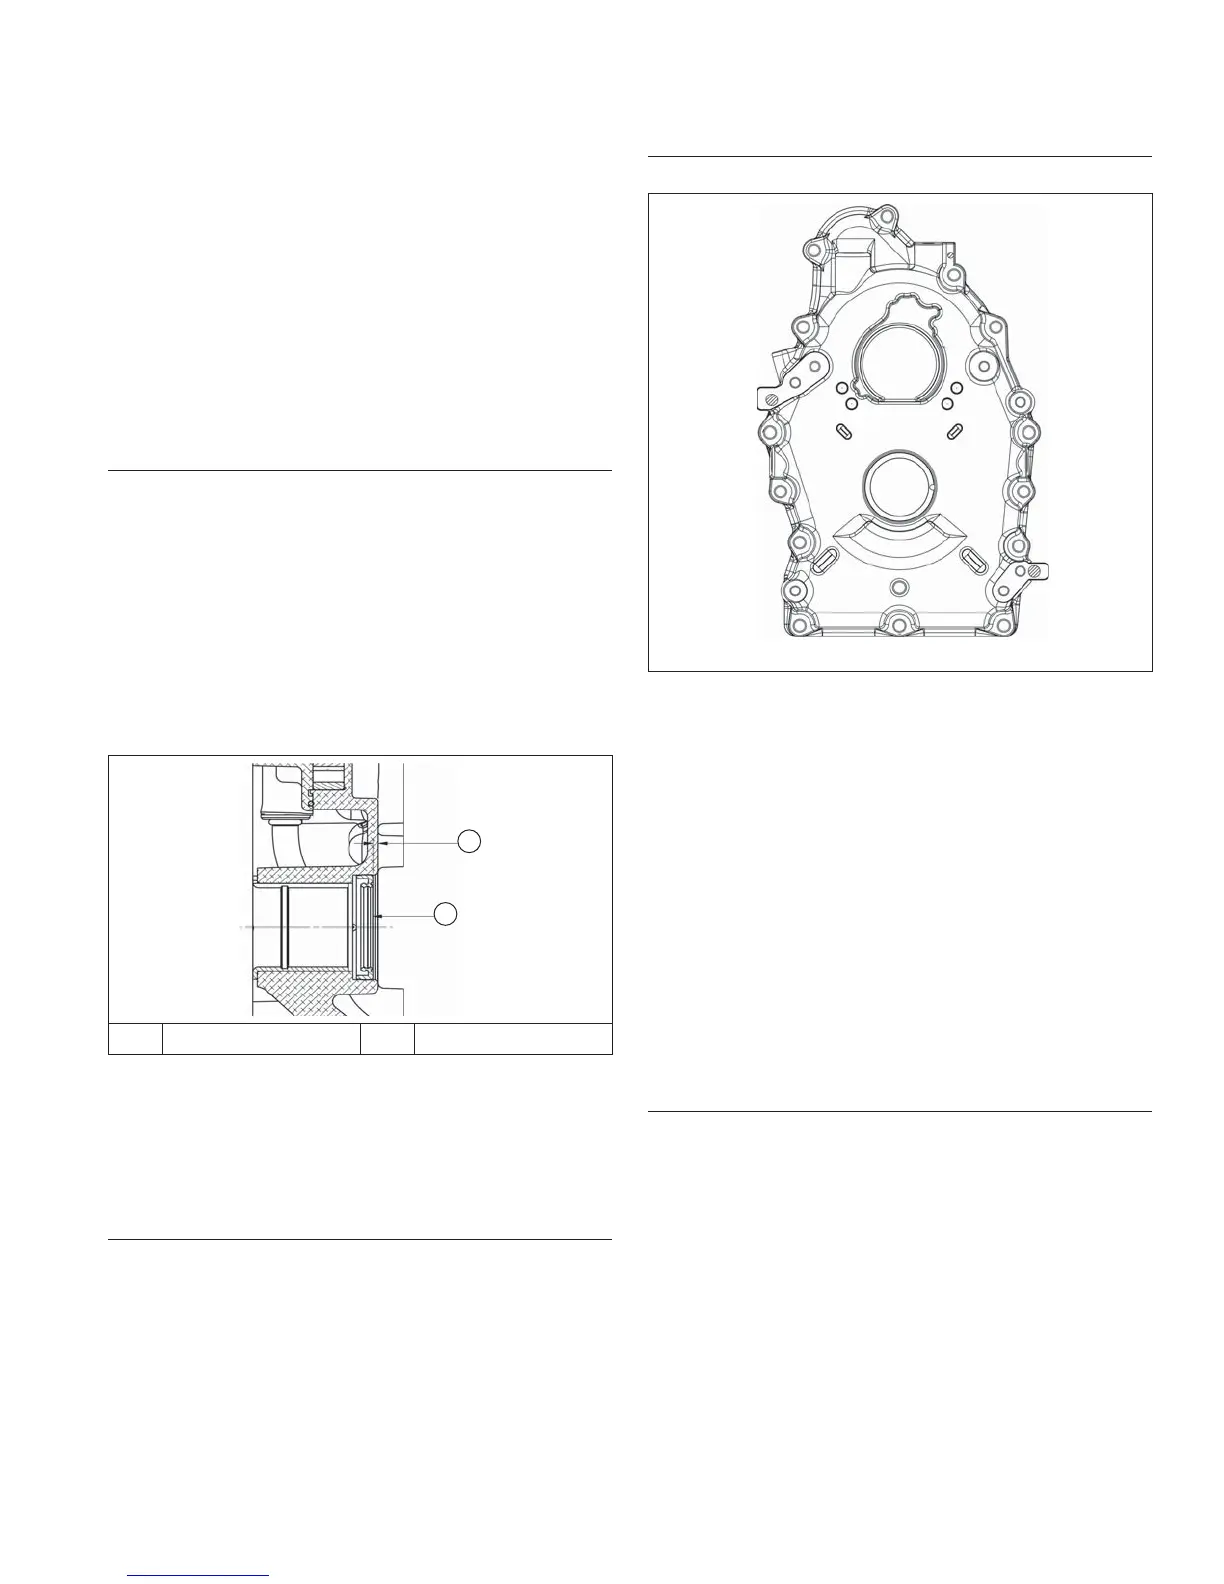
Oil Seal
Details
A
B
A 3.0 mm (0.118 in.) B Oil Seal
1. Check to make sure there are no nicks or burrs in
crankshaft seal bore of oil pan.
2. Lightly oil outside diameter of oil seal.
3. Install oil seal into oil pan using a seal driver. Make
sure oil seal is installed straight and true in bore to
depth shown.
Oil Pump Assembly
Oil pump is mounted inside oil pan. If service
was required and oil pump was removed, refer to
Disassembly/Inspection and Service procedure.
Install Oil Pan Assembly
Torque Sequence
1
2
13
11
9
7
5
3
14
12
10
8
6
4
1. Make sure sealing surfaces of oil pan and crankcase
are clean, dry, and free of any nicks or burrs. Install
a new O-ring in oil pan.
2. Install a new oil pan gasket onto crankcase.
3. Make sure oil pump and oil pick up are installed in oil
pan.
4. Ensure end of locking tab washer on governor gear
is positioned outward in 6 o’clock position inside
crankcase.
5. Orient fl at of oil pump gear to match position of fl at
on camshaft. Install oil pan to crankcase. Carefully
seat camshaft and crankshaft into their mating
bearings. Rotate crankshaft slightly to help oil pump
and governor gears mesh.
6. Lightly oil threads and install screws securing oil pan
to crankcase. Torque fasteners in sequence shown
to 27 N·m (238 in. lb).
Check Crankshaft End Play
Set engine on base and use a dial indicator to check
crankshaft end play to 0.30/1.50 mm (0.011/0.059 in.).