5
INFORMATION ABOUT MAINTENANCE
EN 34
Should the correct tool not be available, the belt tension can
be checked by applying a force in the direction of arrow
G
of
approx' 10kg on the point
p
. When correctly tensioned the belt
must show a movement of less than
10 mm.
If not adjust it.
Fig 5.11
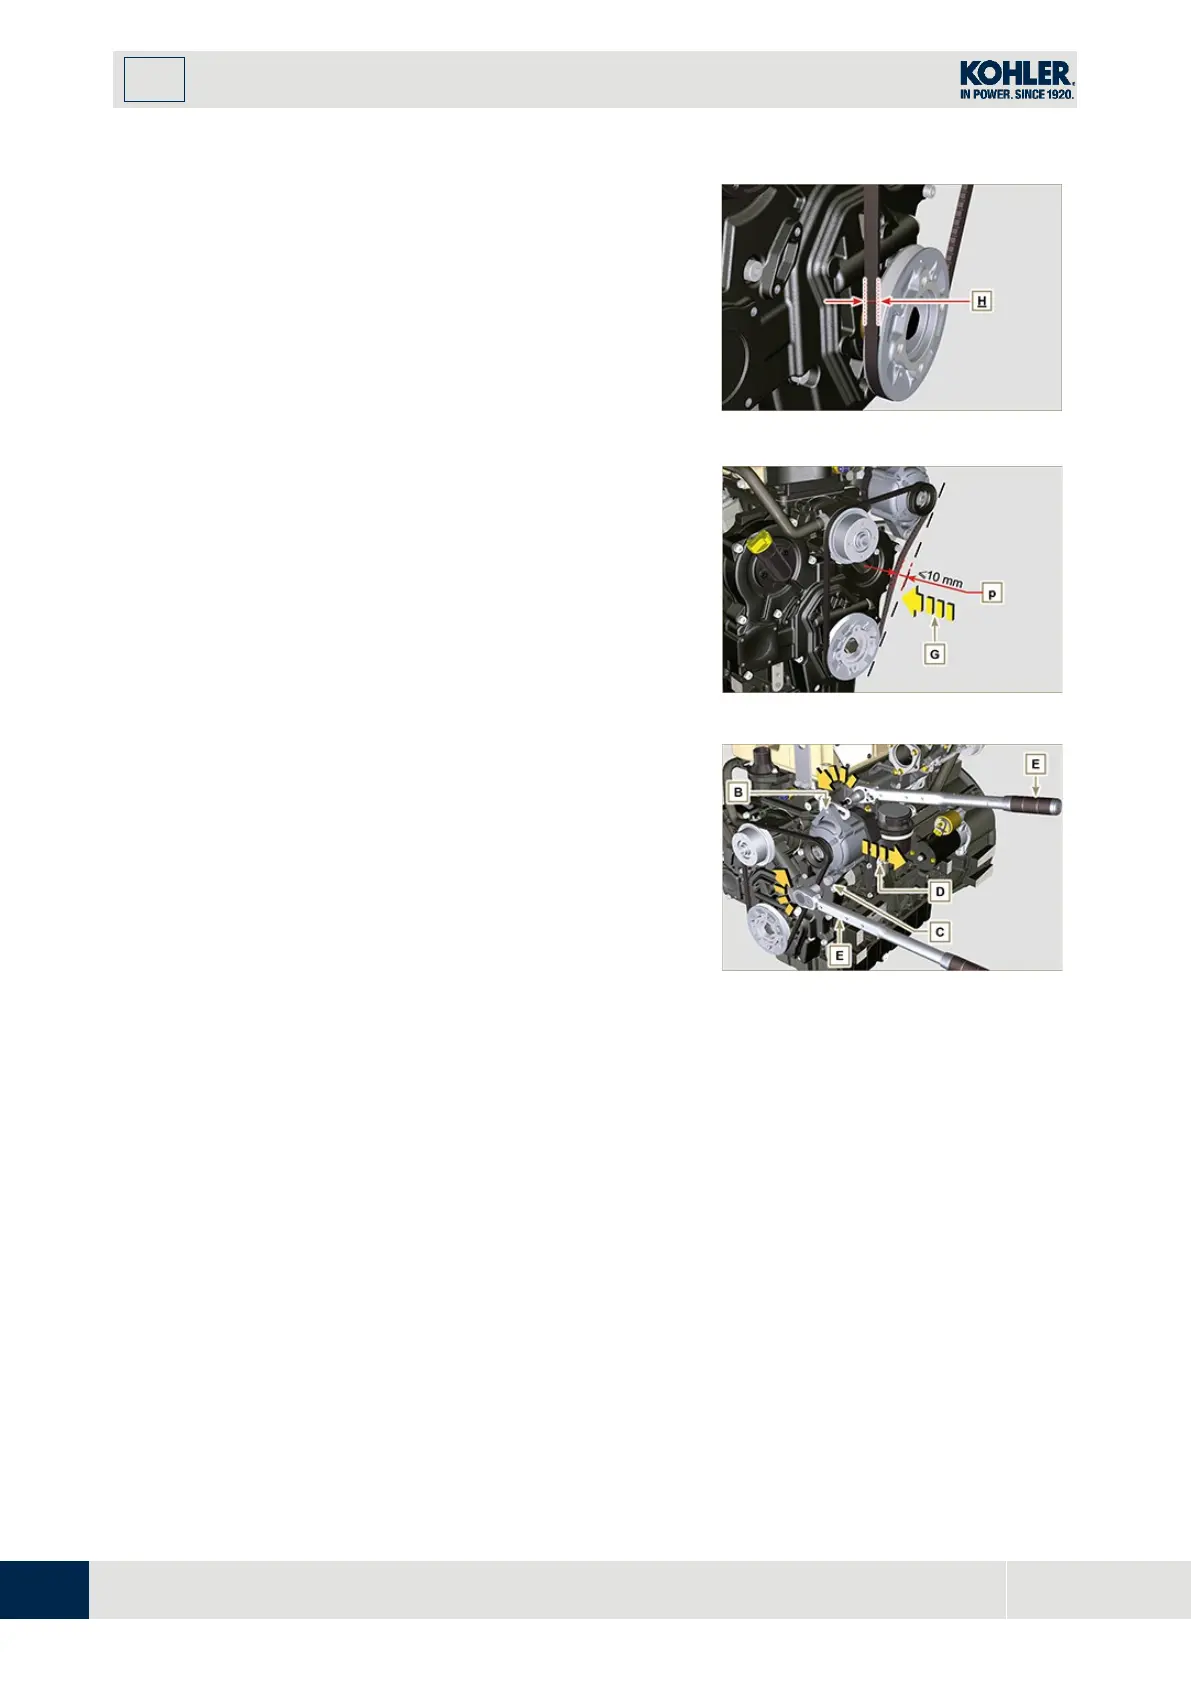
1.
Loosen the fastening bolts B e C.
2.
Pull the alternator outwards (in direction of the arrow D
), to tension the belt.
3.
Tension the belt tightening the bolts B e C.
4.
Tighten bolts B (tightening torque of 25 Nm) and C
(tightening torque at 69 Nm [thread M10] - 40 Nm
[thread M8]) in sequence with a torque wrench E.
5.
Check by the appropriate tool that at point p the
tension value is between 70 and 75 Hz for V-belt of 9
mm and 80 and 85 Hz for V-belt of 17 mm (Fig. 5.10)
(H).
Using the tool
F (DENSO BTG-2)
shown in the picture (or a
similar one) it is possible to check the corresponding value in
Newton, (which should be) included between
200 and 230 N
for V-belt of
9 mm and 350 and 450 N
for V-belt of
17 mm
(H)
.
Should the correct tool not be available, the belt tension can
be checked by applying a force in the direction of arrow
G
of
approx' 10kg on the point p. When correctly tensioned the belt
must show a movement of less than 10mm.
Let the engine run for some minutes, then let it cool down at
ambient temperature and repeat the operations
2, 3, 4 and 5
in
case the belt tension results out of the above mentioned
values.
NOTE:
Contact
KOHLER
authorised workshops for
replacement.
Fig 5.12
Fig 5.13

 Loading...


