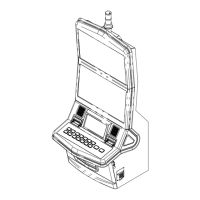
30
Screw
Socket
Button fixture
Bracket
Projections
Notch
Guide
Nut
Bracket
Button
7 Maintenance
How to replace the start button
•Before replacing the start button, be sure to turn OFF the main power
switch and unplug the power cord from the receptacle.
•When replacing parts, be sure to use parts of the correct specifications.
Never use parts other than the specified ones.
•Never disassemble, repair or modify any section other than those
specified in this manual.
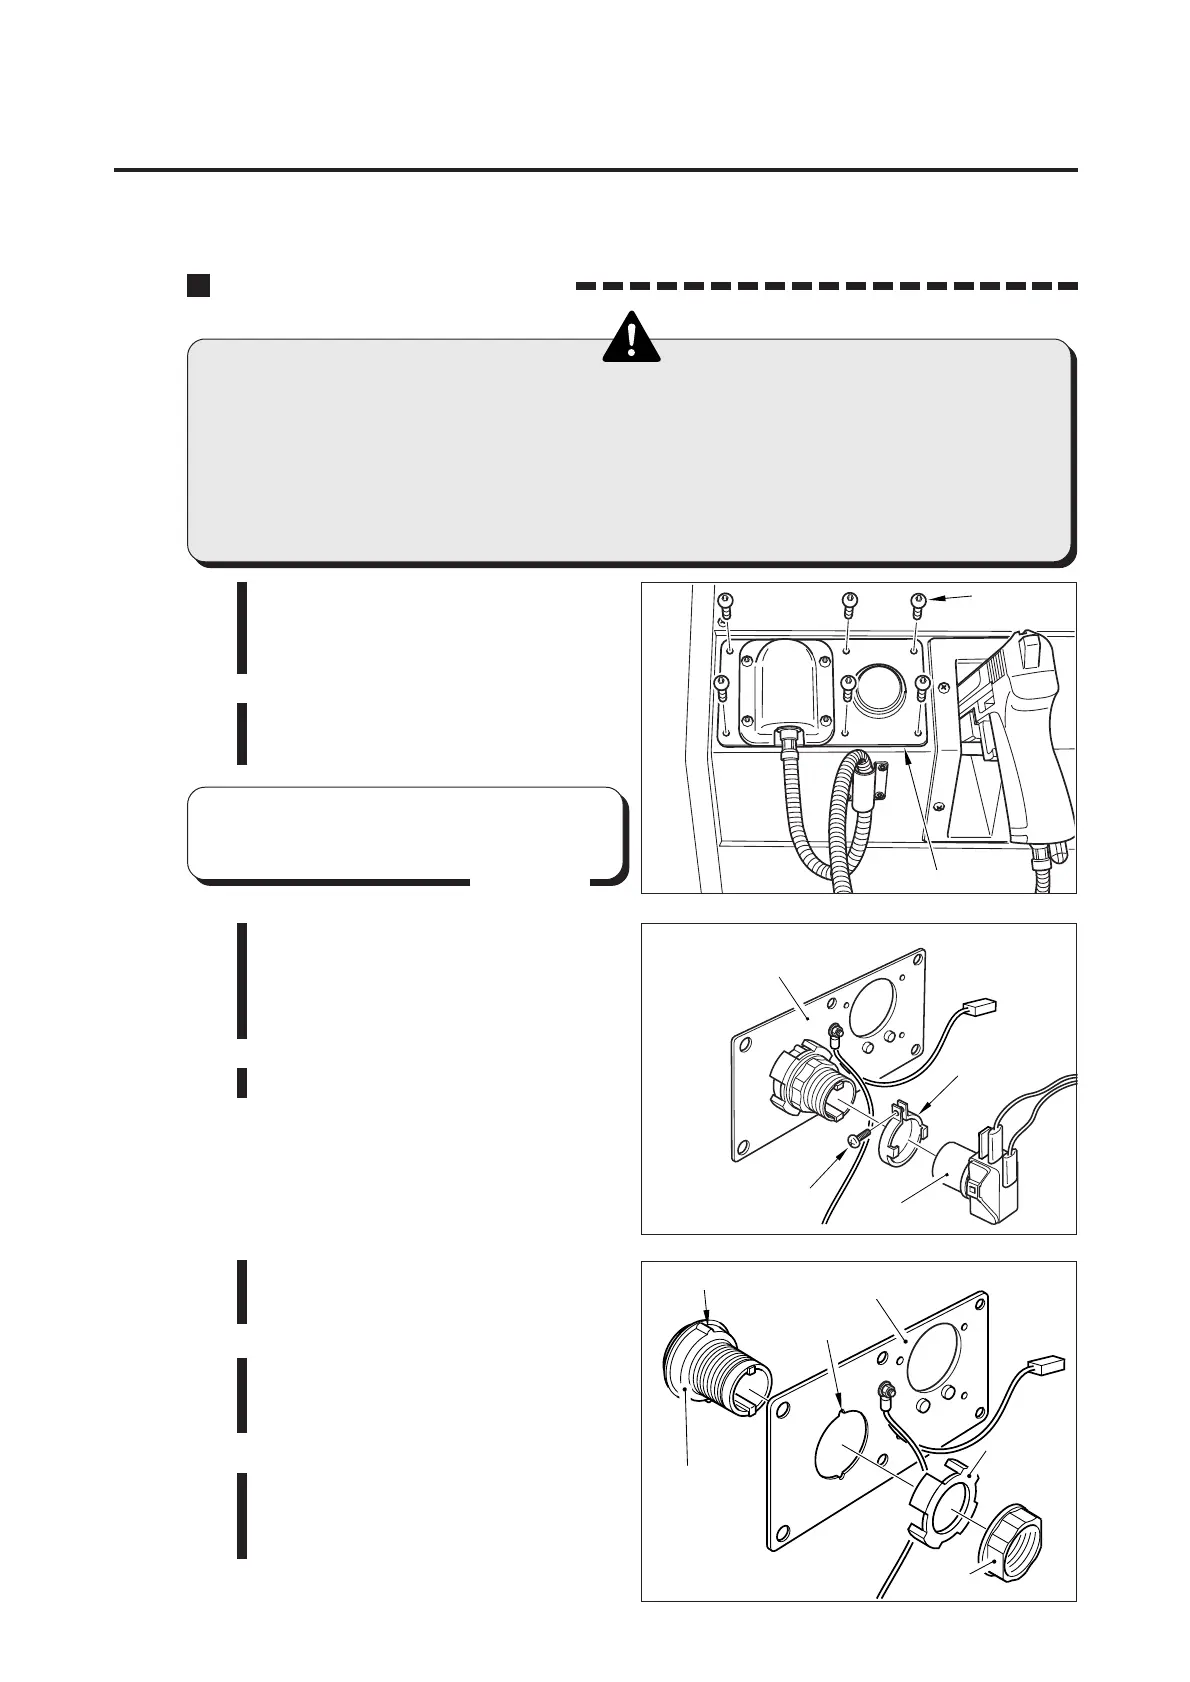
7-3 Replacing the start button
1 Be sure to turn OFF the main power
switch and unplug the power cord
from the receptacle.
2 Remove the screws and detach the
bracket.
3 Remove the screw off the button
fixture that fixes the button and
socket together. Take out the
button fixture.
4 Draw the socket from the button.
5 Loosen the nut and separate the
button.
6
To fit the button again
Fit the projection of the button to
its mating notch of the bracket.
7 In reassembling the parts, take the
reverse order. Pay attention to the
socket’s direction.
Screws
Bracket
2
•Be careful not to pull the gun cable
located behind the bracket.
MEMO