C353/C253/C203 11-41
Utility mode
11
11.7 Printer Adjustment
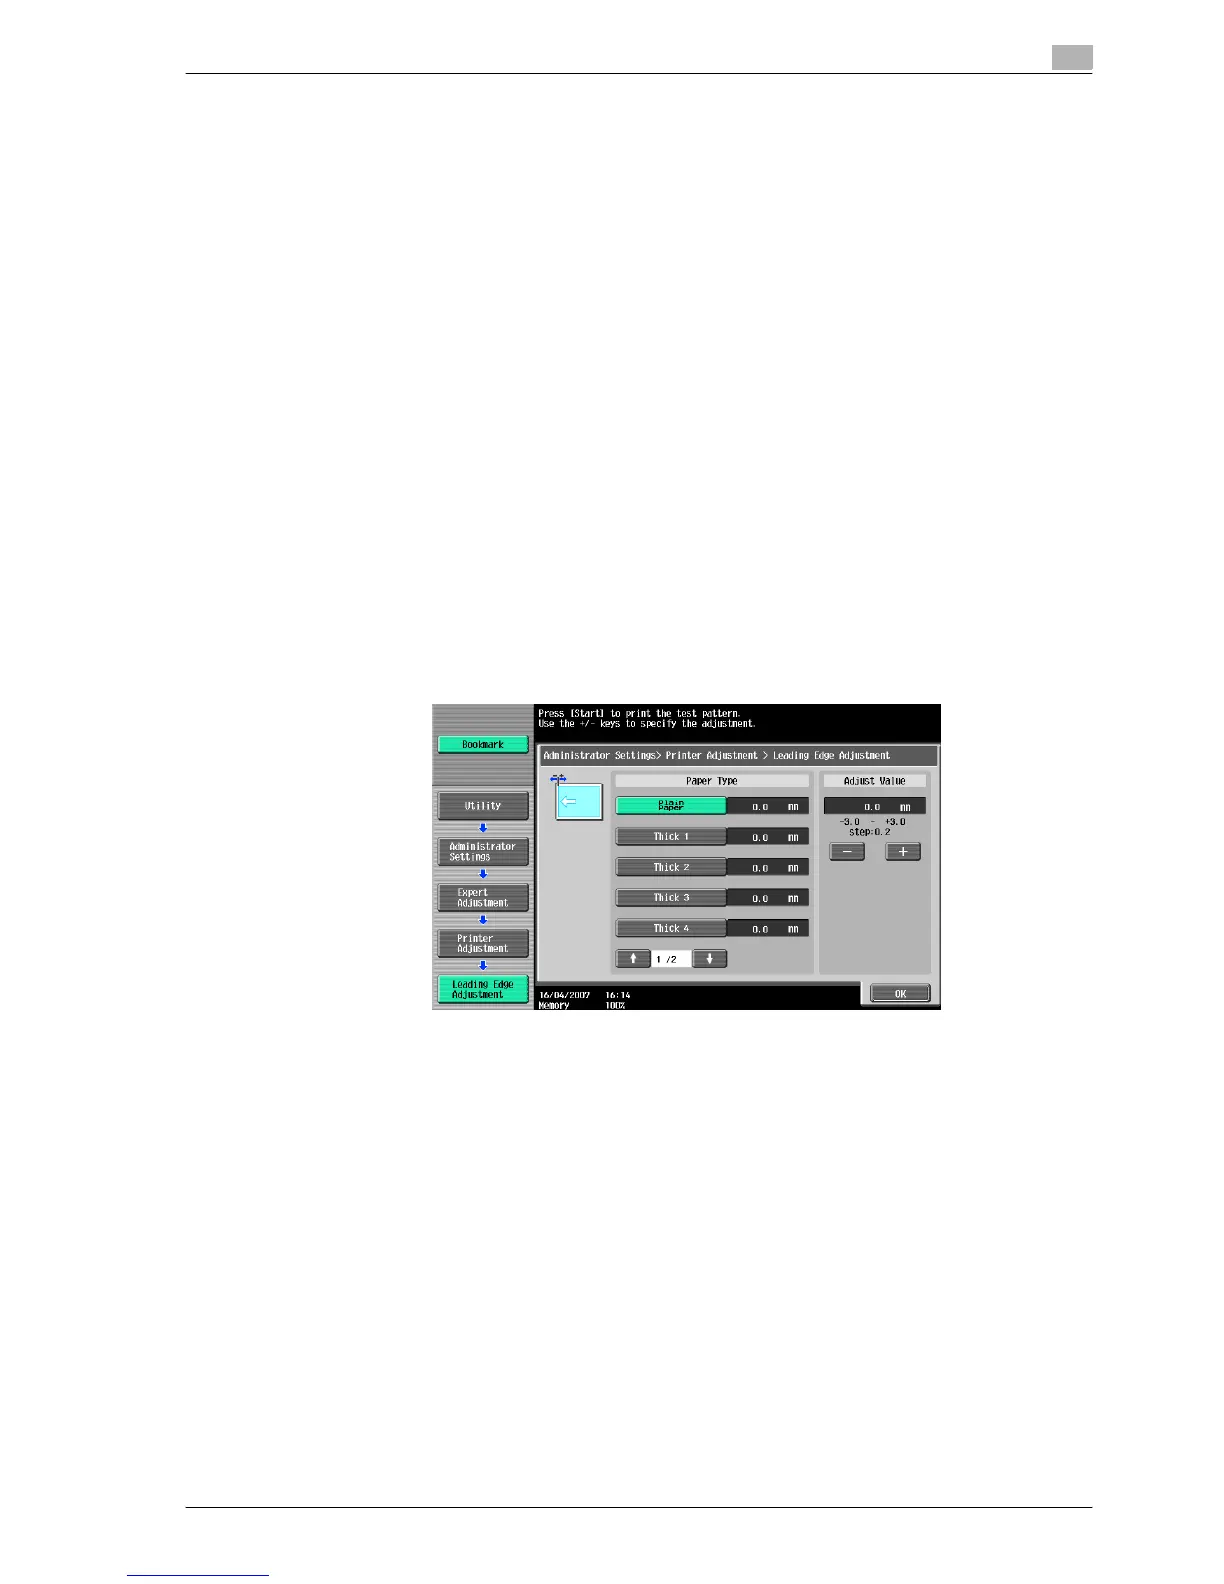
11.7.1 Leading Edge Adjustment
The starting print position at the leading edge of each type of paper (with respect to the paper feed direction)
can be adjusted.
0 The starting print position is adjusted during manufacturing of the machine. Normally, the starting print
position will not need to be adjusted.
1 Display the Administrator Settings screen.
– For details on displaying the Administrator Settings screen, refer to "Displaying the Administrator
Settings screen" on page 11-36.
2 Touch [1 System Settings].
The System Settings screen appears.
3 Touch [7 Expert Adjustment].
The Expert Adjustment screen appears.
4 Touch [2 Printer Adjustment].
The Printer Adjustment screen appears.
5 Touch [1 Leading Edge Adjustment].
The Leading Edge Adjustment screen appears.
6 Touch the button for the paper type to be set.
7 Press the [Start] key.
– Only paper loaded into the bypass tray can be used.
A test pattern is printed.
8 Check that the distance from the starting print position of the test pattern to the edge of the paper (a)
is 4.2 mm.
– If the distance is less than 4.2 mm, touch [+] to increase the adjustment (between 0.2 mm and 3.0
mm).
– If the distance is more than 4.2 mm, touch [-] to reduce the adjustment (between -0.2 mm and -3.0
mm).
 Loading...