2
Start up
Controlling the Volume
ABOUT THE AUTO POWER-OFF FUNCTION
With the factory settings,this instrument will automatically
power‐offwhenfourhourshavepassedsinceyoulastplayed
thekeyboardorusedthebuttons.Ifdesired,youcanturnoff
(disable)thisfunction.
The power will also turn off automatically after four hours
passwithonlysongsordemosongsbeingplayed.
To adjustpowe
ron/offsettings, pressthe [GLOBAL] button
to enter the GLOBAL page, and adjust the settings on the
Page1‐Gen.Controlspage.
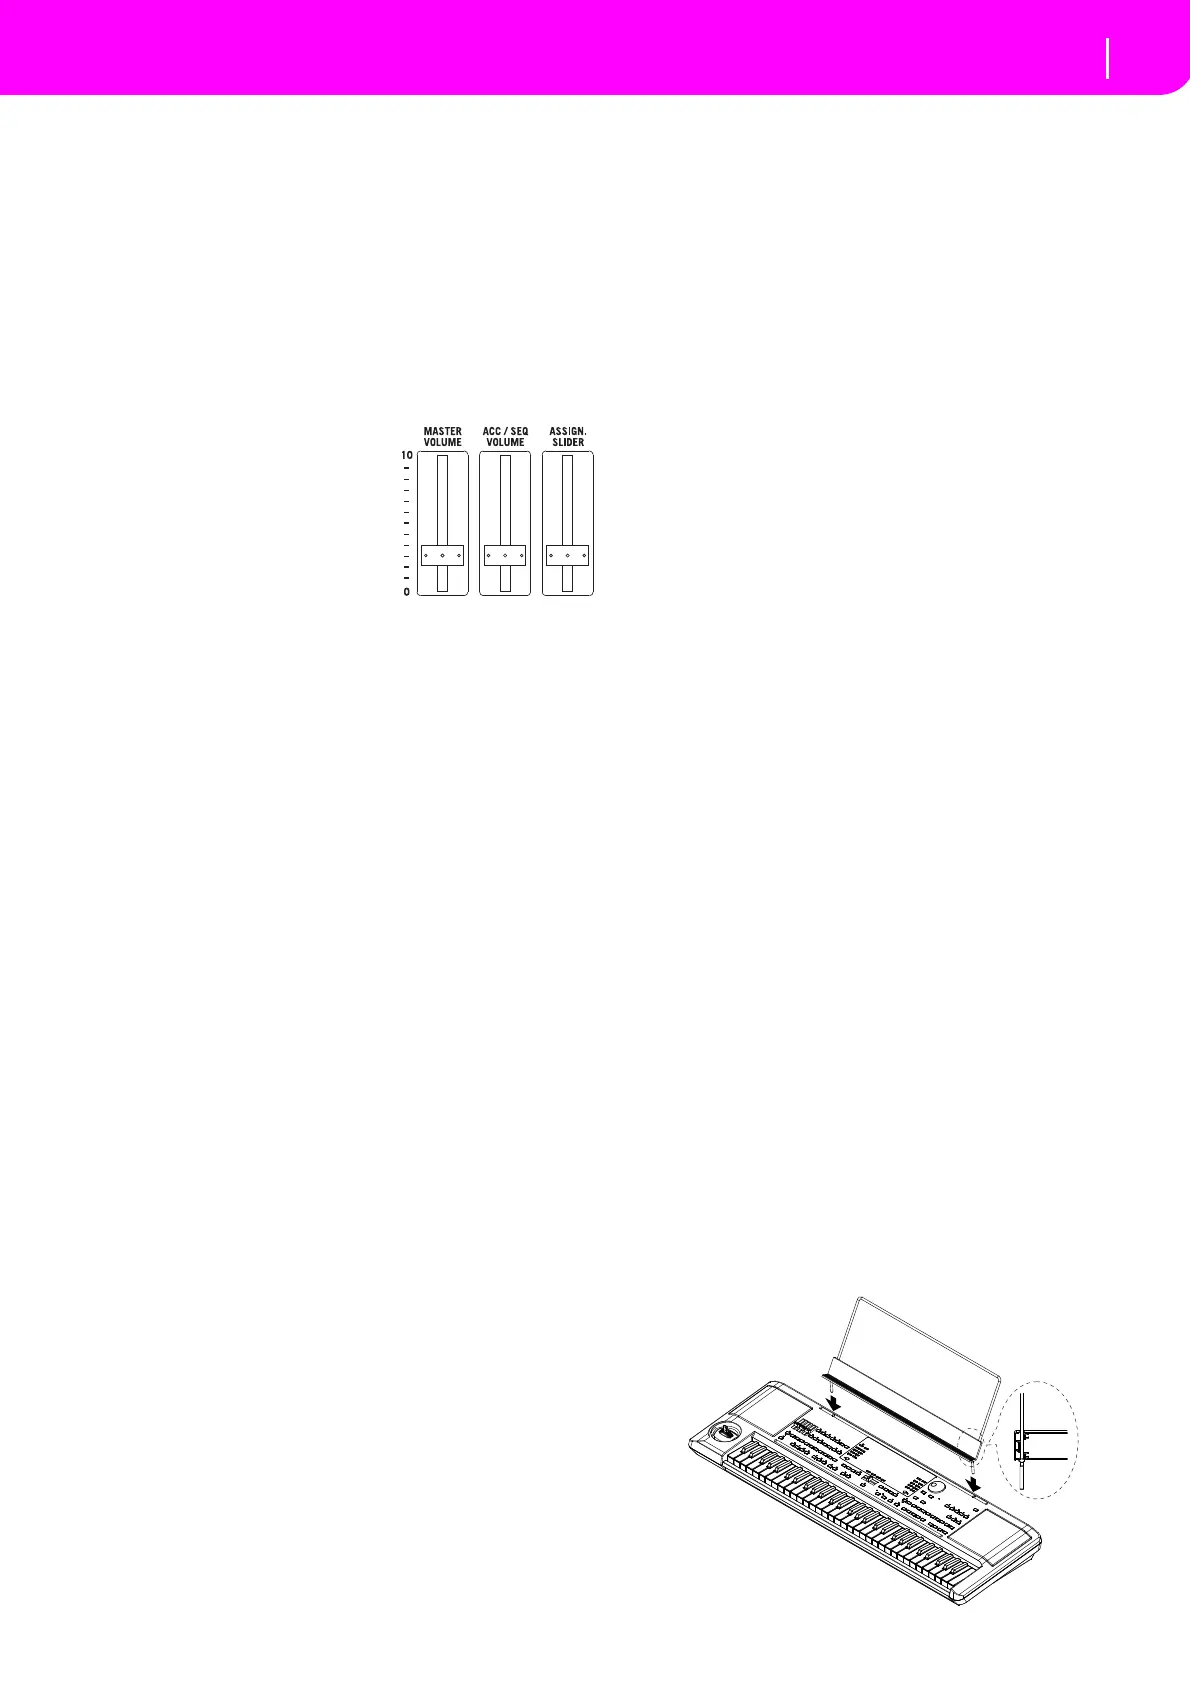
CONTROLLING THE VOLUME
•UsetheMASTERVOLUME
slider to control the overall
volume of the instrument.
This slider controls the vol‐
ume of the sound going to
theinternalspeakers,
the L/MONO & RIGHT
OUTPUTS, and the HEAD‐
PHONESconnector.
Note:Startatamoderatelevel,
thenraisetheMASTERVOLUMEup.Don’tkeepthevolume
atanun
comfortablelevelfortoolong.
•Usethe ACC/SEQ VOLUMEslider to control the Style
tracks (drums, percussion, bass…) volume. This slider
also controls both of the Sequencers tracks, excluding
theRealtime(Keyboard)tracks.
•Bydefault, you can use the ASSIGN.SLIDERto control
the keyboard tracks volume. This slider is user‐assign‐
able,butissettoth
eKeyboardExpressionparameterby
default.
THE BALANCE SLIDER
The BALANCE slider sets the relative volume of the two
onboardsequencers(Sequencer1andSequencer2).
•Move it fully left to set Sequencer 1 to the maximum
levelandSequencer2tozero.
•Move it fully right to set Sequencer 1 to zero and
Sequencer2tothemaximumlevel.
•Moveittothece
nterto
setbothSequencersatthesame
level.
Note:Whenturningtheinstrumenton,movethisslidertothecen‐
ter,toavoidstartingaSongattheminimumlevel.
HEADPHONES
Youcanconnectapairofheadphonestotherearpanelhead‐
phone jack (PHONES: stereo mini‐jack). You can use head‐
phoneswithanimpedanceof16–200Ω(50Ωrecommended).
AUDIO OUTPUTS
Youcansendthesoundtoanexternalamplificationsystem,
instead of theinternal speakers.Thisis useful whenrecord‐
ing,orwhenplayinglive.
AUDIO INPUTS
You can connect the output of another electronic musical
instrument,anunpoweredmixer,oranyaudiodevicetothe
rearpanelinputjack(INPUT:stereomini‐jack).Sincethisisa
line‐levelinput,youʹllneedtouseaseparatelysoldmicpre‐
ampormixerifyouʹreconnectingamic.
Usetheconnecteddev
ice’svolumecontroltoadjusttheinput
level.Becarefulnottomakeitdistort(or“clip”).Hereishow
tosetthevolumeoftheconnecteddevice:
•ifthesoundheardonmicroARRANGER’soutputsistoo
low, you should increase the output level of the con‐
necteddevice.
•ifitsou
ndsfi
ne,it’sok.
•ifitdistorts,youshouldlow erthelevelalittle,untilthe
soundsisfineagain.
MIDI CONNECTIONS
You canplaytheinternalsoundsofyourmicroARRANGER
with an external controller, i.e. a master keyboard, a MIDI
guitar,awindcontroller,aMIDIaccordion,oradigitalpiano.
1. Connect a standard MIDI cable from the MIDI OUT of
your controllerto theMIDI INconnectoronthe micro‐
ARRANGER.
2. Select a transmission MIDI channel on your controller.
Some controllers, like the MIDI accordions, usually
transmitonmorethanonechannel.
3. On the microARRANGER, select the MIDI Setup that
bestfitsyourcontroller’stype.
DAMPER PEDAL
ConnectaDamper(Sustain)pedaltotheDAMPERconnector
on the back panel. Use a KORG PS‐1, PS‐3 or DS1H foot‐
switchpedal,oracompatibleone.
DEMO
Listentothebuilt‐inDem oSongstoappreciatethepow erofthe
microARRANGER.Thereare16DemoSongstochoosefrom.
1. Press the STYLE PLAY and SONG PLAY buttons
together.TheirLEDsstartblinking.
Atthispoint,ifyoudon’tpressanyotherbutton,allthe
DemoSongswillbeplayedback.
2. Choose a page using the PAGE buttons. Therearetwo
differentpagesintheDemomode.
3. SelectaDemoSongbypressingthecorrespondingVOL‐
UM
E/VALUEbuttonaroundthedisplay.TheDemowill
automaticallystart.
4. StoptheDemobypressingSTART/STOP.
5. ExittheDemomodebypressingoneoftheMODEbuttons.
THE MUSIC STAND
AmusicstandcomesstandardwithyourmicroARRANGER.
Fititintothetwodedicatedholesinthefrontpanel.