18
Tutorial
Recording a Song (Simultaneously recording the Style and realtime performance)
RECORDING A SONG
(Simultaneously recording the Style and
realtime performance)
The Backing Sequence mode is a fast and effective way of
recordinganew Song,making fulluseofthefeaturesofthe
Style Play mode. So, arm your recorder, and play live with
theStyles—asongwillbereadyinseconds!
1 First, enter Backing Sequence mode
PressB.SEQtoaccesstheBackingSequencemode.TheReal‐
time tracks, on the keyboard, will remain the same as you
selectedintheStylePlaymode.
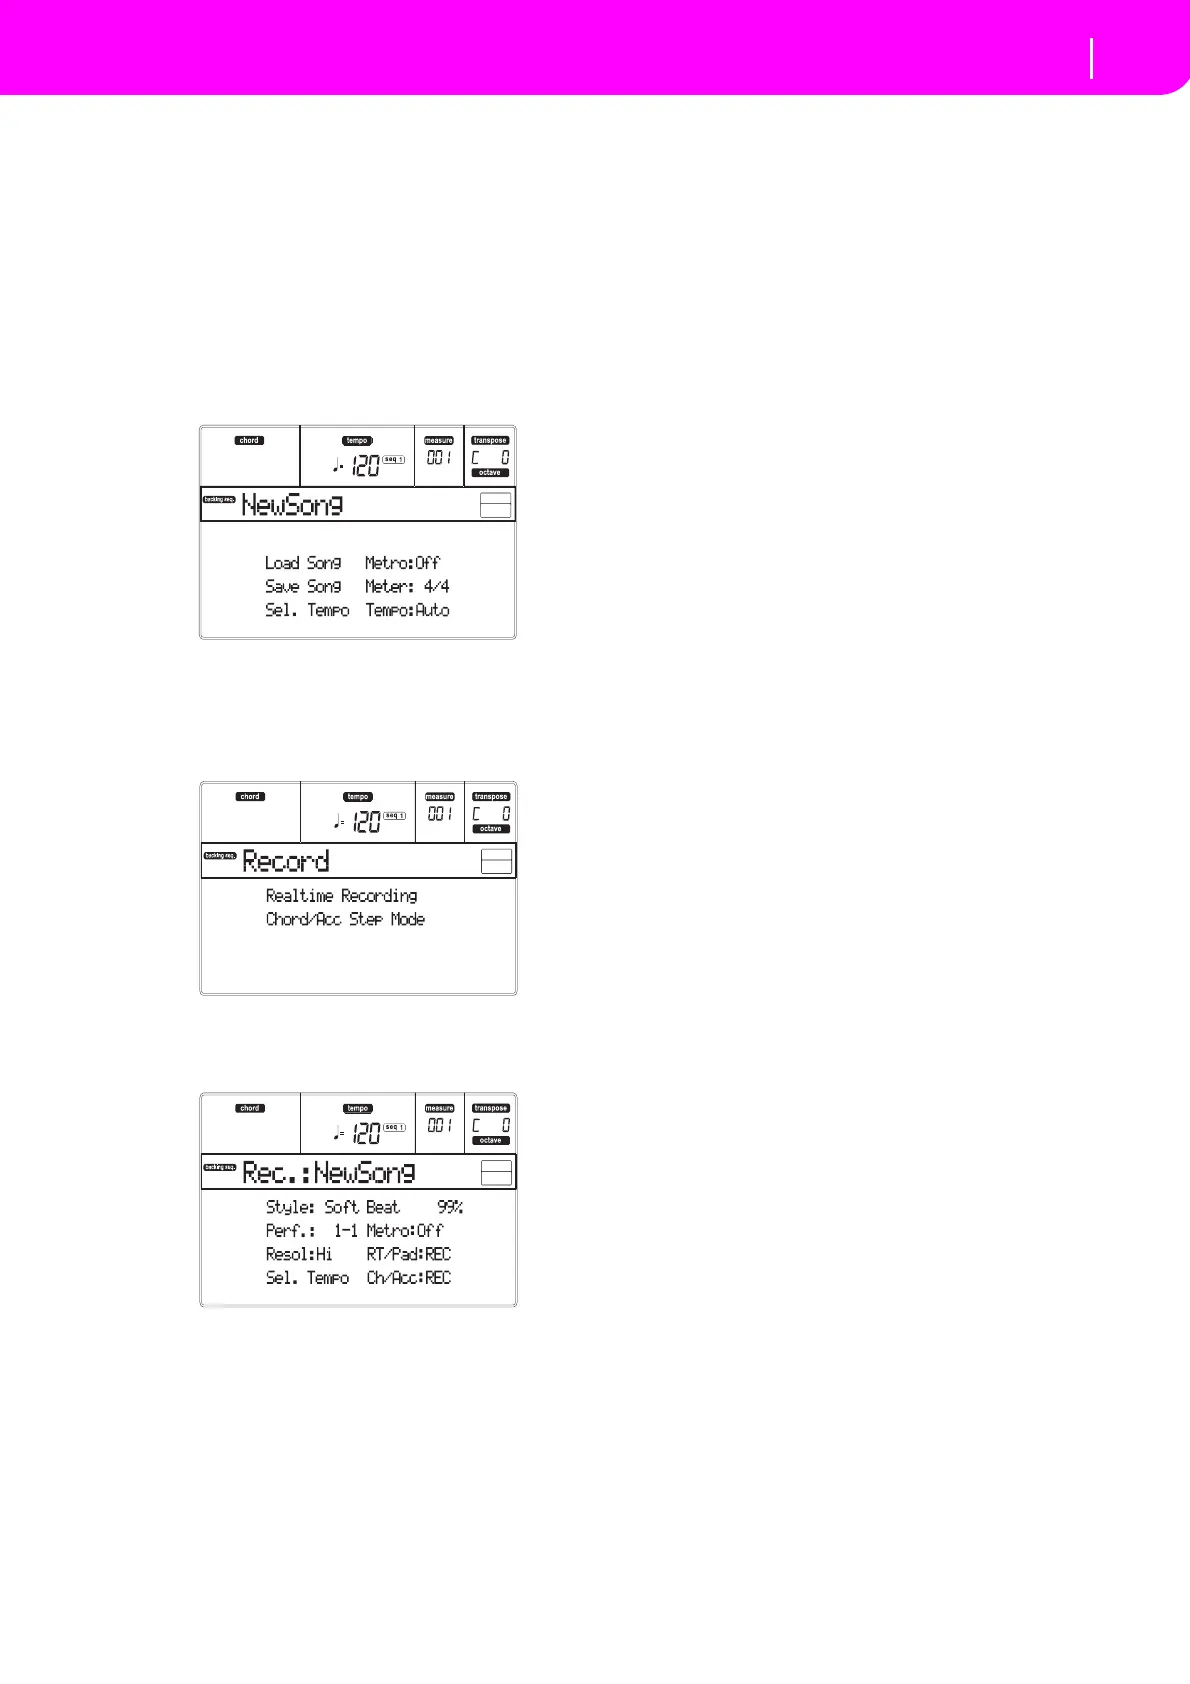
ThisistheBackingSequencePlaypage,whereyoucanload,
playorsaveaSong.
2 Now, press RECORD.
You are prompted to select either the Realtime recording
mode,ortheChord/AccSteprecordingmode.
3 Select the Realtime recording mode.
Simply press one of the A VOLUME/VALUE buttons. The
Recordpageappears.
4 If you think the selected Style is not what you
like for your backing tracks, select a different
one.
Hereisafastreminder:
1. SelectoneoftheStylerowsintheSTYLEsection,using
theleftmostbutton.
2. SelectoneoftheStyleBanks,bypressingoneofthebut‐
tonsoftheSTYLEsection.
3. Selectoneofthepages,usingthePAGEbuttons.
4. Select a Style, using the VOLUME/VALUE (A–H) but‐
tons.
TheSt
yl
eBankandnumberappearafterthe“Style”parame‐
terinthedisplay.
5 And what about changing the Performance or
Single Touch Setting?
(see“SelectingaPerformance”onpage 12,or“SelectingaSin‐
gleTouchSetting(STS)”onpage 14).Hereisashortrecapfor
thePerformances:
1. PressthePERFORMbuttontosetthePROGRAM/PER‐
FORMANCEsectionactasaPerformanceselector.
2. SelectoneofthePerformanceBanks,bypressingoneof
thebuttonsofthePROGRAM/PERFORMANCEsect ion.
3. Select a Performance, using the VOLUME/VALUE (A–
H)buttons.
…andfortheSingleTouchSettings(STS):
•PressoneoftheSINGLETOUCHSETTINGbuttons.
6 Ok, now we can go.
As you see, both the RT track and the Ch/Acc track are in
RECord mode. This means you can start recording every‐
thingyouplayinarealtimeperformancewiththeStyles.
PRESS START/STOP
WAIT FOR THE PRECOUNT TO REACH BAR 1
AND BEGIN PLAYING!
7 Play as if you were playing live.
You can do exactly what you do when playing with the
Styles: select a different Style, Performance, STS, different
Variation,aFill,andEnding…
You can even start your recording with an Intro: just press
one of the INTRO buttons before pressing START/STOP to
startrecording.
8 Stop the Song.
To stop the Song, press either START/STOP or one of the
ENDINGbuttons.TheSongwillstop,buttheRecordingwill
stillbeon.So,youcanstartwithanotherSongtoberecorded
inthesamesession(gobacktostep6,ifyoulike).
Otherwise, finish the Recording. Now forgoing to the next
step.
9 Finish the recording.
PRESS PLAY/STOP (SEQ1)
andtheRecordingstatu swillbegone.BothBackingSequence
tracks(RTandCh/Acc)willbesettothePLAYstatus.