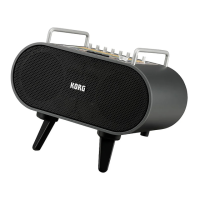
STAGEMAN 80 Owner's manual
20
3. Put the STAGEMAN 80 in the record-standby state, and
select the song number that you want to record.
Press the [ ] buon to put the STAGEMAN 80 in the
record-standby state, and then use the [F1] or [F2] buon
to select the song number that you want to record.
The display indicates the song number (d01, d02...). The
number of a new song blinks, and the number of an
already-recorded song is lit.
Tip: If there is a new song, the lowest-numbered new
song is selected automatically.
If you select a previously-recorded song number
(whose song number is lit) and then start recording, the
previously recorded data is lost and overwrien by the
newly recorded data.
• Adjust the playback of the audio le and the mic or
instrument recording level.
Set the volume of the audio le by turning the RHYTHM/
PLAY knob to the 3 o’clock position. Use the MIC knob
and the (INPUT) 1 and 2 knobs to adjust the volume level
of your mic or instrument accordingly.
Note: Adjust the level so that the top LED of the three
LEDs in the left side of the display ickers occasionally.
Note: Note: To check the recording level of the audio le,
press the [
] buon to put the STAGEMAN 80 in the
recording state. When you’ve nished adjusting the level,
press the [ ] buon to stop; then re-select the song in
the record-standby state.
Note: The VOLUME knob does not aect the recording
level. If acoustic feedback occurs, use this knob to lower
the overall volume.
4. Press the [
] buon to start recording.
The LEDs above the [ ] buon and [ ] buon are
lit.
5. Play your instrument along with the playback of the
audio le.
6. When you’ve nished performing, press the
[ ]
buon to stop recording.
You can listen to the recorded song in Recorder mode (see
page 17 “Playing back the recorded performance”).
Tip: You can import data that can be used in Recorder mode,
and then use Recorder mode to overdub onto that data. (see
page 17 “Overdubbing onto a recorded song”)
Note: When recording in Player mode, you can’t start
recording from a specic point of the playback, nor can you
record just a specic region. You can only record from the
beginning of the audio le. If you want to record from mid-
way through the playback, or only in a specic region, you’ll
need to use the import function.
Rhythm mode
In Rhythm mode you can play back rhythm styles and record
your performance, and also use the following functions.
• A “memory function” that lets you register your favorite
rhythm variations and performance tempo.
• A “chain function” that lets you create rhythm styles for an
entire song by specifying a rhythm style for each measure.
• A “metronome function” that lets you sound the metronome
in the time signature and tempo that you specify.
• A “count start function” that lets you insert a two-measure
count when playing back a rhythm style.
The “Rhythm mode” section further explains these functions.
For a guide to basic operation, refer to “Playing and recording
rhythm styles (Rhythm mode)” on page 15.
Registering a rhythm variation and
tempo to the [M1]–[M8] buttons
You can register a favorite rhythm variation and playback
tempo to each of the [M1]–[M8] buons.
Registering a rhythm variation and tempo
1. Select the rhythm variation that you want to register,
and specify the tempo.
Note: You cannot register a ll-in or ending.
2. Press the [
] buon to stop the rhythm style.
3. Hold down the [Set] buon and press one of the [M1]–
[M8] buons.
The rhythm style’s variation and tempo are registered.
Cancelling a registered rhythm variation and tempo
1. With the rhythm style stopped, hold down the [Clear/
Cancel] buon and press the buon whose registration
you want to cancel.
The registered content is cancelled.
Using the memory buttons to recall a registration
Tip: When the unit is shipped from the factory, a rhythm
style and tempo is already assigned to each of the [M1]–[M8]
buons.
1. While the rhythm style is stopped, press one of the
[M1]–[M8] buons to select the rhythm that’s registered
to that buon.
The rhythm style switches to the variation and tempo that
are registered to that buon.
[M1]–[M8] buons to which a variation and tempo are
registered are lit when the rhythm style is stopped.
When you press a buon to select a rhythm, it changes to
blinking.
2. Press the [
] buon.
The rhythm style variation registered to that buon plays.
Chain function
The chain function lets you create the rhythm track for an
entire song by specifying a rhythm style for each measure.

 Loading...