Page | 33
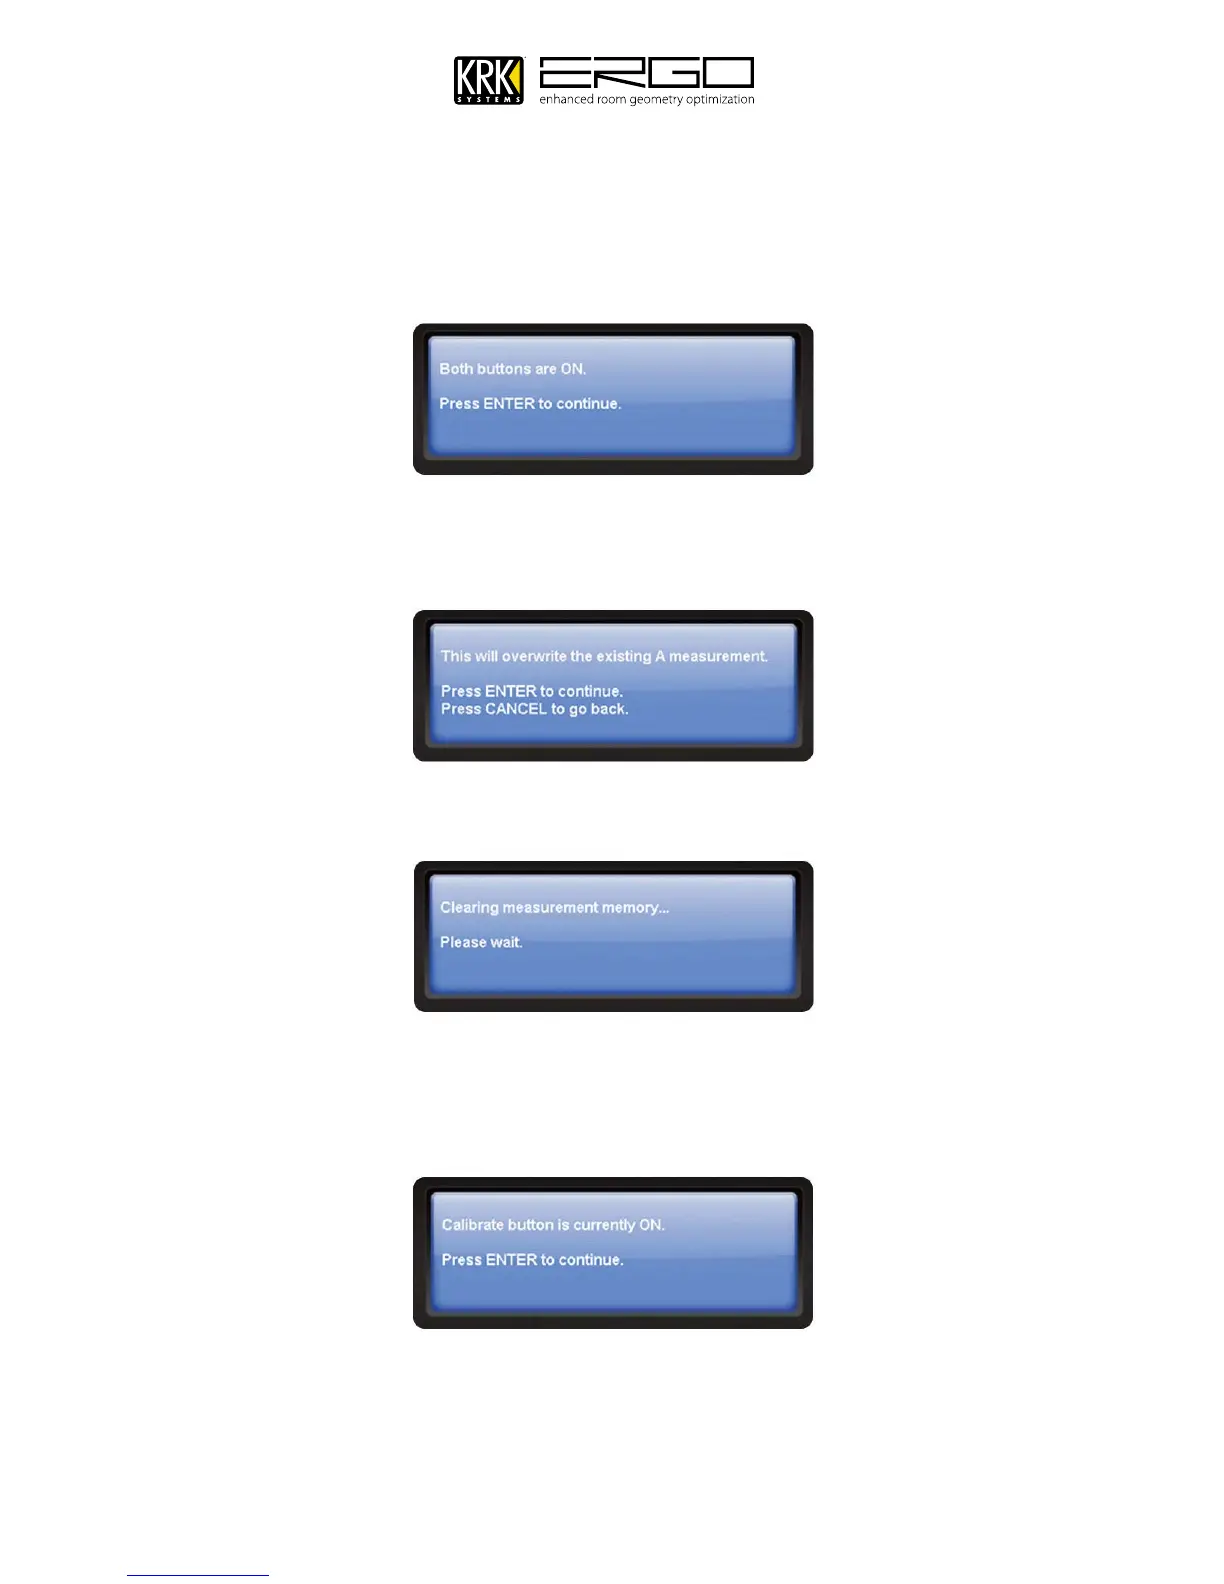
9. If you chose to use ERGO in Subwoofer mode, the next window may tell you to press any of ERGO’s required
buttons, please follow the guidance. When given the prompt below confirming both buttons are on press ENTER
to continue
10. In order to create new calibration data ERGO must first overwrite the existing measurement. The screen will look
as shown below (differing messages for each choice – Measurement A shown). Press ENTER to continue.
11. After a few seconds you will see the following message, please wait while the measurement memory is cleared.
12. The step will check the position of the calibration button, as this routes the signal from ERGO’s measurement
microphone into the hardware. If the calibration button is OFF you will be asked to turn it on, for the position
please refer to the rear panel diagram at the front of this manual. You will then see the following message,
press ENTER to continue.