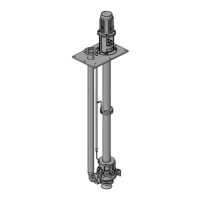
RWCP, RWCN
14
7.5.2 Mechanical seal (when fitted)
Mount in reverse order to dismounting.
For the correct operation of the seal it is
necessary to at least:
- Take great care when cleaning the different parts of the
mechanical seal, especially the contact faces. Not use
lubricant; use only clean water with a cloth for cleaning
optical devices.
- Not damage the O-rings during assembly.
7.5.3 Packing (where fitted)
- Introduce the packing gland and the cover along the
shaft.
- Mount and secure the cover on the lantern support.
- Cut the new packing, forming as many rings as required.
The cuts, seen from above, may be straight or inclined at
45º.
- We recommend leaving a small clearance of 0.5 mm in
the packing cut.
- Position the rings one by one, pushing on them but
without excessive force. The rings shall be introduced
with the cut ends alternated 90°.
- Take care to introduce the lantern ring in the same order
as before.
- Once the packing has been introduced, check that the
shaft rotates freely without any stiff points.
- Secure the packing gland. The packing gland must not
penetrate the entire free length. If necessary, introduce
more rings.
- Gently tighten the packing gland nuts.
- In order to determine the appropriate torque of the
packing proceed as indicated in point 7.2.1
7.5.4 Pump
Proceed in reverse order to that described above, taking
special care:
- When mounting the shaft in the support, take care to
ensure it does not tilt and maintains the axial direction
with the support.
- To introduce the different elements, use a plastic
hammer, banging gently in order to prevent damage to
the ball bearings, seals and bearings.
- Proceed to lubricate the bearings.
- Do not forget to position new joints. There should be no
clearances and the joints should be perfect.
The pump materials have been selected in
accordance with the process fluid indicated in the
datasheets. If this fluid is modified, check with KSB ITUR that
the new fluid is suitable for the pump.
- Note that the mounted intermediate bearing support is
not symmetrical, since it presents a larger interior
diameter on one side than on the other. Tighten the keep
pin which secures the intermediate bearing. The smaller
interior diameter part of the intermediate bearing support
must remain towards the bottom, on the side of the
pump.
- Use your hand to check that the shaft rotates freely every
time a piece is mounted.
- If the friction bearing has been removed from its position
in the cover, clean the inside of the cover and the
exterior bearing surface before returning it, and use a
plastic hammer to hit an intermediate piece into place.
Do not forget to position the keep pin which fixes the
bearing to the pump cover.
Note
- It is very important to check that the bearings are
perfectly aligned with the shaft, without any gaps which
may lead to the deviation of the shaft.
- The impulsion pipes of the RWCP series pumps must
take a position perpendicular to the support plate without
presenting tensions or deviations from the shaft.
- Check the correct positioning of pieces,
especially seals, bushing and impellers.
Note
7.5.5 Tightening torque of the screws/nuts
Steel
Stainless
steel
ISO Metric
thread
Tightening Torque in [N·m]
(for non-lubricated thread)
M4 3.1 2.15
M5 6.1 4.25
M6 10.4 7.3
M8 25.2 17.7
M10 49.5 34.8
M12 85.2 59.9
M16 211 148
M20 412 290
M24 710 276
M27 1050 409
M30 1420 554
 Loading...