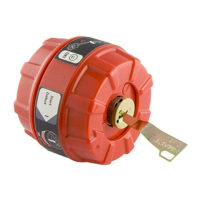
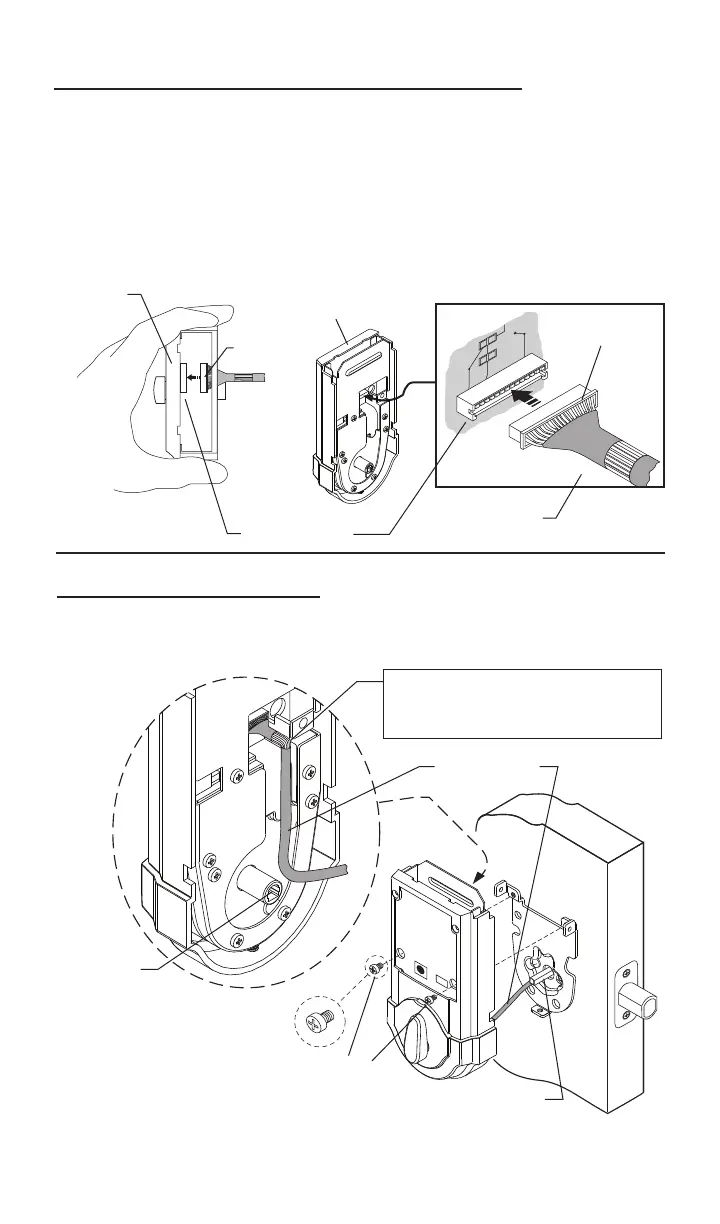
EasyManuals Logo

Kwikset SmartCode Series User Manual

Kwikset SmartCode Series
24 pages
To Next Page IconTo Next Page
To Previous Page IconTo Previous Page
Page #4 background imageLoading...
Page #4 background image
Wire Harness
Small
Screws
Torque Blade
Important Note: To prevent damage, always handle the wire harness
with care.
4
Routewiresdown-avoidingany
excess bulge at curve, which could
interferewithbatterypackinstallation.
5.AttachtheConnectortotheInteriorAssembly.
Connector Port
Interior
Assembly
Connector
Connector
Wire Harness
a. Makingsurewiresareclearofpinchingandwireharnessisroutedas
shown, place the interior assembly on door, aligning torque blade inside the
turnpieceshaft.
6. Install Interior Assembly.
Turnpiece
Shaft
b.Onceushondoor,
insert and tighten small screws
to secure assembly onto the
mountingplate.Note: To aid insertion of screws,
approach the screw holes with the screw loaded onto the screwdriver.
a.Aligntheconnector(smoothsideup)withtheconnectorportoftheinte-
riorassembly.
c.Oncealigned,pushtheconnectorinrmlytoconnect.
b.Foreasierorientation,viewthealignmentofconnectionfromthetopof
theinteriorassembly.
Topof
Interior
Assembly

Other manuals for Kwikset SmartCode Series

Questions and Answers:

Question and Answer IconNeed help?

Do you have a question about the Kwikset SmartCode Series and is the answer not in the manual?

Kwikset SmartCode Series Specifications

General IconGeneral
Battery4 AA batteries
TypeElectronic Deadbolt
Locking MechanismMotorized Deadbolt
Smart Home CompatibilityVaries by model (Zigbee, Z-Wave, or Wi-Fi)
User CodesUp to 30
Auto-LockYes, programmable
Finish OptionsSatin Nickel, Venetian Bronze, Polished Brass
Re-key TechnologySmartKey
KeywayKwikset
Voice ControlVaries by model and smart home system
CompatibilityVaries by model and smart home system

Related product manuals