2GL/2FV/2FW
1-6-18
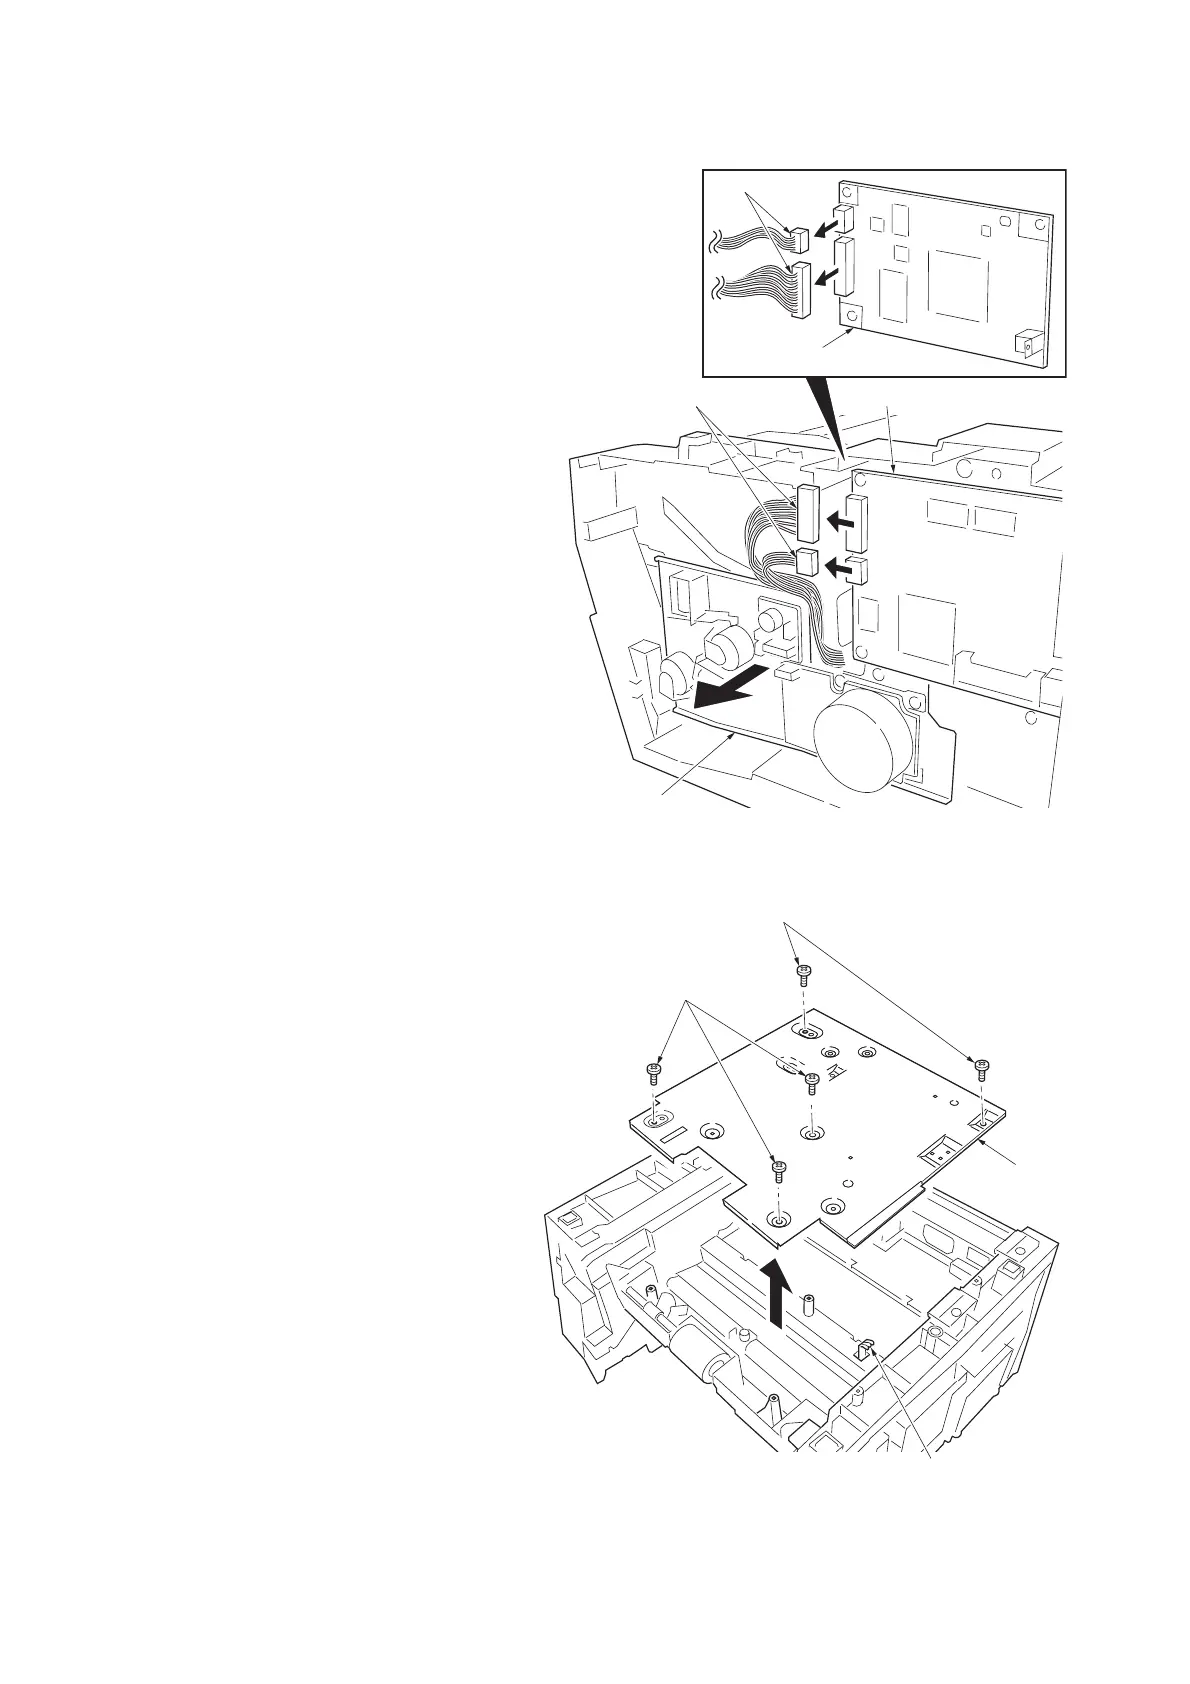
5. Remove the two connectors from main
PWB.
6. Remove the drive unit. See page 1-6-23.
Figure 1-6-24
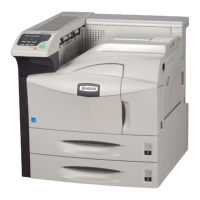
7. Turn the printer bottom side up.
8. Remove the five screws and then remove
the bottom frame plate with PWBs (behind
the plate).
Figure 1-6-25
Connectors
Main PWB (16/18 ppm printers)
Drive unit
Main PWB (16 ppm GDI printer)
Connectors
Bottom frame
plate
(Transfer bias terminal)
Screws
Screws