Preparation for Usage
2-21
Connecting Cables
Connect to a computer to use the printer and scanner features. This device has the following
interfaces for connecting to computers.
Use the type of cable appropriate for the interface used.
NOTE: Use shielded USB, 10Base-T and 100Base-TX cables.
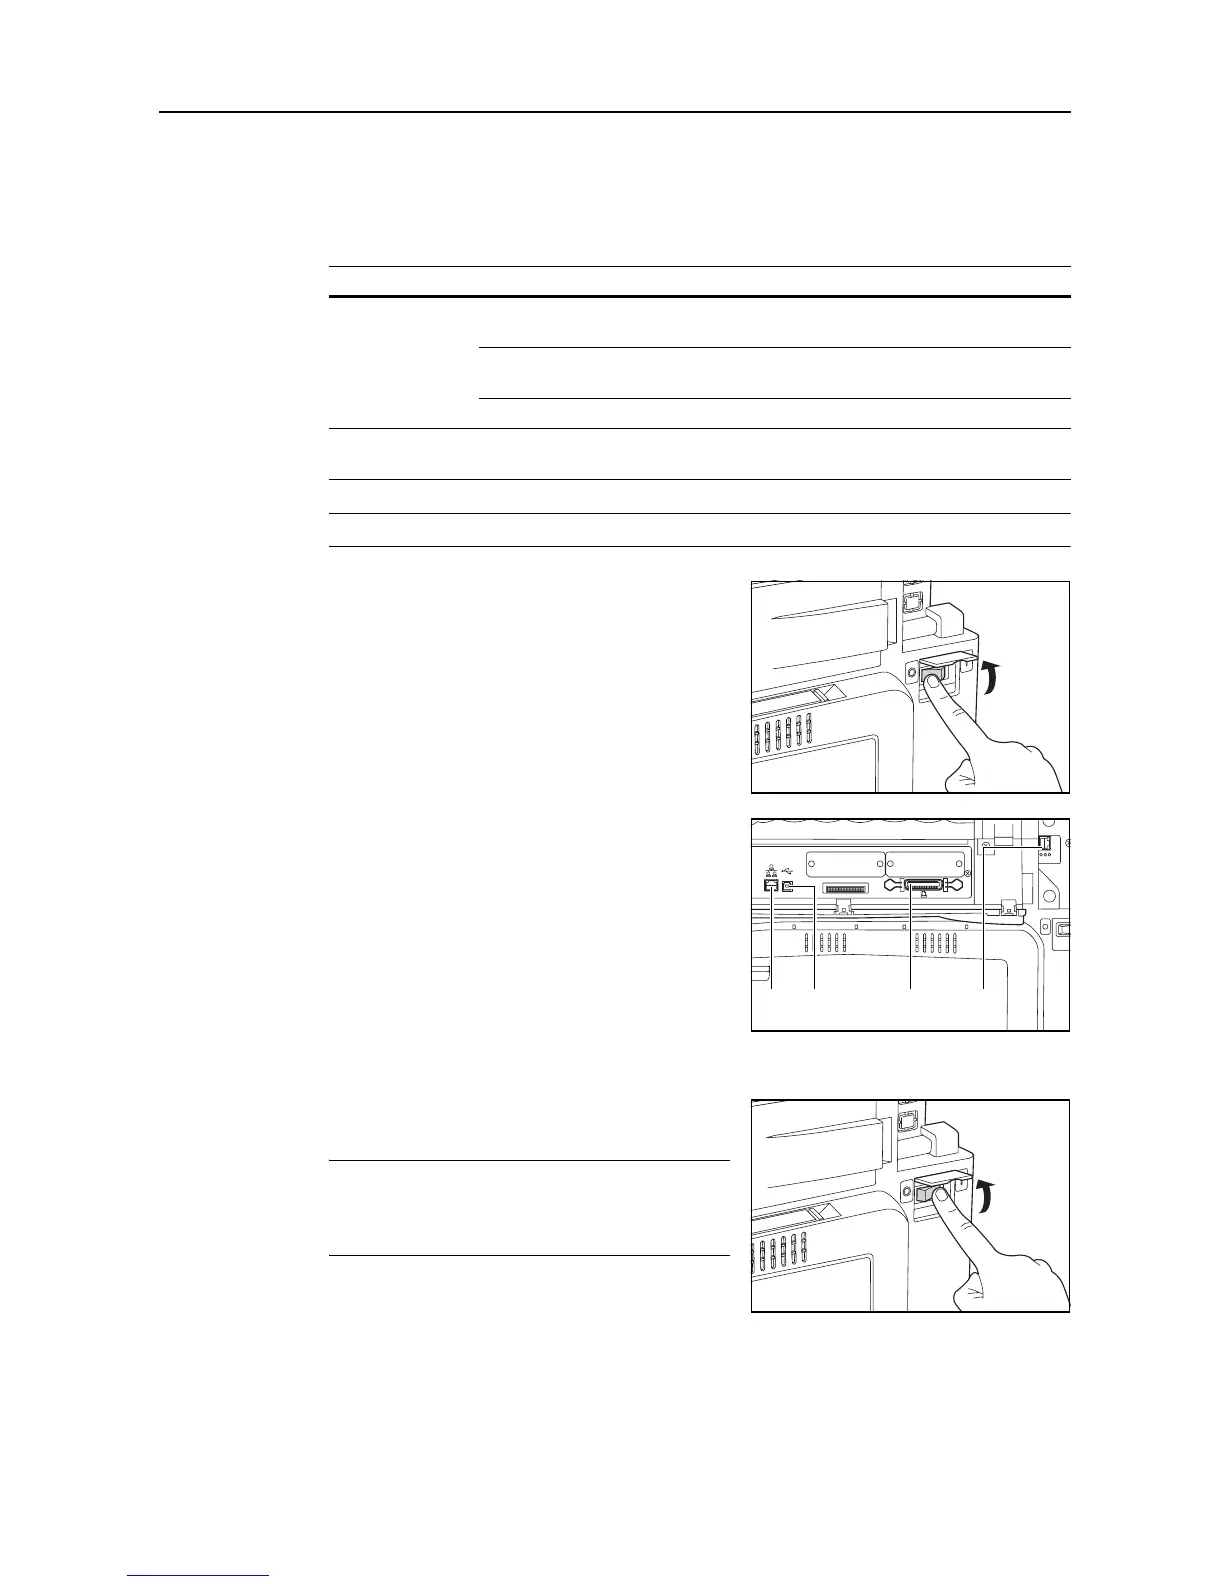
1
Open the main power switch cover, and switch the
main power switch to off ( position).
Turn off the computer’s power when connecting a
parallel port cable.
2
Open the interface cover on the right side of the unit
and connect the cable to the interface.
A: Network interface (printer)
B: USB interface (printer)
C: Parallel port interface (printer)
D: Network interface (scanner)
3
Connect the other end of the cable to the computer or a hub (network switching device).
4
Open the main power switch cover, and switch the
main power switch to on ( | position).
NOTE: For network cable connections, configure the
network after connecting the cables. For details, refer
to Network (TCP/IP) Settings on page 2-22 and
Scanner Basic Settings on page 2-32.
Function Interface Required cable
Printing
Functionality
Parallel port interface Parallel Port Cable (IEEE1284 specification, 1.5 m or
less)
USB Interface Hi-Speed USB-compatible cable (Hi-Speed USB
specification, 5.0 m or less) shielded cable
Network interface Network Cable (10Base-T or 100Base-TX)
Scanning
Functionality
Network interface Network Cable (10Base-T or 100Base-TX)
AB C D

 Loading...


