18
6.
Insert short rail and
switch 7.
Join front fence
supports 8.
Align the front rail with
blade
Insert the short front rail into the first square head
bolt. IMPORTANT: Insert the switch assembly
before joining the two front rail pieces. STOP
BEFORE TIGHTENING.
Align the pins and join the two front rail pieces and
firmly push together.
Using the blade notching on the measuring tape,
align the entire front rail section to the blade.
9.
Level and fasten front
rail
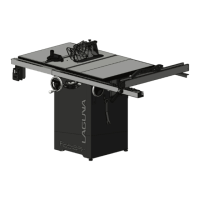
10.
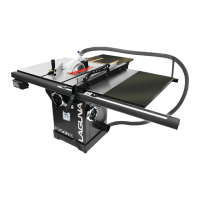
Install the
fence
11.
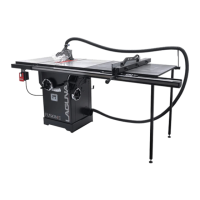
Level the tablesaw with
casters
This step may take 2 persons. To level the front
rail sections to the table top, use a ridged straight
edge atop the loosely fit rail sections. Apply
downward force to the straight edge while keeping
the two sections firmly together. Simultaneously
fasten down the bolts.
Install the fence by placing the front end first. Be
sure that the handle is in the open, unlocked,
position prior to installing.
To level the tablesaw with the ground, use the two
leveling casters. The knobs on the left lock the
mobility of the saw.
12. Fix the machine to the floor
Adjust lock plate location and fix the machine on the
floor by screw.
Installing/Removing the Throatplate
Installing the throat
plate
Leveling the throat
plate
1. Un-plug the tablesaw!
2. Insert the throat plate back end first.
3. Lower the throatplate to the table.
4. Lock the throat plate with the thumb-lock.
5. Level the throatplate with the table using
the cat screws.
Notice: This machine is shipped
with a zero-clearance throat plate that
has already been cut at the factory.
Because of this, there may be some
residue already in the saw.
WARNING: MAKE SURE SAW IS UNPLUGGED.
To remove or install the throat plate, first set it to
the unlock position. Then, insert the rear end first
and tilt the other end down into position.
To level the throatplate, adjust the leveling screws.
Use
Caution: Make sure the throat
plate is lower than the cast iron table.
Having the throat plate higher at any
position can interfere with the workpiece
feed and cause injury or harm and
increase the chance of kickback.