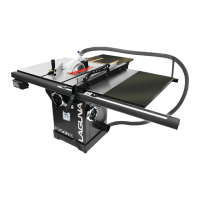
20
Installing/Removing the Blade
Guard
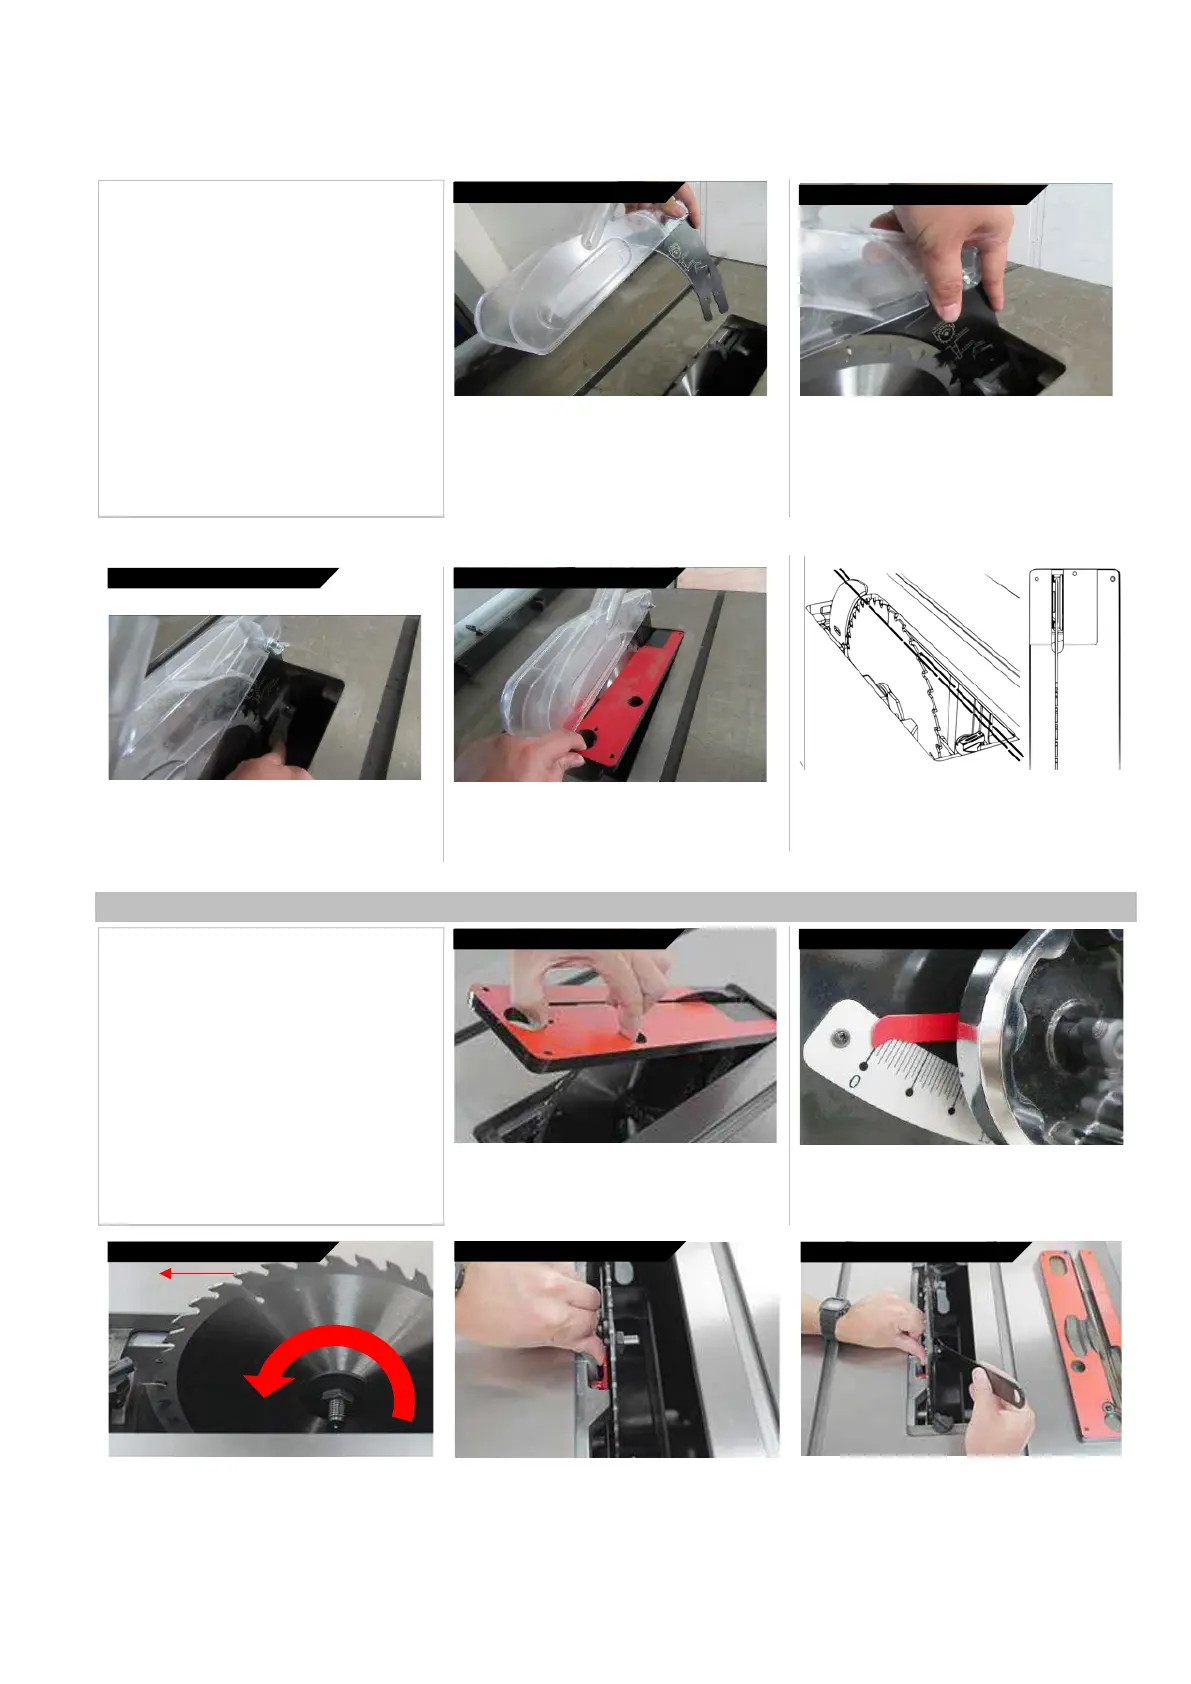
1. Un-plug the tablesaw!
2. Make sure the lock is in open position
3. Insert the blade guard
4. Position the guard insert
5. Lock the blade guard
6. Reinstall throat plate
3.
insert the blade
guard 4.
position
TO
LEFT
OF CASING
CAUTION: Make sure the blade guard is in-
line with the blade. If it is not in line, please
see the Adjustments Section. WARNING: MAKE SURE SAW IS UNPLUGGED.
With the throat plate removed, and the cam lock
mechanism in the open position (pulled up), insert
the blade guard insert into the slot.
5.
lock THE Blade
Guard 6.
Reinstall the throat
plate
Hold up the pawls and position the blade guard
against the left inside of the casing and push down.
Make sure the guard is positioned correctly and
seated in the bottom of the casing. Grasp the
pawls with one hand, leaving the other hand free
to activate the cam action lock.
Keep firm hold of the blade guard with left hand
and engage the cam lock with the thumb of your
right hand.
Grasp the pawls up and out of the way to re-insert
the throat plate. Lock the throat plate.
CAUTION: Make sure the riving knife is in-line with
the blade. If it is not in line, please see the
Adjustments Section.
Installing/Removing the Blade
2.
Remove
all accessories 3.
Set arbor tilt
to 0
and
lock.
1. Un-plug the tablesaw!
2. Remove any blade guards, riving knifes,
splitters, and the throat plate to access the
blade.
3. Set the arbor tilt to 0 degrees and lock.
4. Raise saw to highest position.
5. Engage blade lock (red component).
6. Remove the arbor nut and flange with
arbor wrench.
7. Remove or install blade.
CAUTION: Make sure the teeth of the blade
are facing the front of the saw as shown.
4.
Raise saw blade
to
highest
pos.
WARNING: MAKE SURE SAW IS UNPLUGGED.
To access the blade remove all accessories
around the blade, including riving knifes, throat
plates, ect.
5.
Engage the blade
lock
Set the arbor tilt to 0 degrees and lock the arbor to
prevent it from moving when installing or removing
blades.
6.
Remove arbor nut and
flange