7
Adjusting The Ice Flow Regulator (230 V Units Only)
TheRegulatorDoorAssembly(PN82-2904)can
regulatethedispensediceow.Installationofan
IceFlowRegulatorisNOTnecessaryforthe
dispensing of ice. This IBD unit will dispense ice
unrestricted.
NOTE
The total adjustment is 1/2 inch.
NOTE
1. Remove Bin Lids.
2. Adjust Ice Regulator to desired position by turning the nut
screw clockwise to close, or counter clockwise to open, with
the use of a nut driver or a socket wrench.
3. Reinstall bin lids.
Turn Screw to Adjust
Adjustment
To Ice
ICE
CUT AWAY VIEW
Access Slot in
If necessary, bend
Wheel
Clockwise to Close
Counter Clockwise to Open
Plastic Wheel Shroud
slightly forward for
easier installation.
for adjustment
Use the access slot
Shroud
Dispensing Chute
SIDE
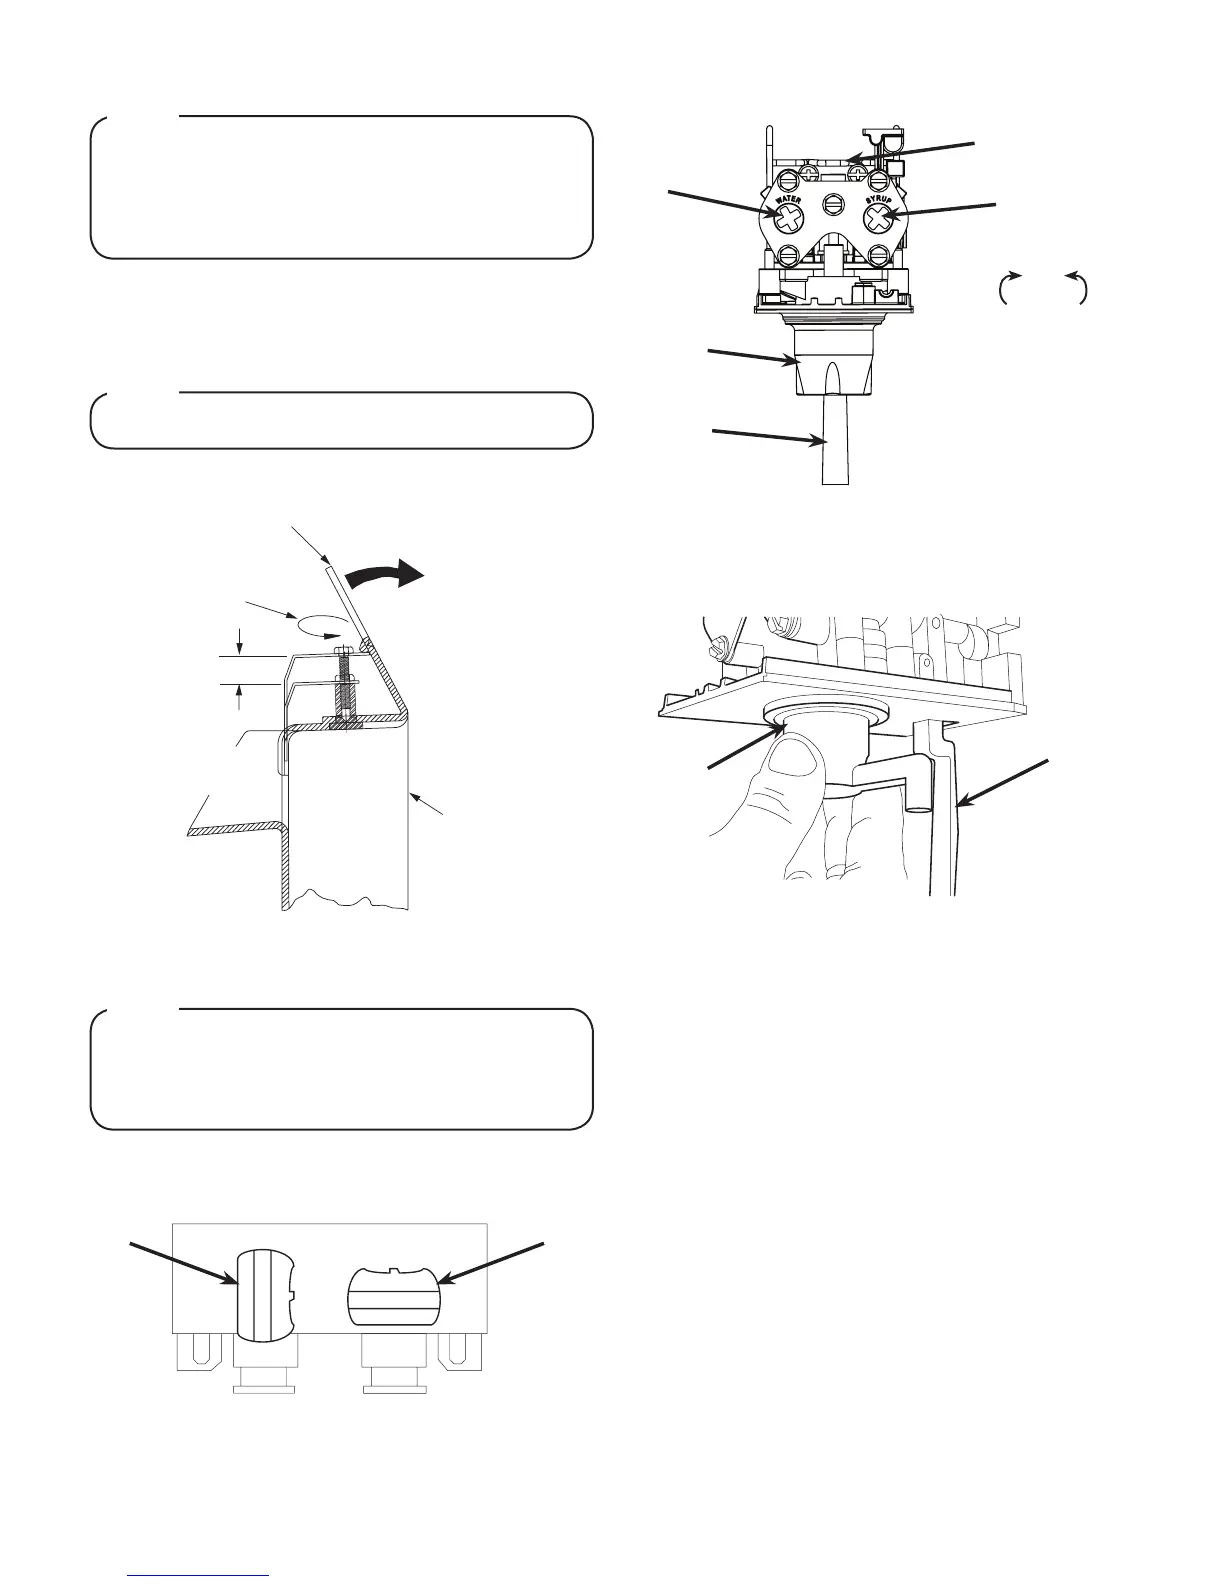
Adjust Water Flow Rate & Syrup/Water Ratio
1. Remove valve cover from rst valve.
2. Close syrup shut-o at mounting block for rst valve.
Ensurethereisiceonthecoldplateandthelinesare
coldbeforeattemptingtosettheowratesonthe
valves.Thedrinktemperatureshouldbenohigherthan
40°F(4.4°C)whenowratesareset.
NOTE
A B
A. Water ON
B. Syrup Closed
3. Using a Lancer ratio cup verify water ow rate (5 oz. in 4
sec.). Use a screwdriver to adjust if needed.
A
B
Increase Decrease
C
E
A. Flow Control, Water
B. Flow Control, Syrup
C. Nozzle (Diuser inside)
D. Retainer Clip
E. Soda Lever
D
4. Remove nozzle by twisting counter clockwise and pulling
down, then remove diuser by pulling down.
5. Install Lancer (yellow) syrup seperator (PN 54-0031) in place
of nozzle.
A
B
A. Syrup Seperator
B. Soda Lever
6. Re-open syrup shut-o at mounting block.
7. Activate valve to purge syrup until steady ow is achieved.
8. Using a Lancer brix cup, activate the valve and capture a
sample. Verify that the syrup level is even with the water
level. Use a screwdriver to adjust if needed.
9. Remove syrup seperator and reinstall nozzle. Replace valve
cover.
10. Repeat steps 1-8 for each valve.
11. Re-install merchandiser, splash plate, and top cover.
 Loading...