32
Version 2.0, Revision I
Instrument Setup
4
1
3
2
4
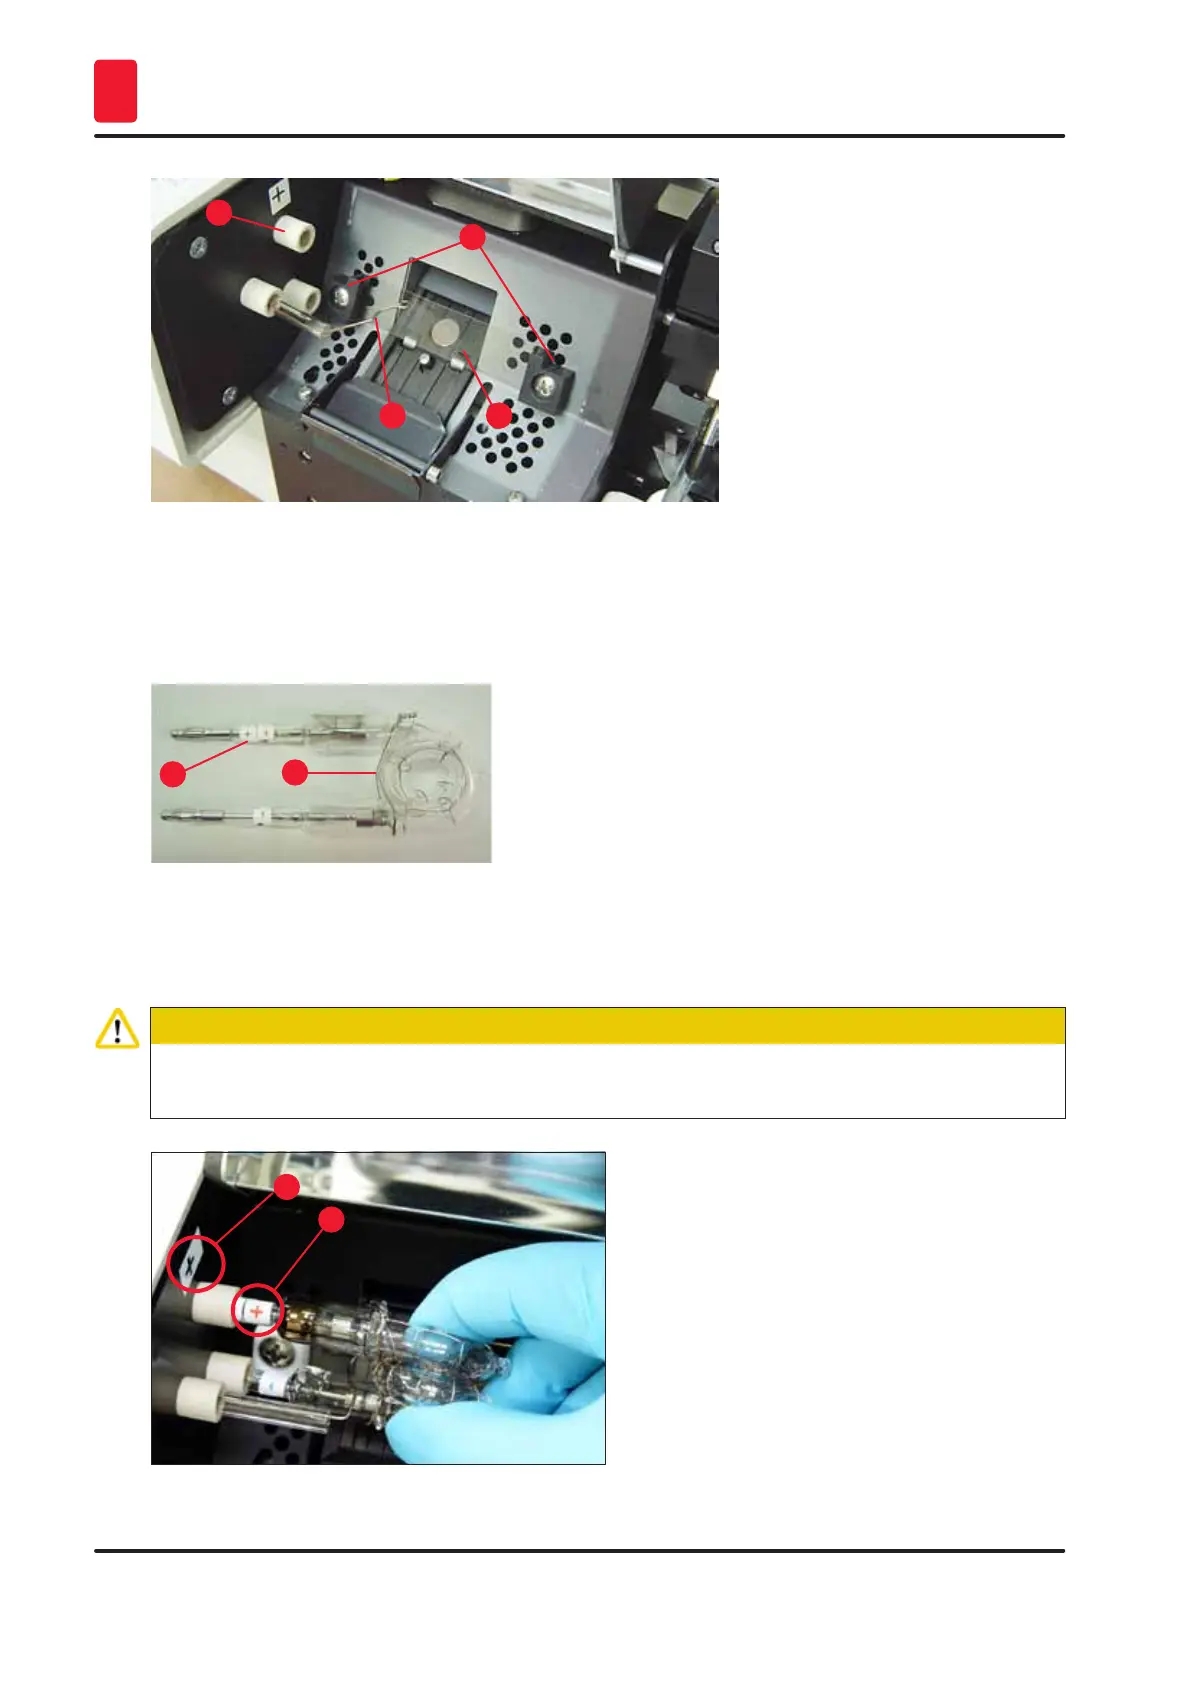
Fig. 18
2. Insert the new flash bulb (→ "Fig. 19") into socket (→ "Fig. 18-3"); then push it carefully
inwards as far as it will go (→ "Fig. 21") (the polarity marker (+) must not be visible any longer).
If necessary, move flash bulb gently up and down.
1
2
Fig. 19
3. Make sure that the bulb is inserted correctly. The electrode marked with + (→ "Fig. 20-1") has
to be inserted into the socket (→ "Fig. 18-3") with the same mark (→ "Fig. 20-2").
Caution
If the bulb electrodes are inserted the wrong way, the flash bulb will still function, but the bulbs life
will be considerably reduced.
1
2
Fig. 20