38
Version 2.0, Revision I
Instrument Setup
4
1
2
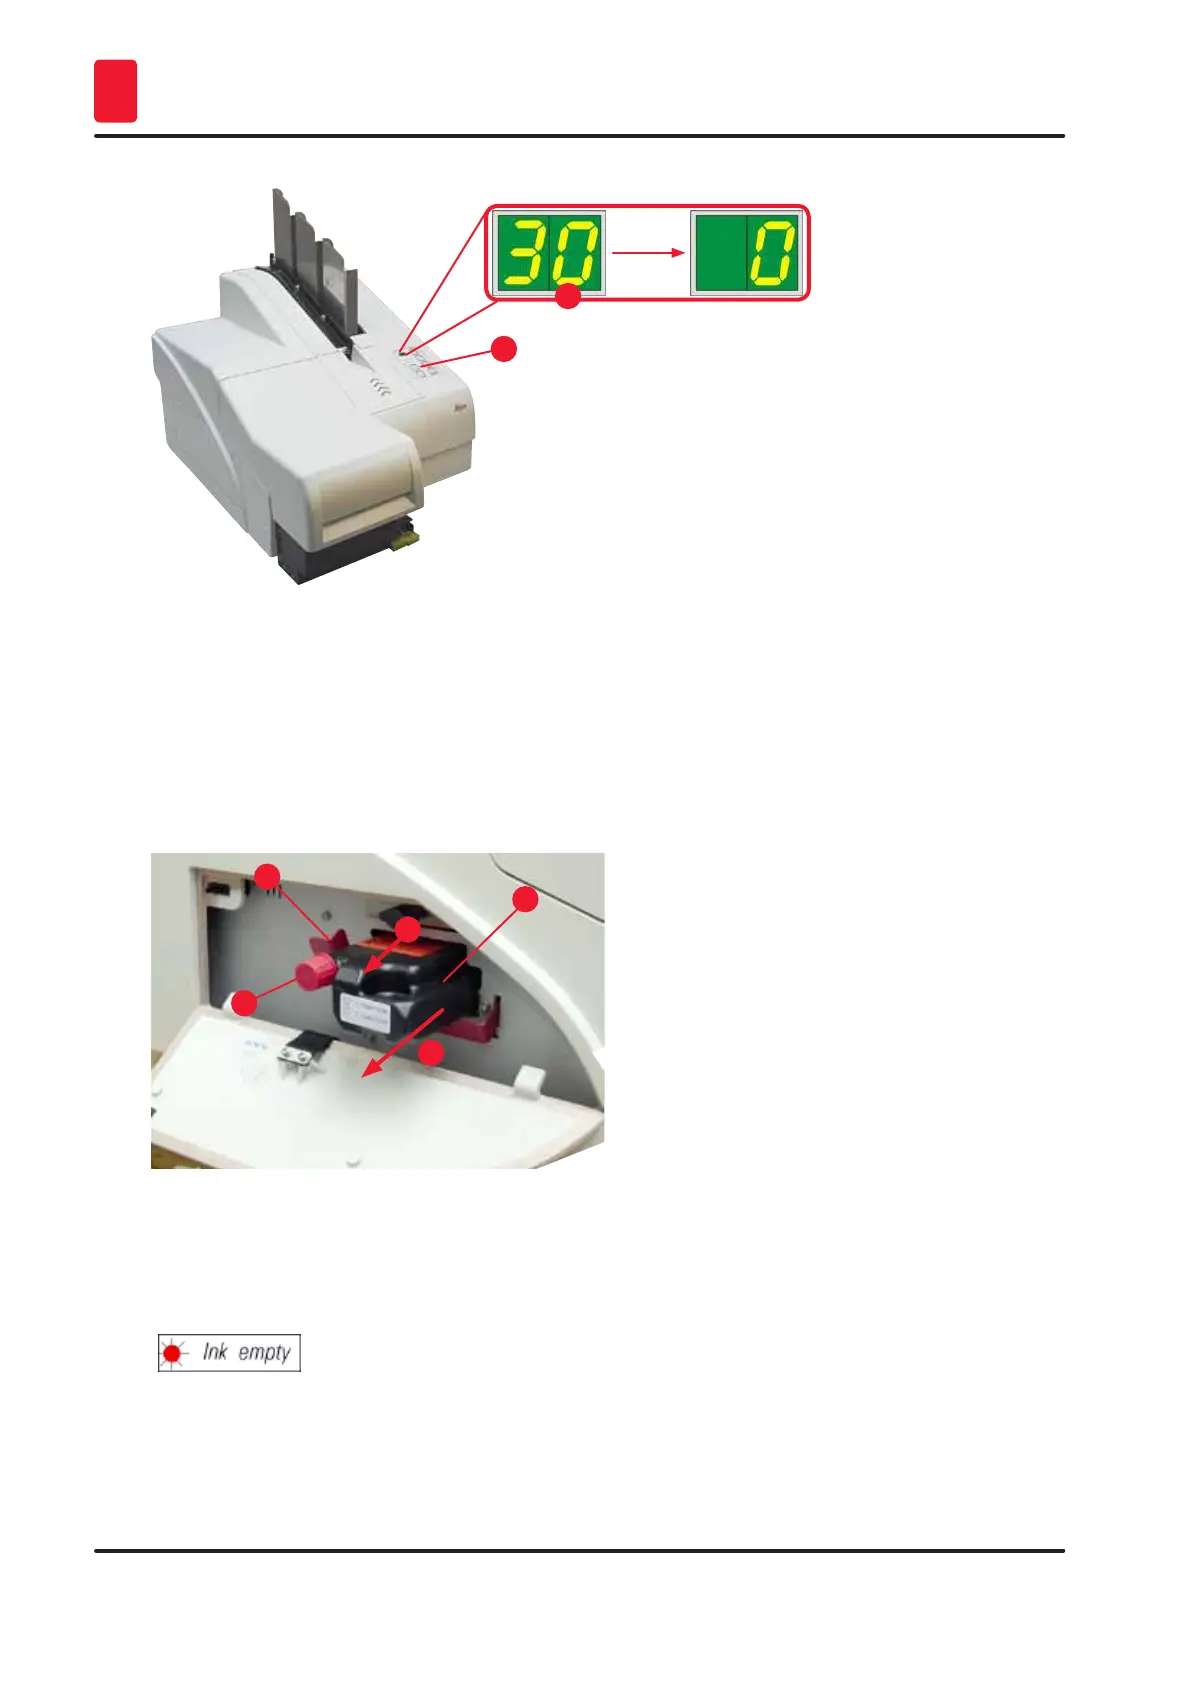
Fig. 33
8. Press the red retaining bracket (→ "Fig. 34-1") down and and hold it in this position, so that the
transport cartridge can be removed.
9. Pull the transport cartridge (→ "Fig. 34-4") approx. 30 mm out of the instrument until the INK
EMPTY LED lights up (→ "Fig. 34-2").
10. Retighten the red cap (→ "Fig. 34-3") and then remove the cartridge completely (→ "Fig. 34-5").
11. Release the red retaining bracket.
1
3
2
4
5
Fig. 34
L The activation of a sensor in the cartridge slot blocks all functions so that no air is sucked into
the ink system.
12. The INK EMPTY indicator LED lights up and remains on.
Store the removed transport cartridge in a sealed container. The cartridge is full and can be
used twice more to clean the print head. The expiration date can be found on the red label.