52
Version 2.0, Revision I
Operation
5
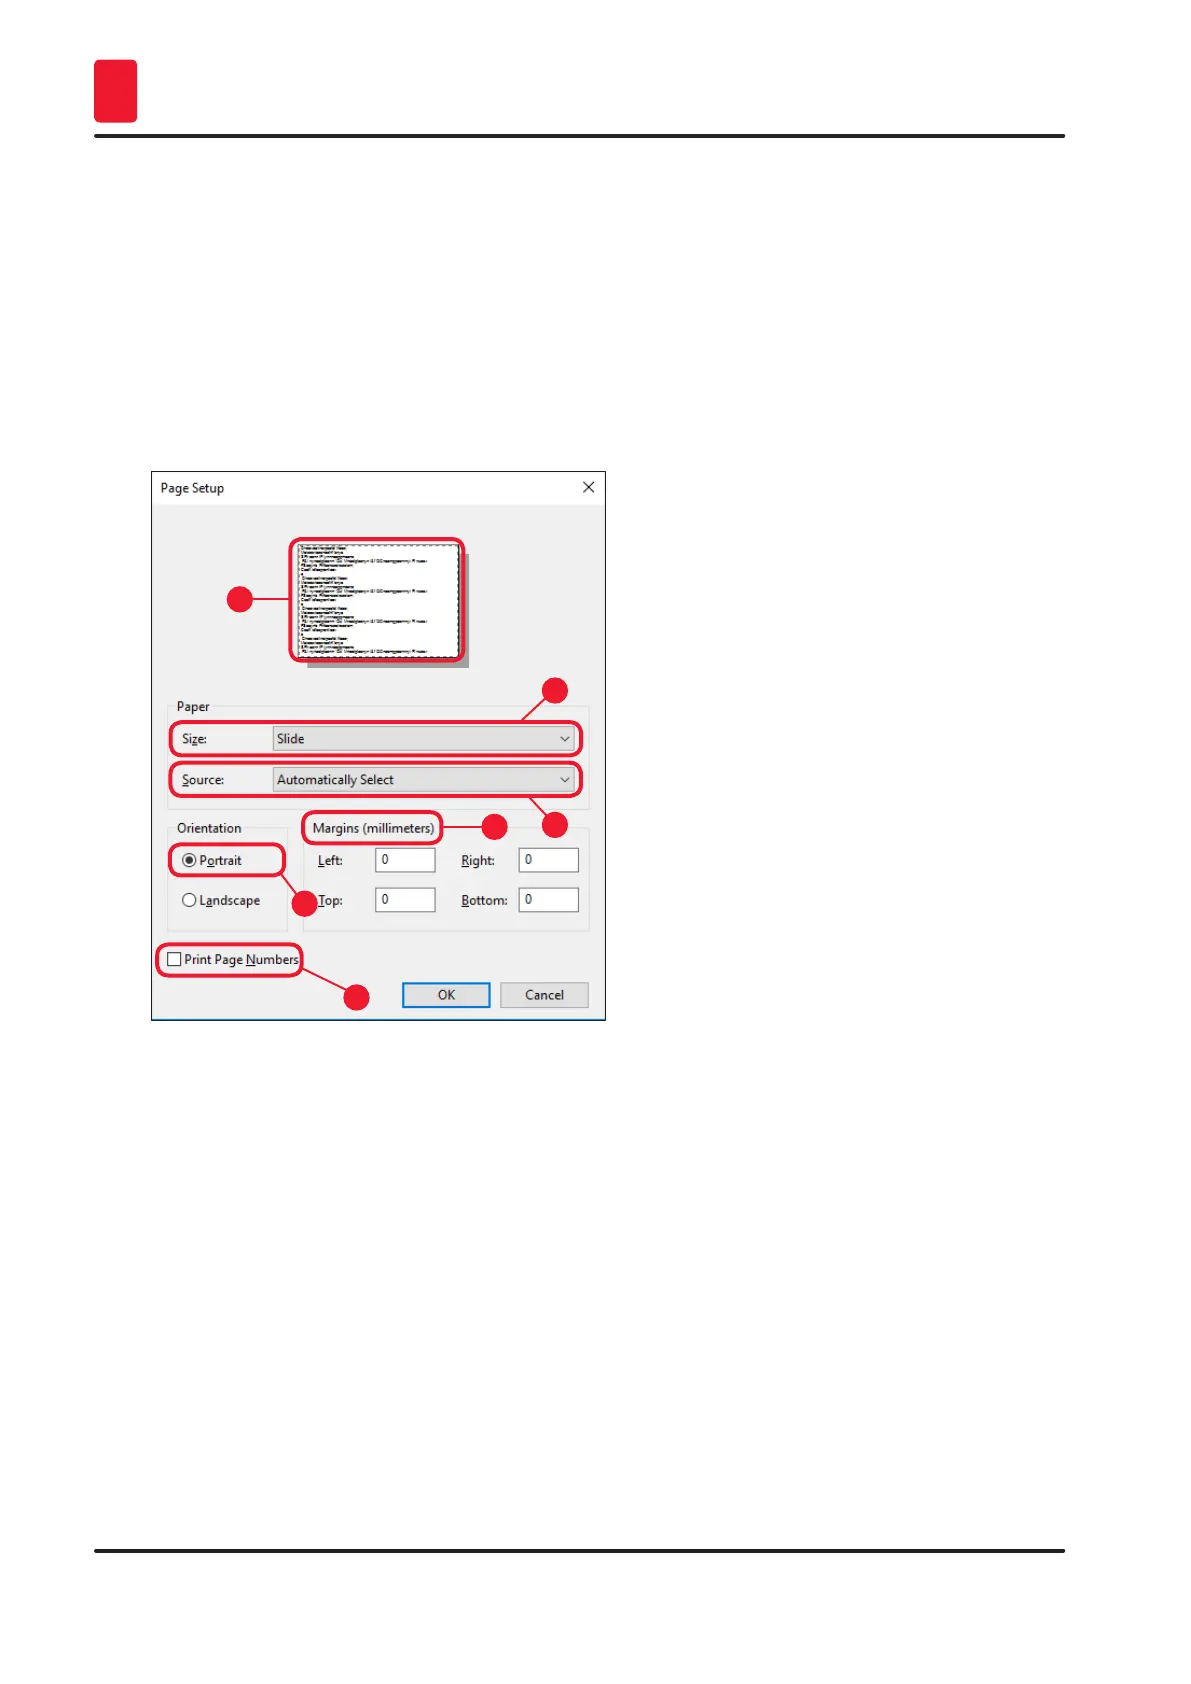
3. First, the page settings must be selected: Click on File > Page Setup to open the Page Setup
dialog box (→ "Fig. 42").
4. In Margins (→ "Fig. 42-1"), set all margins to 0; the print range will change as shown
(→ "Fig. 42-5").
5. In Orientation, select Portrait (→ "Fig. 42-2").
6. Once the printer has been set up as described above, the Slide format will automatically be
shown in the Size (→ "Fig. 42-3") input field in the Paper dialog box.
7. In the Source (→ "Fig. 42-4") input field you can select the magazine(s) which will supply the
slides to be imprinted.
8. Deactivate Print Page Numbers (→ "Fig. 42-6").
Fig. 42
1
2
3
4
5
6
Selectable options in the Paper > Source dialog box
When clicking on the Source input field, an alphabetical list of all slide supply options from all 3
magazines opens up.
• Manual feed (→ "Fig. 43-1") means, that individual slides will be placed onto the chute (→ "Fig. 3-6")
and imprinted. The printer will not start printing until the sensor (→ "Fig. 3-7") reacts (→ p. 49 – 5.2
Display indications).
• Further options are magazines 1 through 3. If a particular magazine has been selected as supply
source, printing will stop once that magazine is empty.
• If a group of magazines is selected (such as F (1|2|3)), printing will continue until the last magazine of
the group selected is empty, i.e. printing will not stop when just one magazine is empty.