21
Leica RM2235
5. Operation
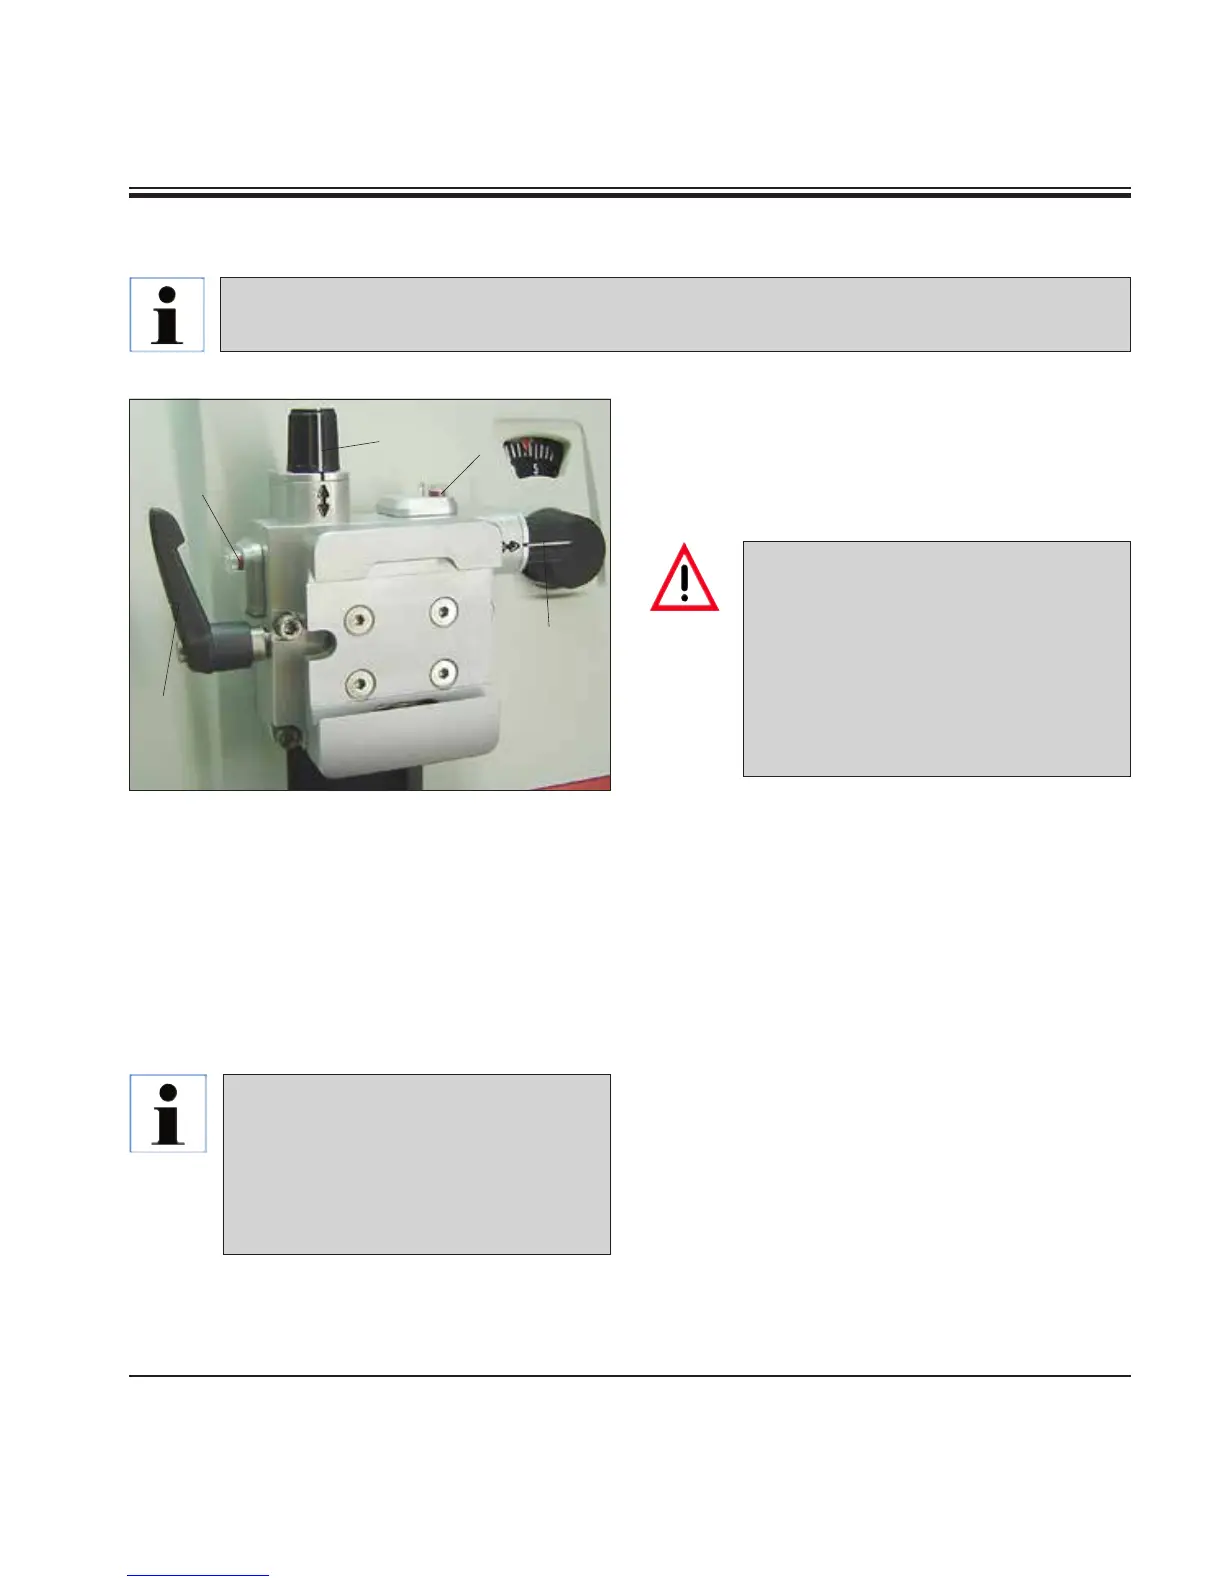
5.1.5 Specimen holder with precision orientation
Orienting the specimen
Fig. 17
Display of the zero position
For better display of the zero position, the orien-
tation has two red indicators (32).
When both indicators are visible and both set-
screws are in zero position at the same time
(notch point, white marking on ""), the specimen
is in zero position.
The specimen orientation allows for simple posi-
tion correction of the specimen surface when the
specimen is clamped into place.
32
30
32
31
29
When the large standard specimen
clamp (50 x 55 mm) is used, the speci-
men orientation of ± 8° in north-south
direction is no longer possible.
The usable angle is only about ± 4° in
this case.
Specimen blocks must NOT be orient-
ed during the retraction phase!
If a block is oriented during retraction,
the block will advance by the retrac-
tion value PLUS the selected section
thickness before the next section.
This may cause damage to both speci-
men and knife!
• Raisethespecimenheadto the upper end
position and activate the handwheel lock.
• Toreleasetheclamp,turntheeccentriclever
(29) forwards.
• Turnsetscrew(30) to orient the specimen in
north-south direction. Turn setscrew (31) to
orient the specimen in east-west direction.
Each complete turn of the screw inclines the
specimenby2°.Atotalof4completeturns=
±8° are possible in every direction. The ac-
curacy is approximately ± 0.5°.
For ease of estimation, there is a white mark on
the handle and a click stop that is noticeable
during turning.
• Tolockthecurrentorientation,turntheec-
centric lever (29) backwards.
In the quick clamping device of the specimen holder fixture with precision orientation, all
specimen clamps available as optional accessories can be used (implemented).


 To Next Page