45
Leica RM2235
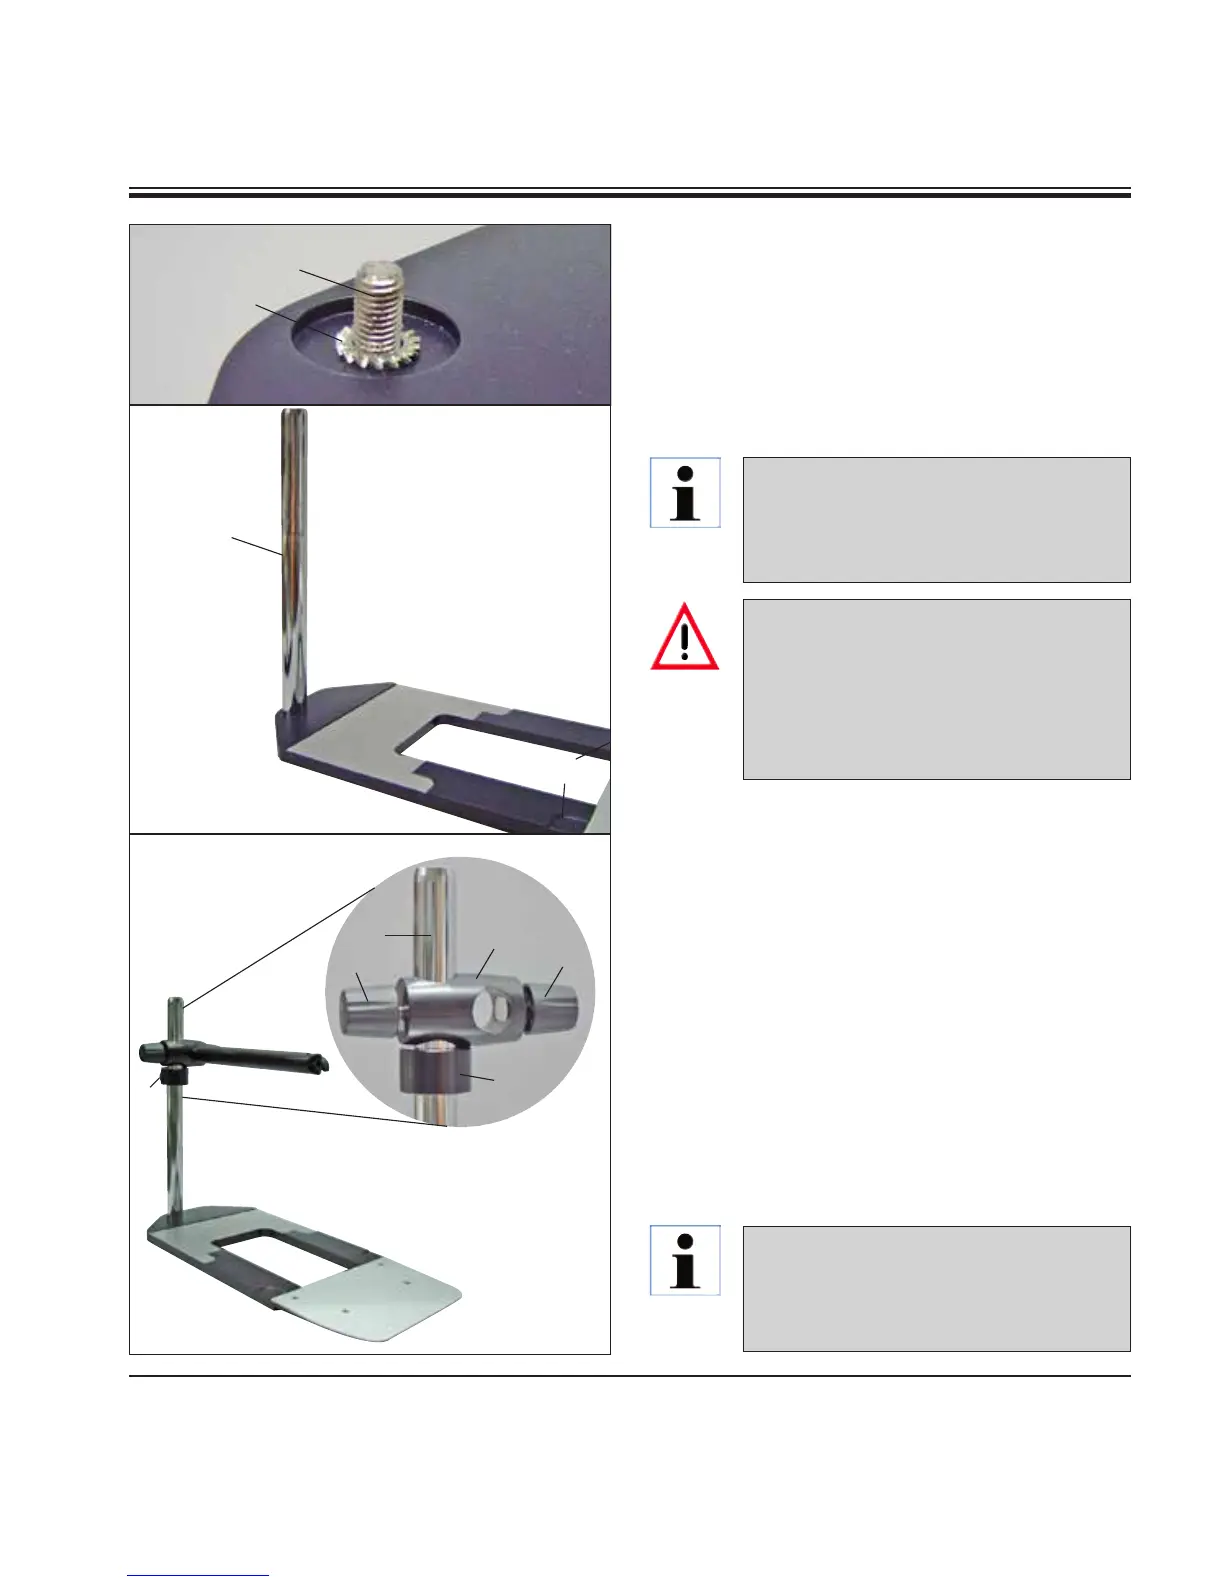
2. Attach vertical column
• Insertthecapscrew(b) into the hole of the
baseplate from below. Place the lock washer
(c) on the cap screw from above.
• Threadthesilververticalcolumn(2) onto the
baseplate from above and tighten with the
Allen key No. 8.
a
3. Attach horizontal arm
• Slidethesupportring(e) onto the vertical
column and position it so that the lock nut (f)
is facing to the back. Tighten the lock nut.
• Slidethecross-member(d) onto the column.
Ensure that the lock screw (g) is facing to the
right of the baseplate. The horizontal arm must
be centered over the microscope.
• Slidethehorizontalarm(3), flat side facing the
lock screw (g), into the cross-member (d) and
tighten.
6. Optional Accessories
Fig. 49
Fig. 48
Fig. 47
b
c
2
e
d
2
g
f
h
For more information on connecting
and using the microscope, magnifying
lens or cold-light source, please see
the appropriate Instructions for Use.
Extreme danger of tipping! After in-
stalling the vertical column, imme-
diately place the microtome onto the
baseplate so that the front feet of the
microtome are positioned in the shal-
low recesses (A).
The lock washer must be positioned
between the baseplate and vertical
column to prevent unintentional turn-
ing of the column.


 To Next Page