Unity Motorhome
47
Vehicle Operation
1
2
3
4
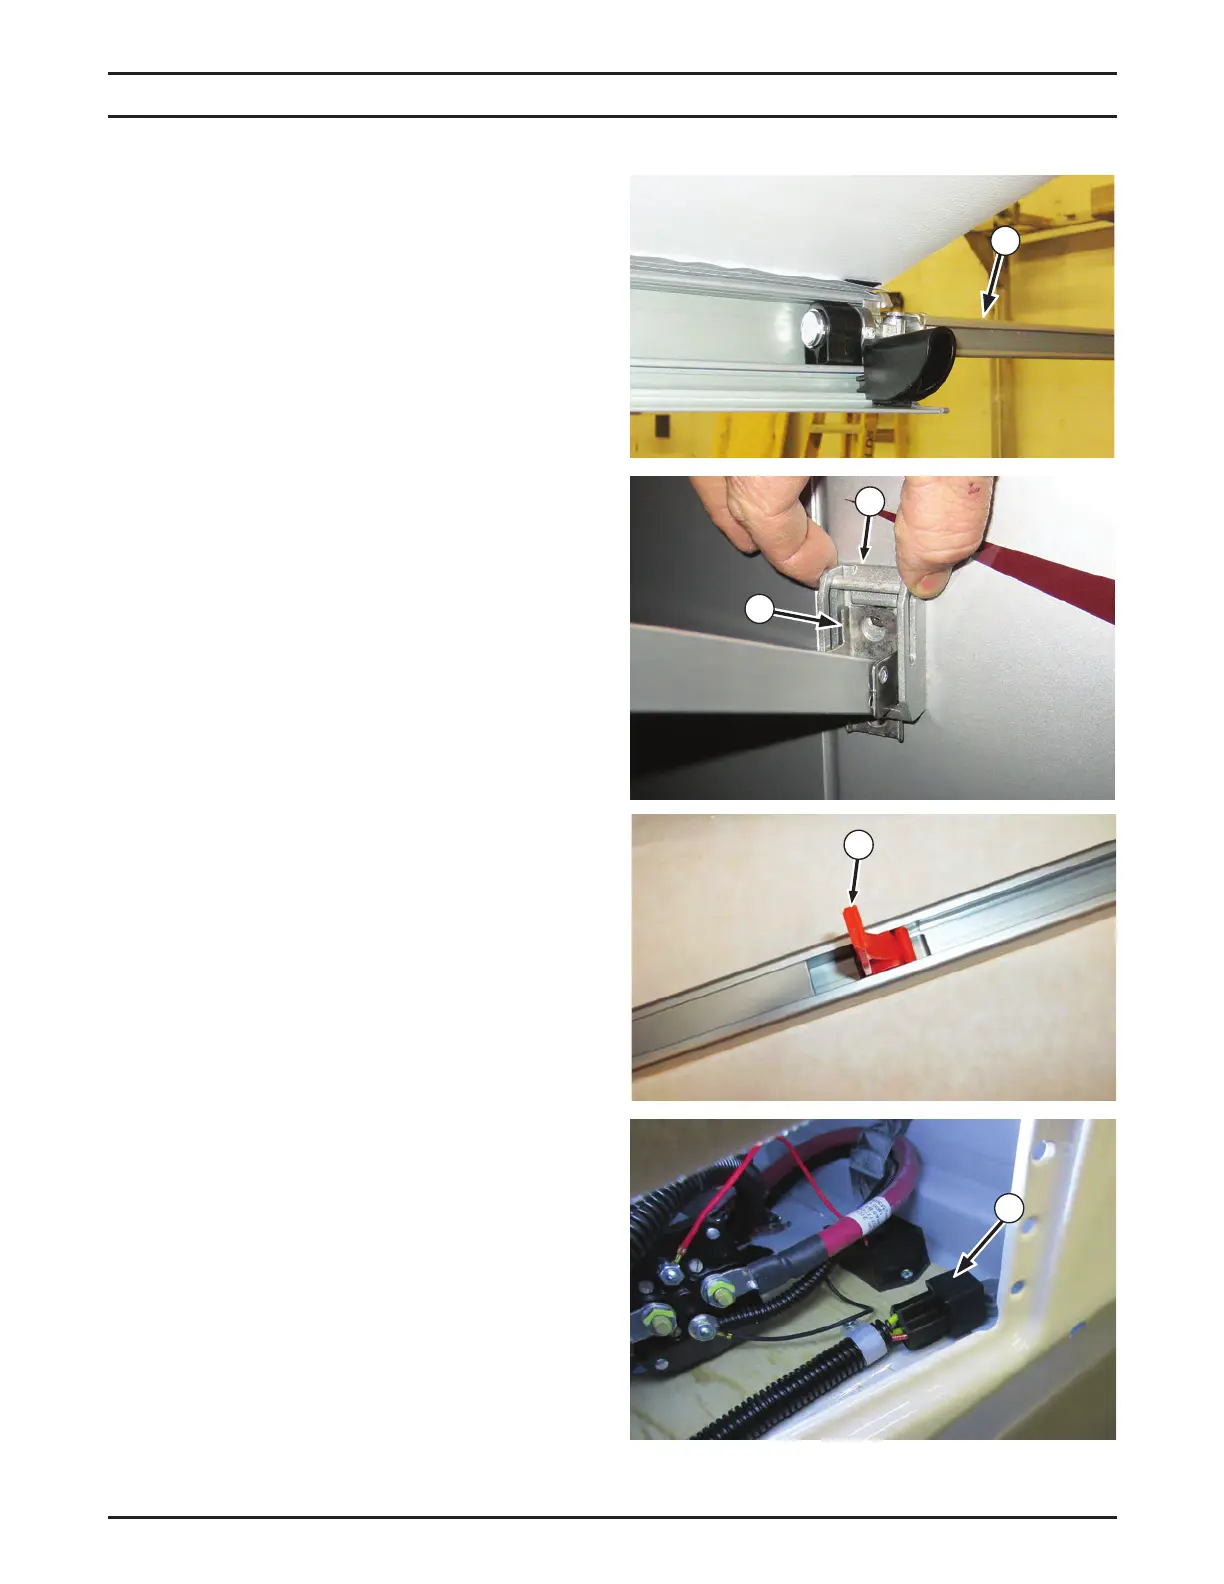
4. Rotate the support leg (1) 90 degrees and
swivel the support leg down.
5. Lift the retaining pin (2) on the coach awning
support bracket, and insert the support foot
plate (3). Allow the retaining pin to drop
down and lock the foot plate in place.
6. Repeat steps 3, 4, 5, and 6 to install the left
support leg.
7. Ensure that the latches (4) in the left and
right support legs are unlocked (raised).
8. Fully extend the awning by depressing
and holding the awning switch in the “OUT’
(extend) position.
9. Lift the lead rail of the awning to the desired
height and lock the left and right latches (4).
NOTE: Adjust the side of the awning
furthest away from the coach door
to a slightly lower position to enable
rainwater to run off.
10. Turn on the awning light if desired (6 on
previous page).
Retracting the Awning
1. Release and stow the legs by following the
steps in the Extending the Awning section in
reverse order.
2. Depress and hold the awning switch, located
on passenger side, in the “IN” (retract)
position until the awning fully retracts.
NOTE: Store the foot inside the lead rail.
NOTE: The power awning is equipped
with a safety feature preventing the
awning from extending while the
motorhome ignition is on (driving).
This relay (5) is located under the front
passenger seat.
5