27
Installation of Rotary Latch
Insert Rotary Latch into Rotary Latch Lock Box. Apply Blue Loctite to (4) ¼ - 20 X 1” BH bolts, secure the Rotary
Latch.
Re-insert rotary latch cover. Secure cover using (4) ¼ - 20 X ¾” BH bolts and ¼” split lock Washers.
Note: Check bolts every 5000 miles or if door lock function is impaired.
Removal of Exterior Door Handle
Remove Rotary Latch Cover, Rotary Latch and Access Panel next the Rotary Latch to access the exterior handle
hardware.
Remove the (4) M6 – 1” x 3 MM BH bolts and washers. Remove the exterior handle.
Installation of Black Handle
Insert (4) M6 – 1” x 3MM BH bolts with ¼” at and lock washers through the bolt holes in the door, secure into
handle.
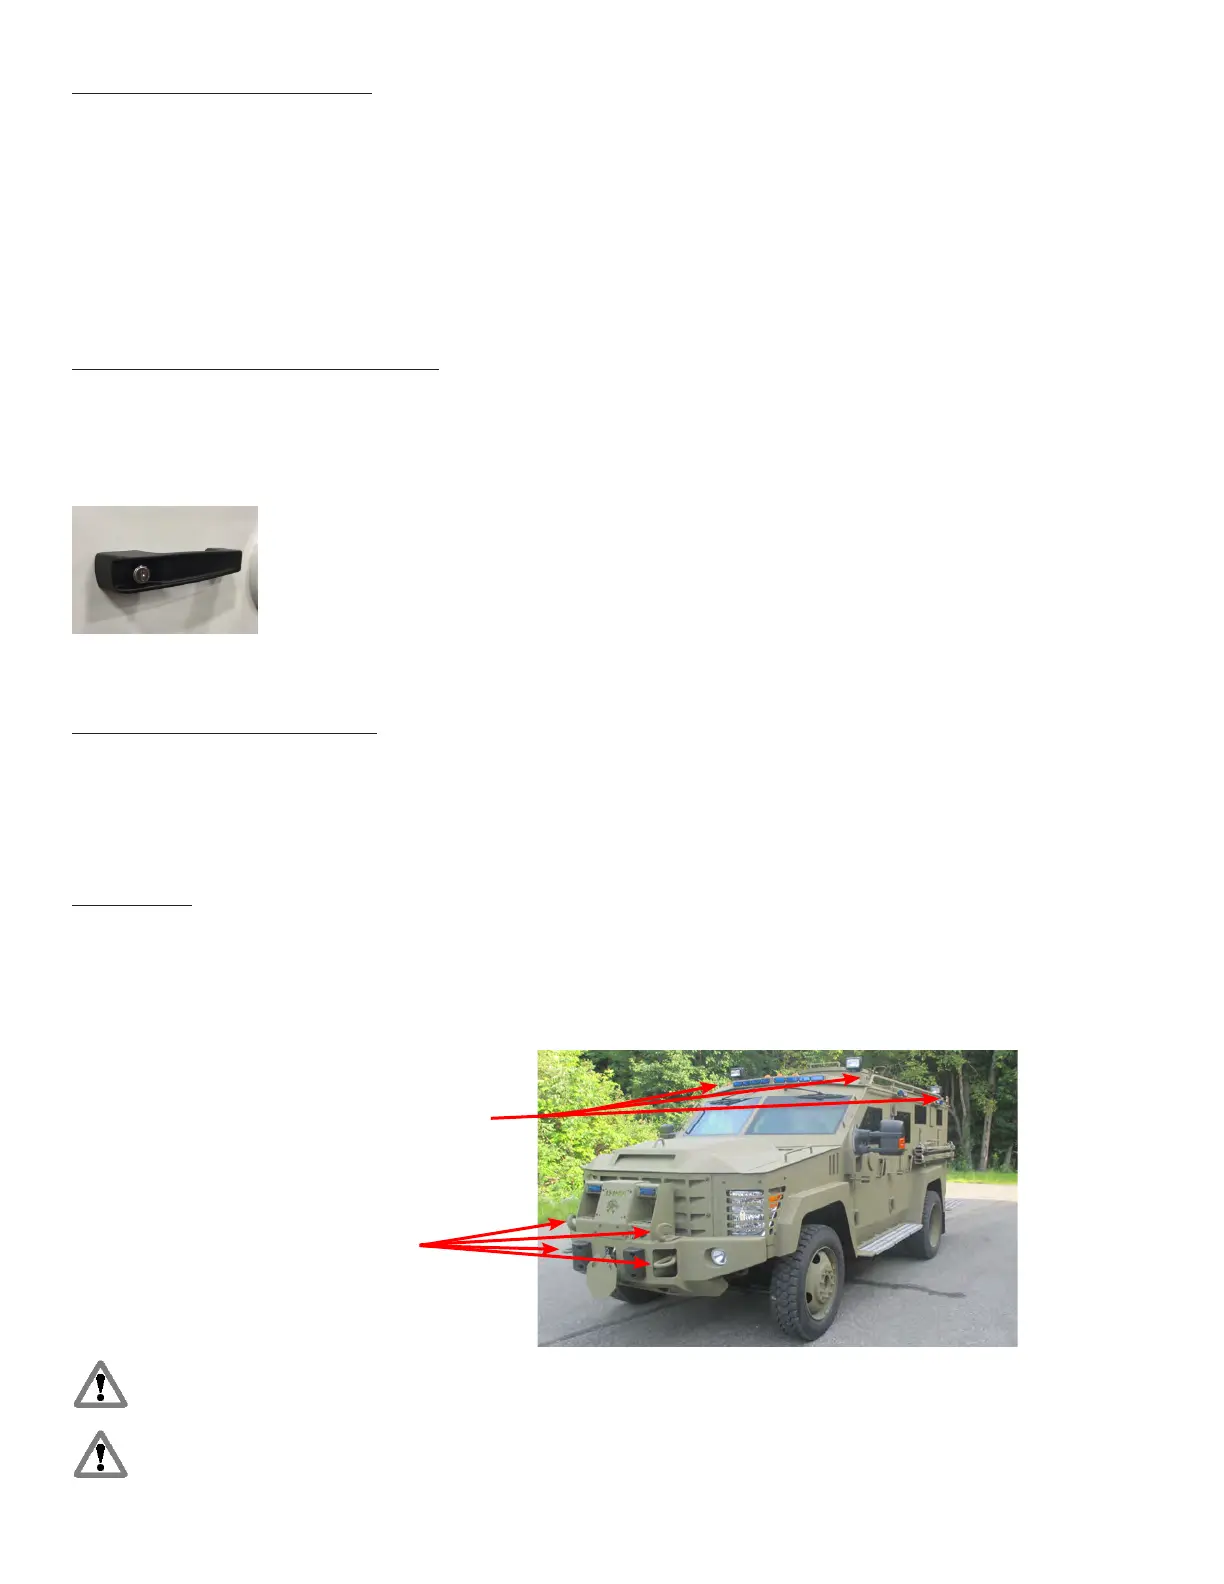
Pull Points
ere are pull points at various locations on the vehicle. Forward locations include four on the front bumper and
two on the forward corners of the roof. Rear Locations are at the le and right of the rear wall above the running
board and two on the rear corners of the roof. e roof mounted points can be utilized when an object needs to
be pulled from over a fence or other high obstruction. e lower points can be used for pulling when height is not
a factor.
Warning: To avoid damage to Ballistic Glass always be aware of the path that debris will follow once it is
dislodged. Always attach from a single anchor point to the object being pulled.
Warning: Pull Points are not for use as transportation tie down points.
Roof Mounted Pull Points
Front Pull Points