Screw specifications Number of screws
M2 x L3.5 3
Go to
https://support.lenovo.com/partslookup to look up the Lenovo part number of the following replacement
part:
Battery pack
Remove the solid-state drive (SSD)
Make sure the following FRU (or CRU) has been removed.
“Remove the lower case” on page 30
Step 1. Disconnect the battery pack cable from the system board.
Attention: Use your fingernails to pull the connector to unplug it. Do not pull the cable.
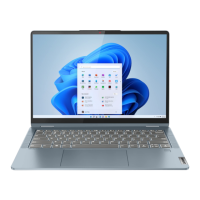
Step 2. Remove one screw. Remove the SSD and SSD bracket by pulling it away from the slot.
Figure 6. Remove the SSD and SSD bracket
Screw specifications Number of screws
M3.5 x L0.4 1
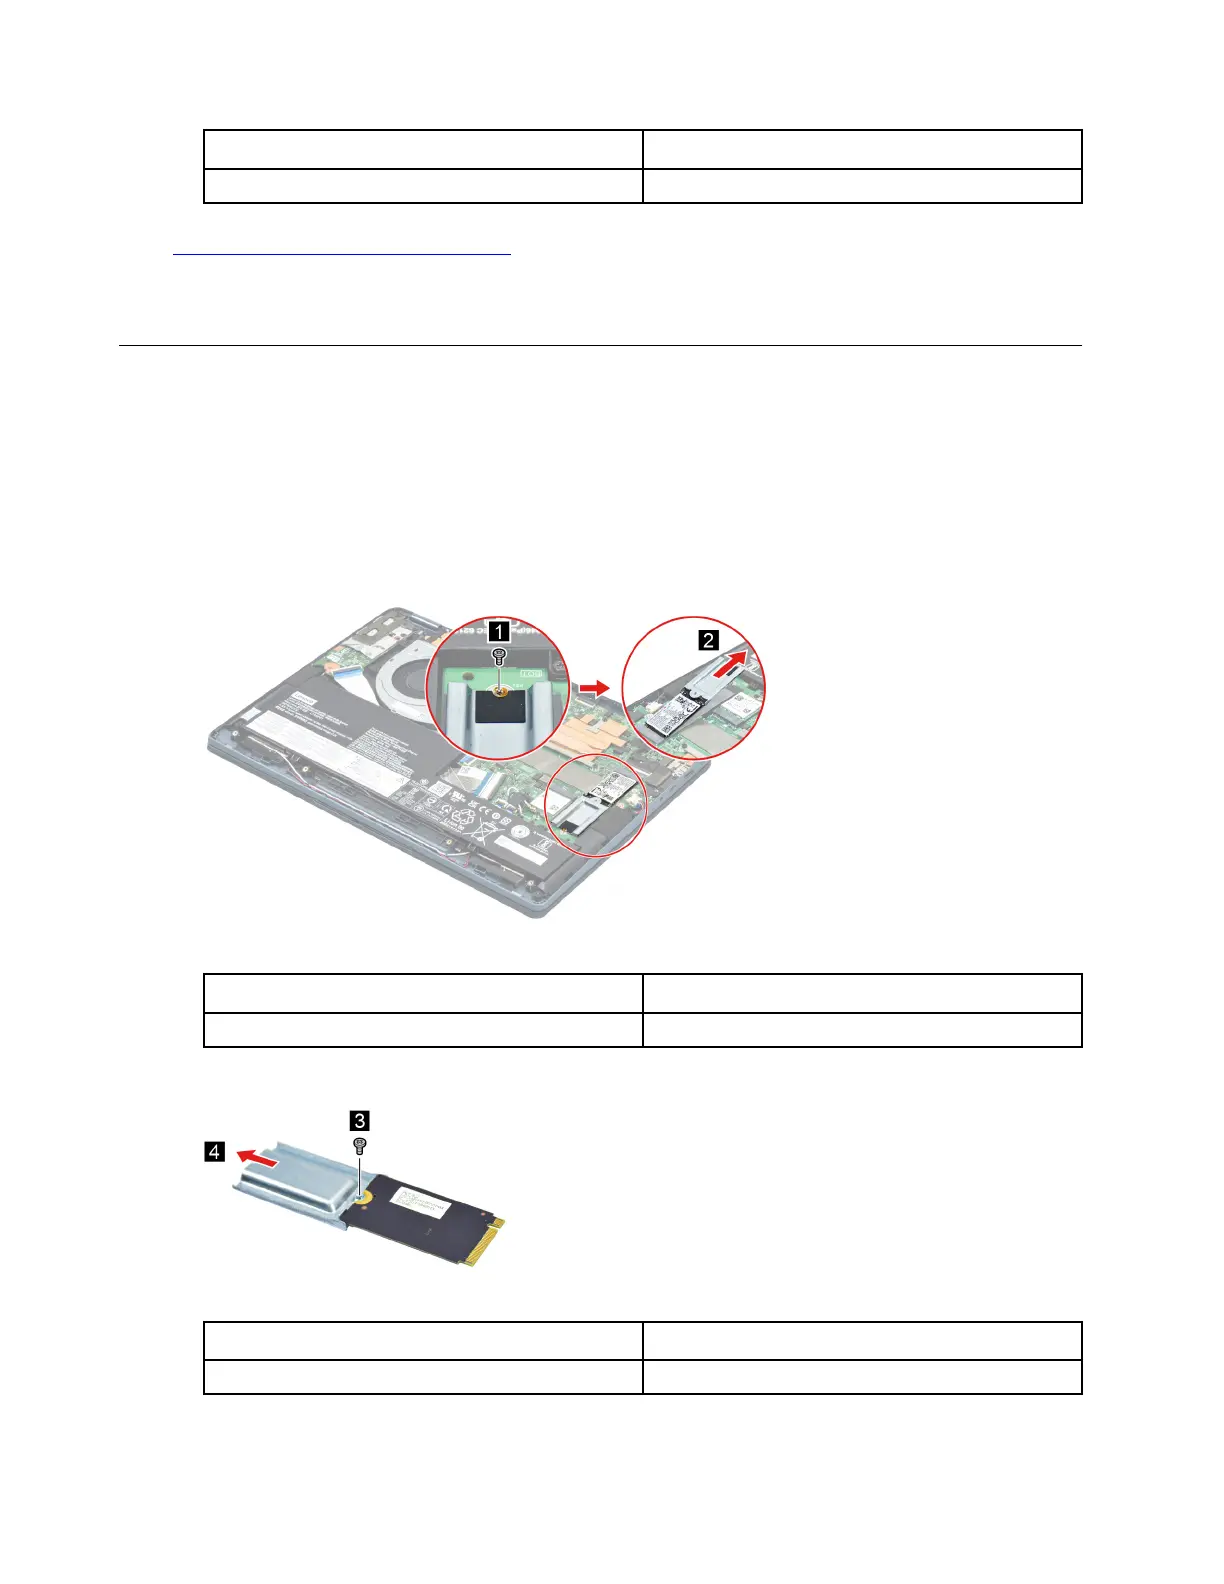
Step 3. Remove one screw then remove the SSD bracket.
Figure 7. Remove the SSD bracket
Screw specifications
Number of screws
1
Step 4. Remove the SSD thermal pad.
32
Hardware Maintenance Manual
 Loading...