Heat sink and fan assembly
Prerequisite
Before you start, read Appendix A “Important safety information” on page 79 and print the following
instructions.
The heat sink might be very hot. Before you open the computer cover, turn off the computer and wait several
minutes until the computer is cool.
Replacement procedure
1. Remove the computer cover. See “Computer cover” on page 42.
2. Remove the front bezel. See “Front bezel” on page 43.
3. Pivot the drive bay assembly upward. See “Drive bay assembly” on page 49.
4. Disconnect the heat sink and fan assembly cable from the system board.
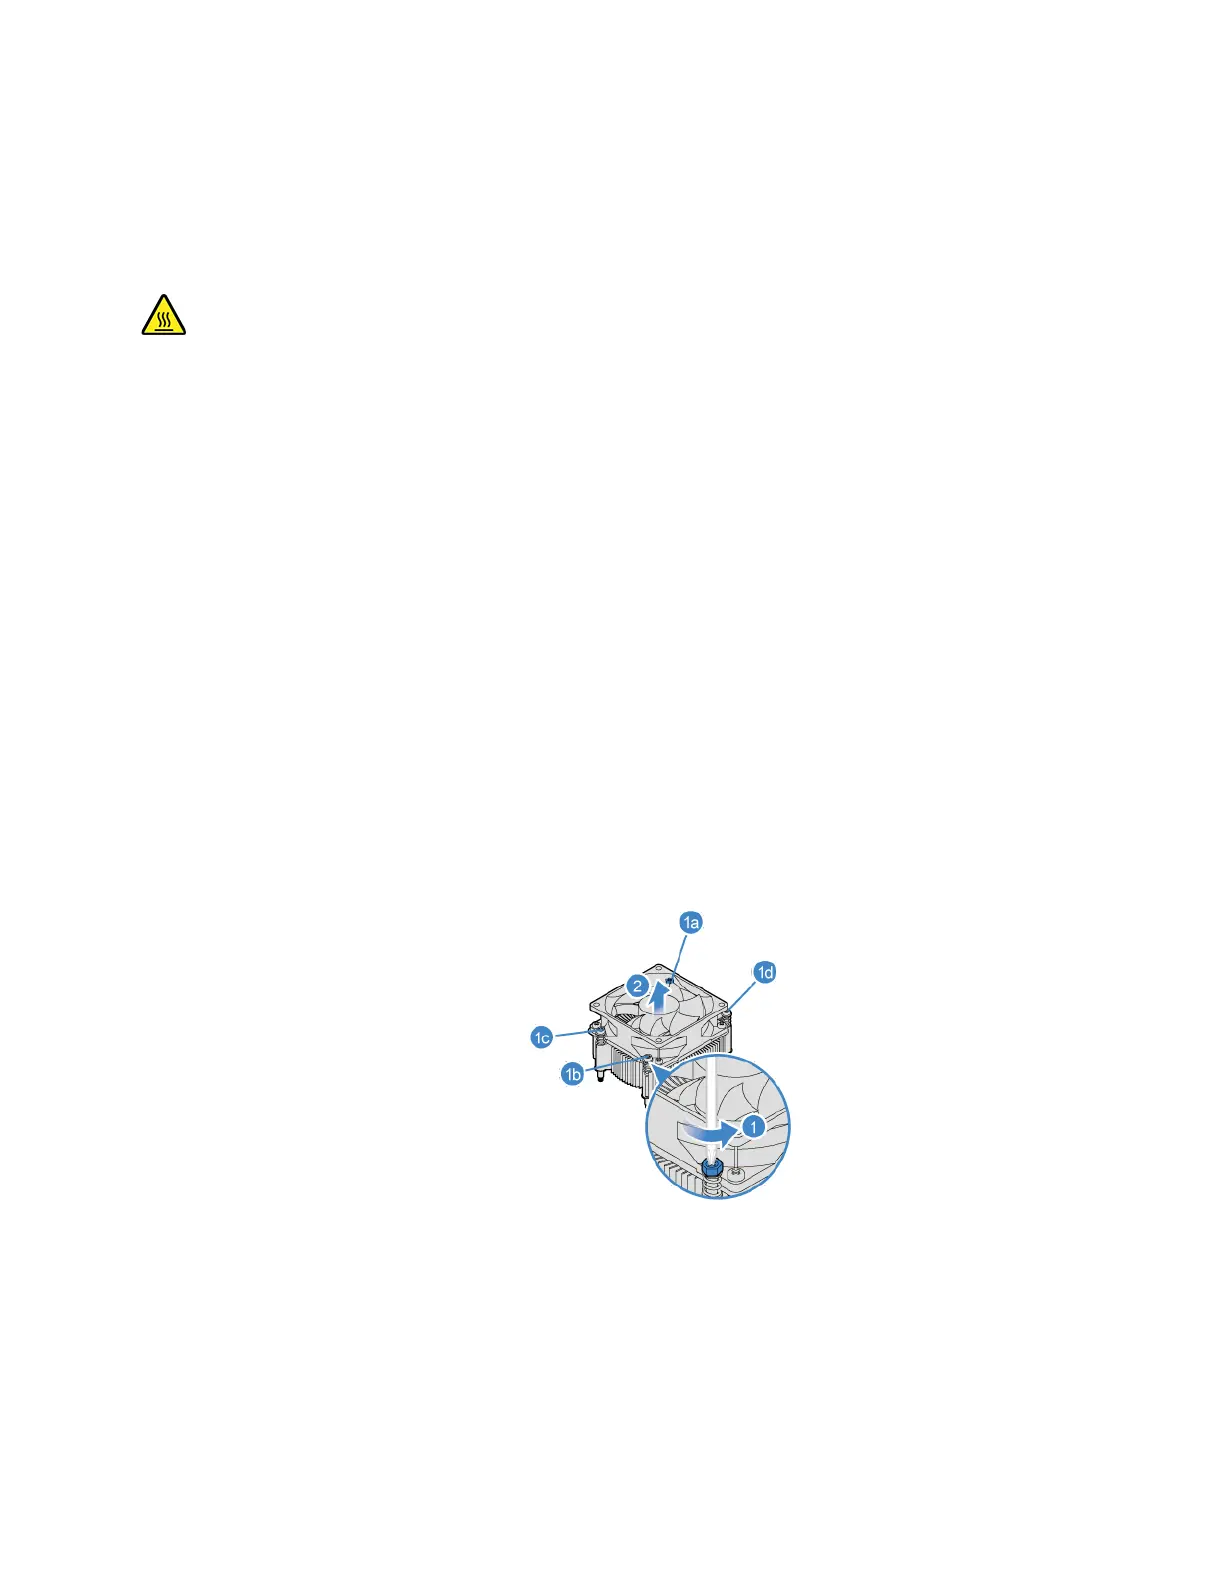
5. Remove the heat sink and fan assembly.
Notes:
• Carefully remove the screws from the system board to avoid any possible damage to the system
board. The screws cannot be removed from the heat sink.
• You might have to gently twist the heat sink to free it from the microprocessor.
• Do not touch the thermal grease while handling the heat sink.
6. Install the heat sink and fan assembly.
Chapter 7. CRU replacement 57