57
18
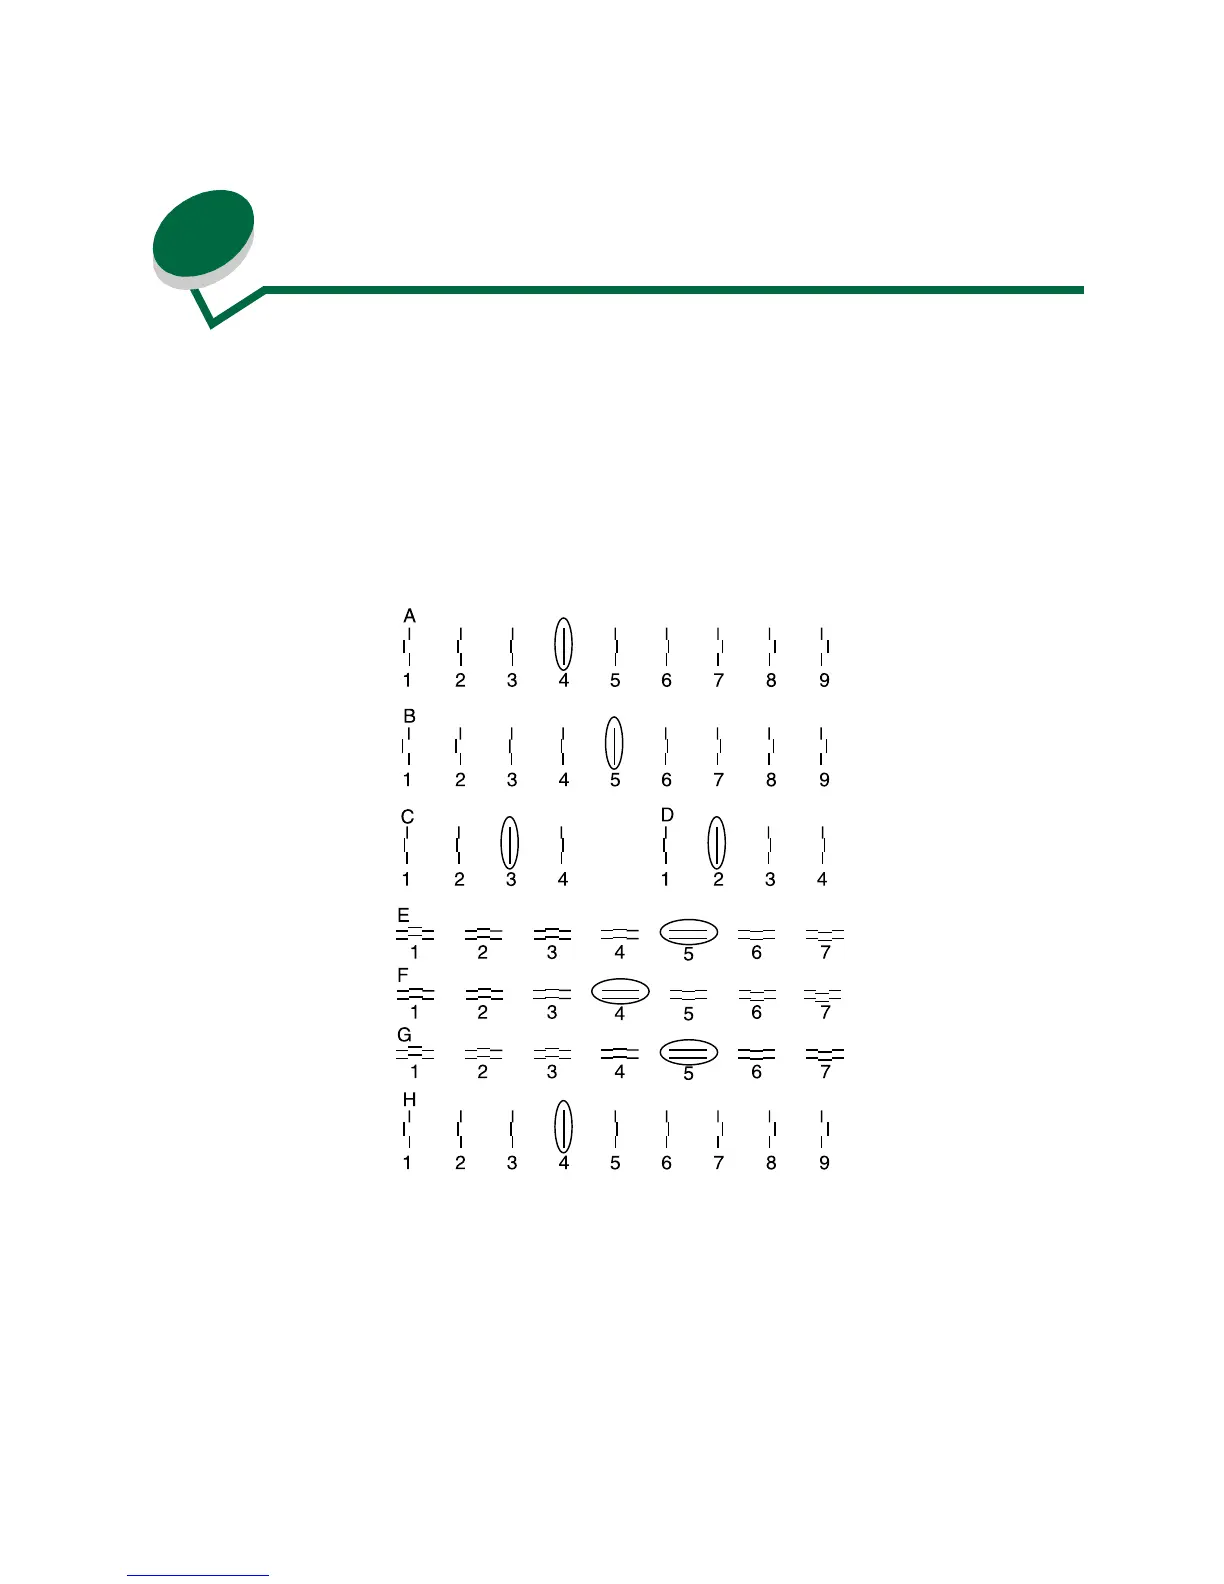
Aligning the printheads
Whenever you install a printhead, the printer automatically prints a test page of alignment patterns.
There are eight patterns: A, B, C, D, E, F, G, and H.
Once the alignment page prints, the operator panel displays the current alignment value for each
pattern.
1 From the Test A alignment group on the test page, select the number under the alignment
pattern that comes closest to forming a straight line.
2 Press Menu> to scroll to the correct alignment value.
3 Press Select.
4 Repeat these steps for alignment groups B, C, D, E, F, G, and H.
Once you select the value for alignment group G, the printer returns to
Ready.