5-5
Copyright © LG Electronics Inc. All rights reserved.
Only training and service purposes
CONVERSION TO LP GAS
If the flame is lifting
off of the burner
ports, gradually
reduce the air shutter
opening until flames
have stabilized.
Some yellow tipping
may be normal when
used on LP.
Approx. 1”
INNER CONE
OF FLAME
OVEN
BURNER
9. LEAK TESTING AND CHECK GAS PRESSURE
1) Check all gas connection joints and fittings for
leaks with a non-corrosive leak detection fluid,
then wipe off.
2) Check and properly adjust the gas pressure.
CAUTION
The range is designed to operate at
a pressure of 5” of water column on
natural gas or 10” of water column
on LP. For proper operation, the
pressure of natural gas supplied to
the regulator must be between 6”
and 10.5” of water column. For LP
gas, the pressure supplied to the
regulator must be between 11” and
13” of water column.
10. CHECK FLAME QUALITY
The combustion quality of the burner flames
needs to be determined visually.
A. Yellow Flames:
Further Adjustment Required
B. Yellow tips on outer cones:
Normal for LP Gas
C. Soft Blue flames:
Normal for Natural Gas.
NOTE: If burner flames look like A, further air
shutter adjustment is required. B or C is normal
for burner flames, depending on the type of gas
you use. With LP gas, some yellow tipping on the
outer cones is normal.
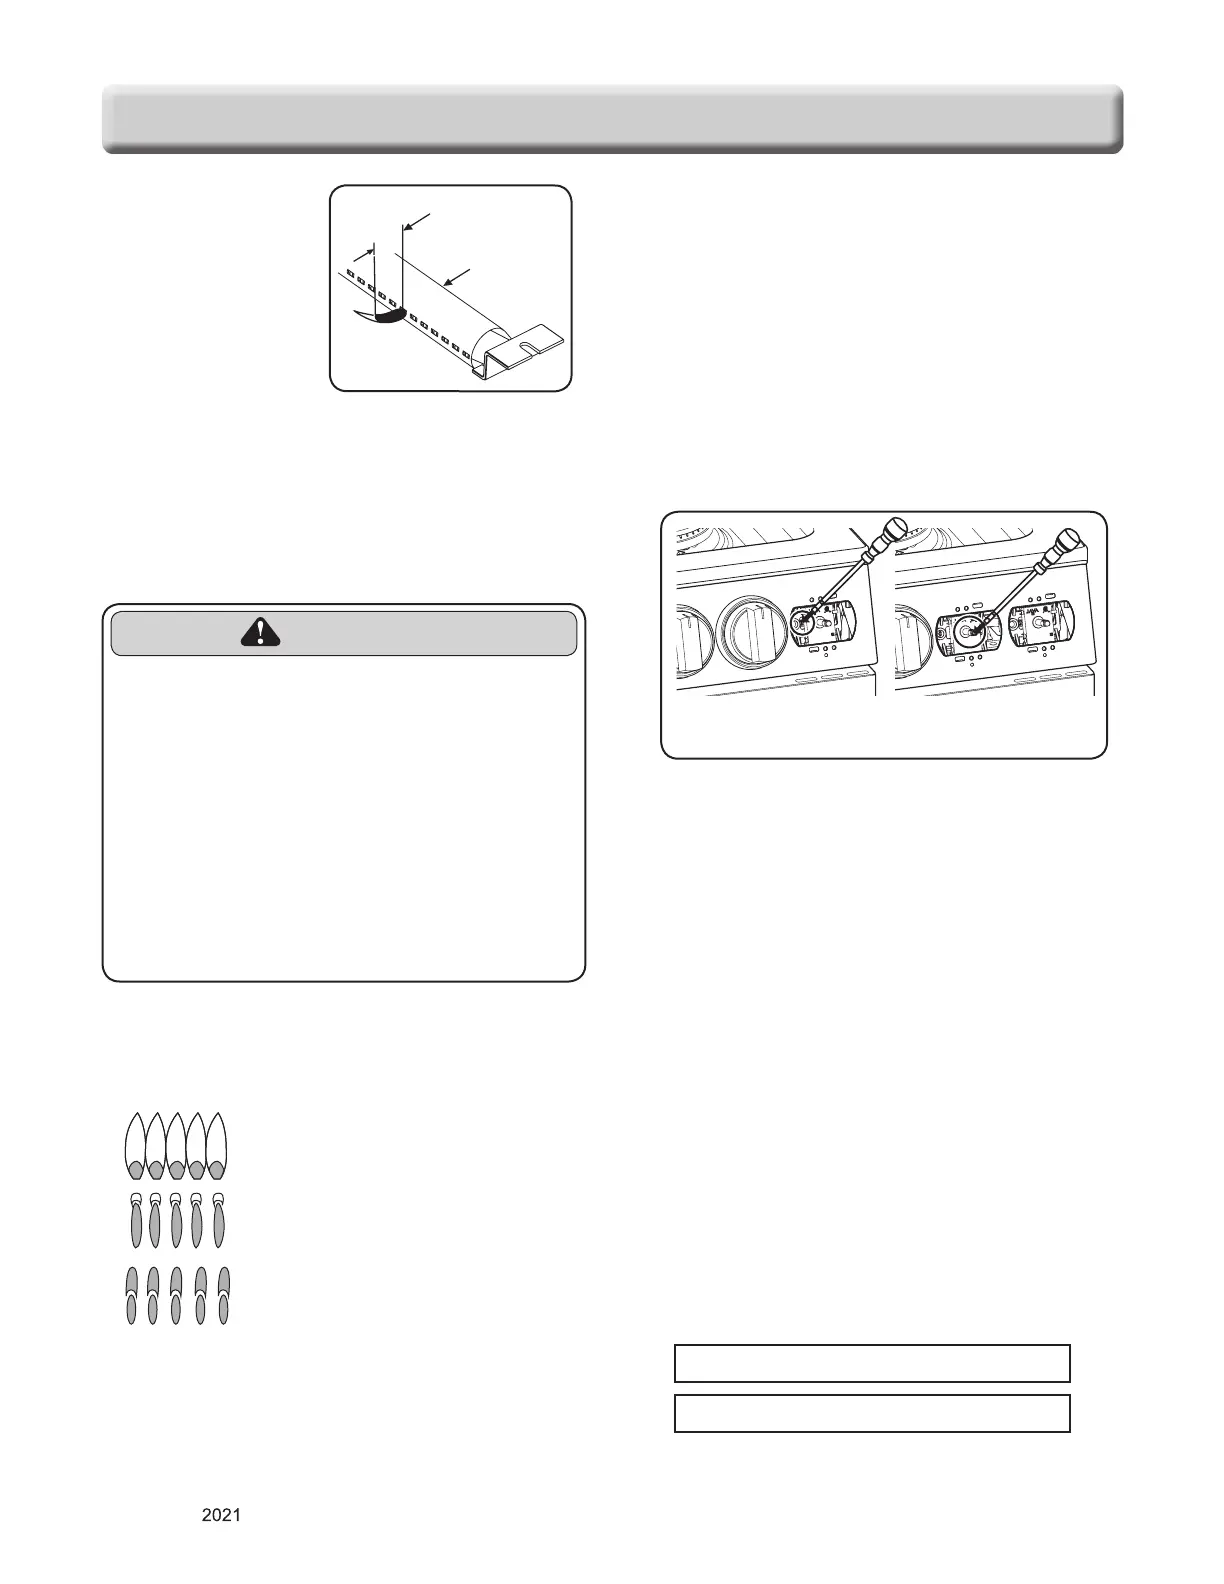
11. ADJUST SURFACE BURNER LOW FLAME
(SIMMER) SETTING
1) Light all surface burners.
2)
Turn the knob on the burner being adjusted to LO.
3) Remove knob and knob ring.
4) Insert a small, flat bladed screwdriver into the
valve shaft as shown in Fig.1.
Turn the adjustment screw until the flame
reaches the desired size.
5) Replace the knob.
Note: Hold the valve shaft with one hand while
turning the screw for adjustment with the other.
Dual burner simmer burner simmer excluding
Dual burner
Fig.1
6) Test The Flame Stability.
Test 1:
Turn the knob from HI to LO quickly. If
the flame goes out, increase the flame size and
test again.
Test 2:
With the burner on a LO setting, open
and close the oven door quickly. If the flame is
extinguished by the air currents created by the
door movement, increase the flame height and
test again.
7) Repeat steps 1-5 for each surface burner.
12. CONVERSION STICKER
Upon completion of the conversion, fill out the
LP sticker located with the instructions. Once
complete, attach the sticker to the back of the
range near the regulator.
Place all orifices that were removed for natural gas
back into the plastic bag along with the instructions.
Place the kit back into its original location.
If converting back to natural gas from LP remove
the LP sticker from the back of the range.
CONVERSION IS FINISHED
To convert to the original gas.
Follow conversion process with original orifices to
convert the appliance to the original gas.