14
2 - INSTALLATION AND START-UP
2.1 YARN FEEDER INSTALLATION AND START-UP
N.B.: Yarn feeders that are moved from warehouse storage into a
warmer knitting mill environment may develop condensation; please
wait until they are completely dry before connecting them up.
Failure to do so may damage the electronic components.
For installation of the yarn feeder onto the machine, proceed as follows:
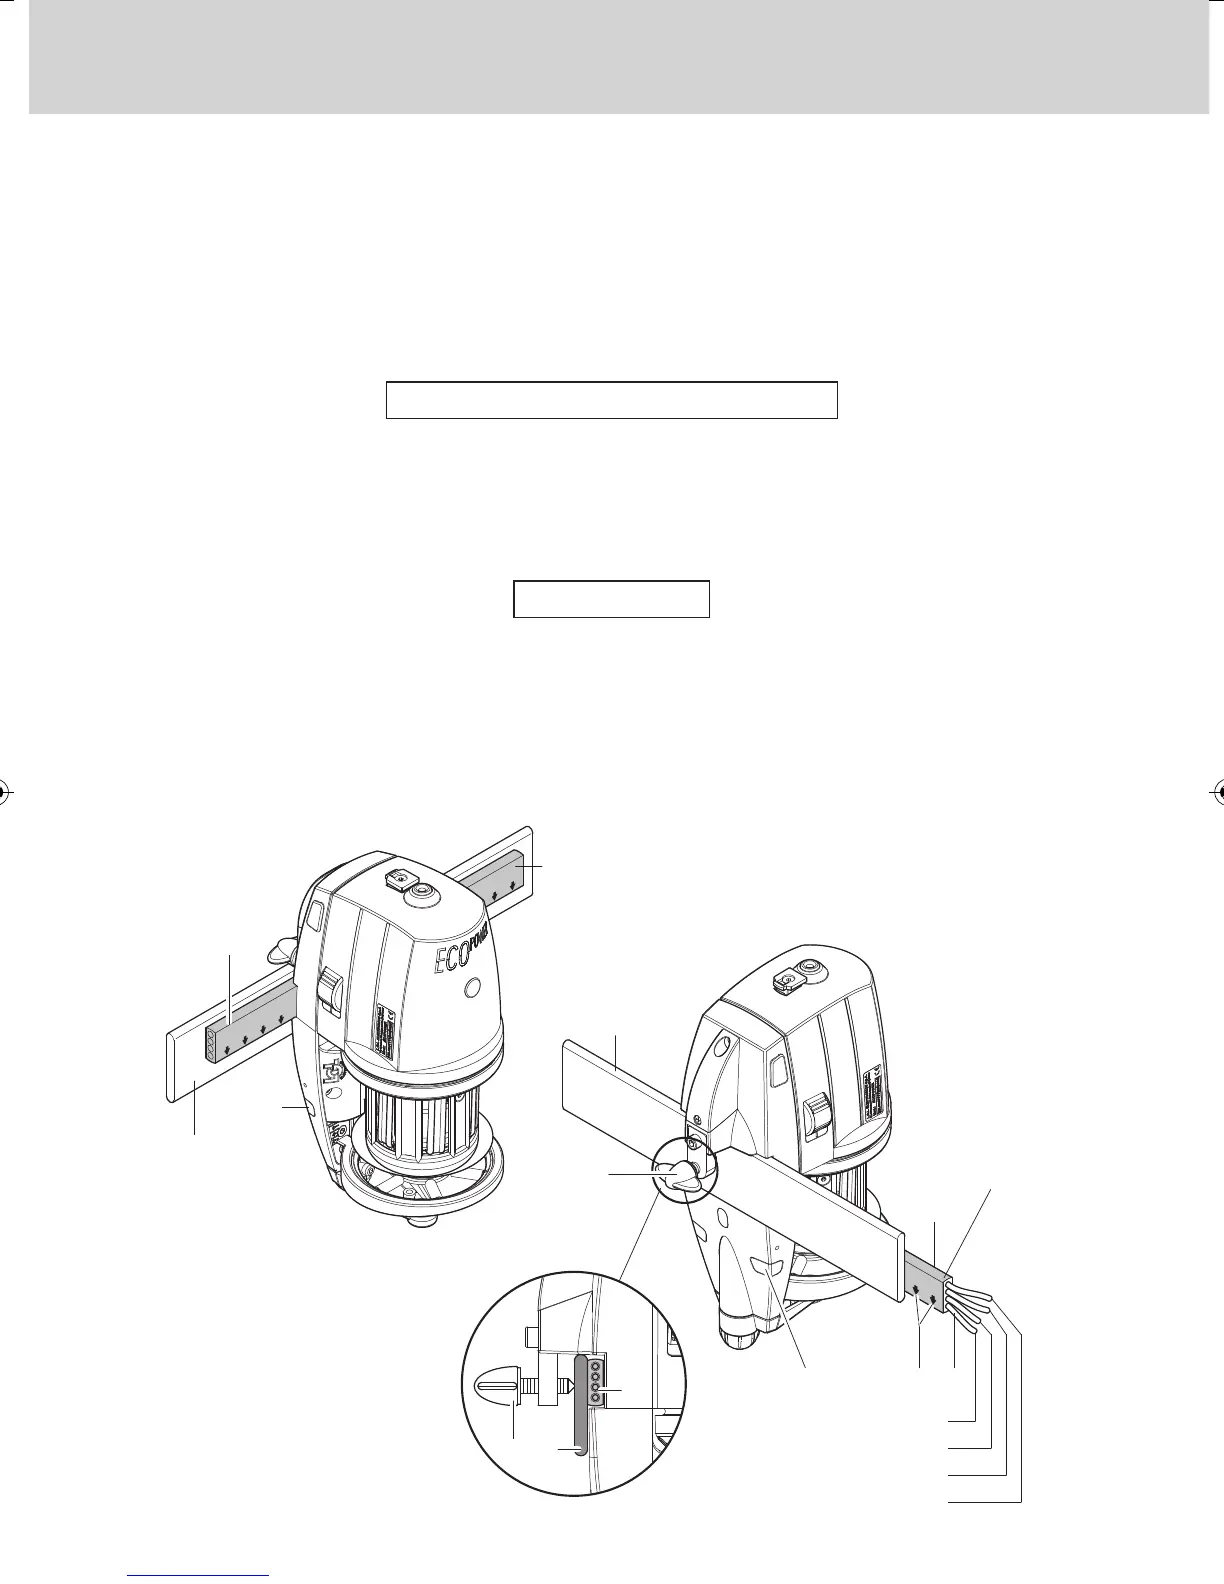
VERTICAL SET-UP VERSION
Fix the feeder onto the appropriate support plate (F) and fit in the power supply
cable strip (G) as well; tighten in grub screw (H) until the strip is punctured.
IMPORTANT: To avoid damaging the electronic components, the instal-
lation sequence illustrated in the figures below must absolutely be
complied with exactly.
The brown cable (I) must be kept facing the signal lamps (C) (if the cable strip
is supplied by LGL, the brown cable (I) can be identified by the arrows (L)
printed on the cable strip).
N.B.: Make sure that the support plate the yarn feeder is fixed onto is
provided with an earth connection, the same goes for the 48V AC three-
phase power supply transformer star-connection.
AC version
Grey strap
Grey strap
Brown
Yellow
Blue
Black