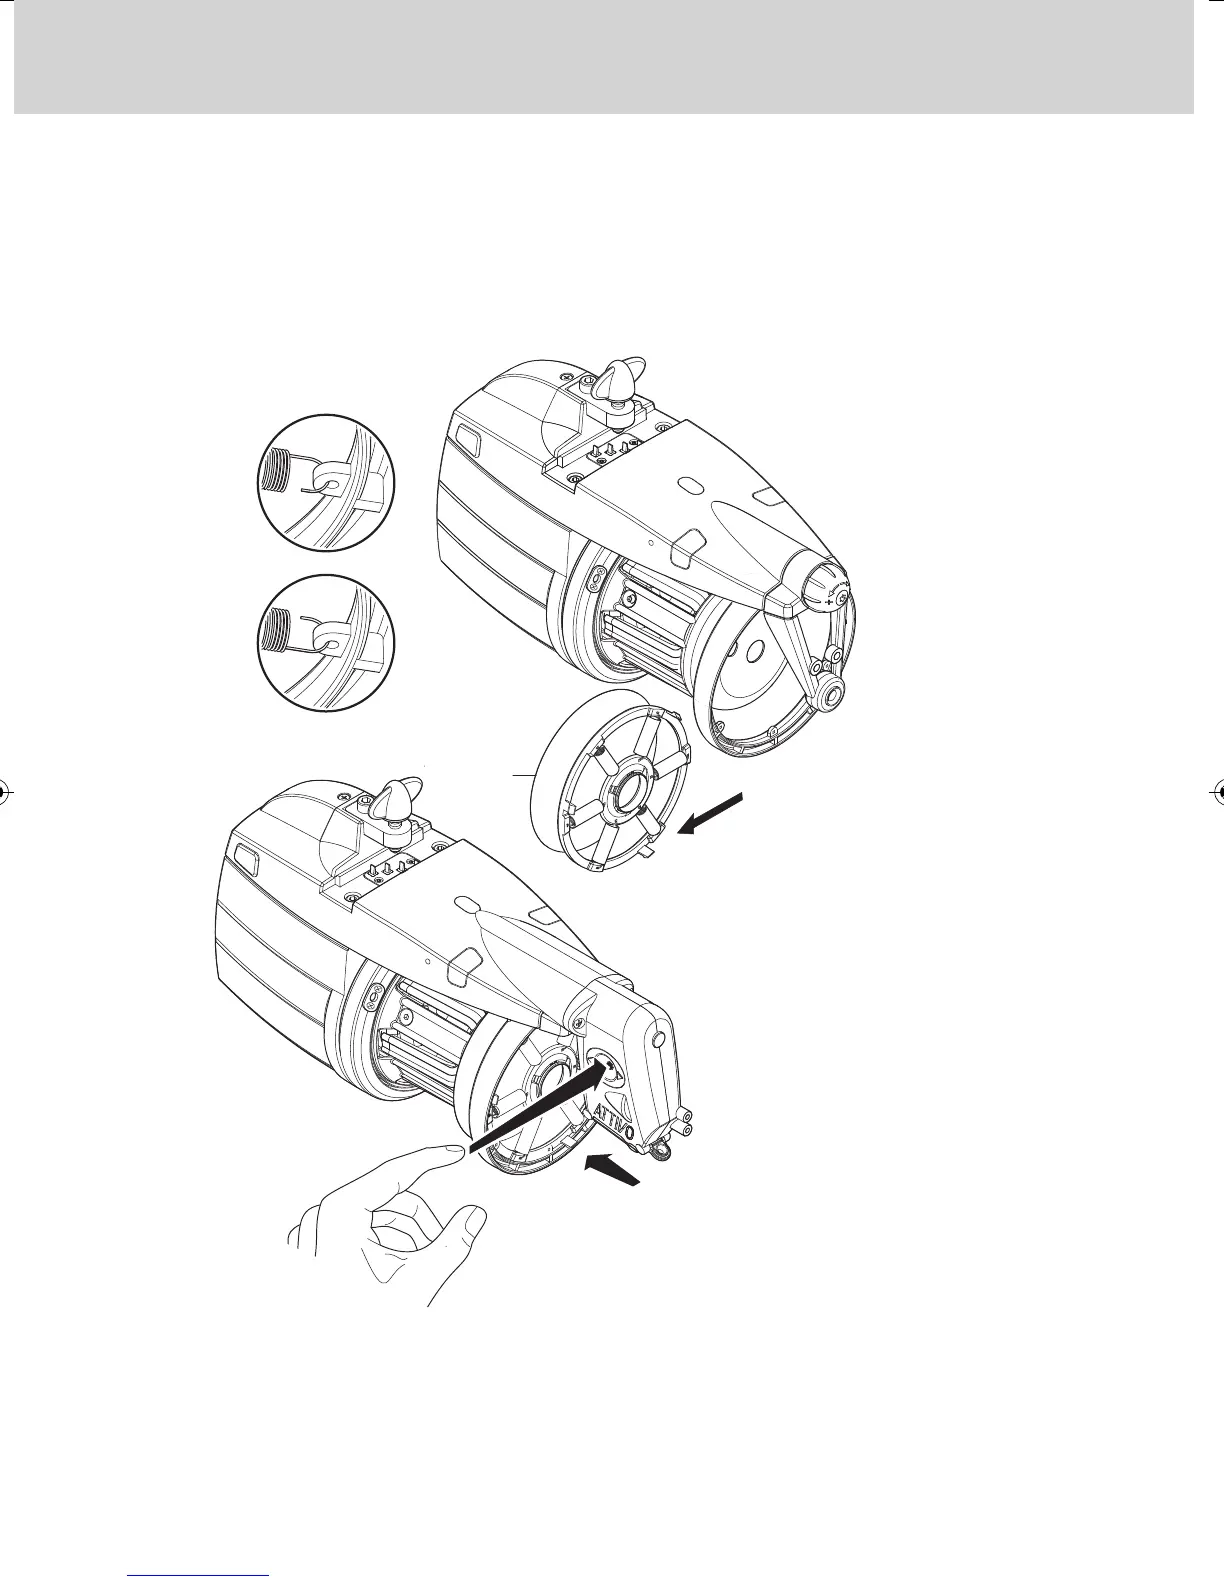
33
6 - COMPONENT REPLACEMENT
3) Remove the tensioner (33). Pay careful attention to the way in which the
springs are attached to the TWM: the spring-hooks must be hooked into
place so that they face outwards from the TWM. This to prevent them from
coming into contact with the truncated cone and damaging it.
4) In cases when the Attivo tensioner is provided, when the new TWM unit
has been installed, press the release pushbutton. The indicator lamps will
change from slow to fast blinking. Then the tensioner will resume the
previous work position.
FIGURE A
FIGURE B
YES
NO