CONVERSION FROM MANUAL
PULL STRAP TO POWER AWNING
TI-164
AWNINGS
Fig. 2
Fig. 3
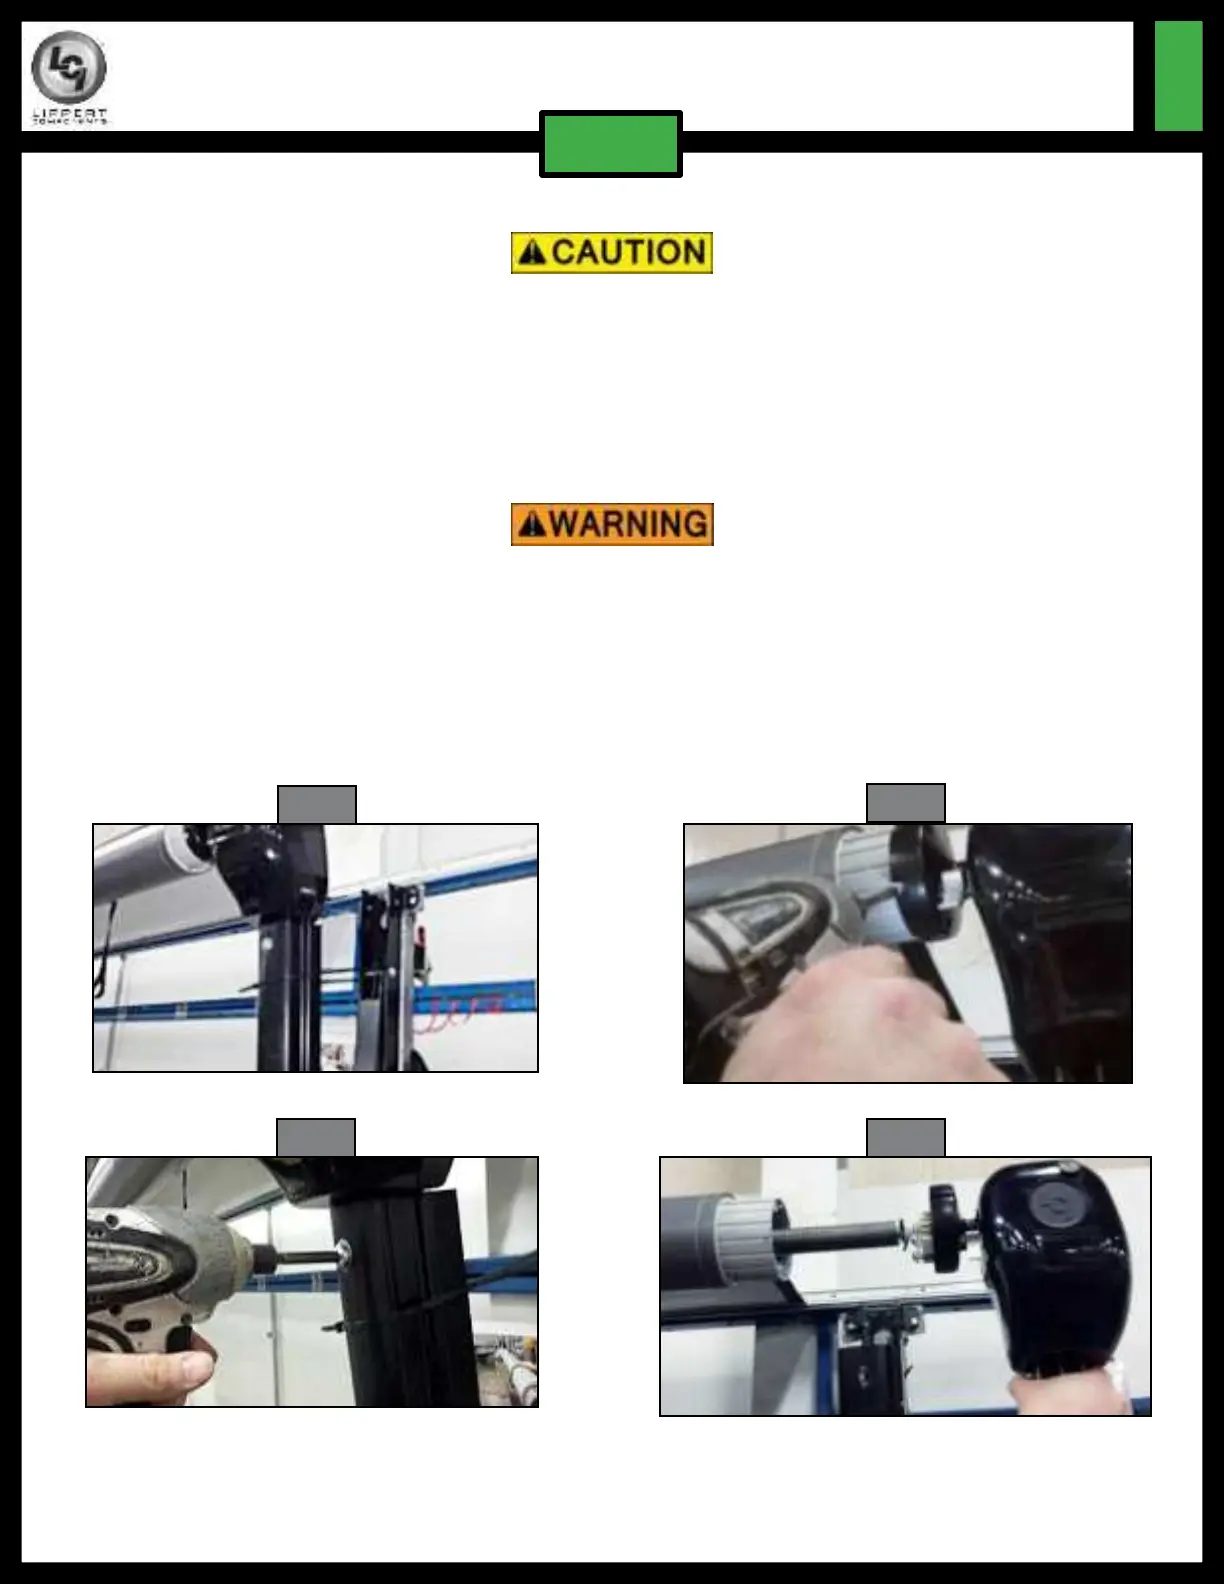
Fig. 4 Fig. 5
2. Zip tie both support arms around the outer arm and top pin of the mounted arm (Fig. 2).
The awning arms will be under pressure from the gas strut and can kick out from the unit if not properly
secured, causing personal injury or property damage.
3. Remove the three (3) screws holding the drive head end cap onto the roll tube (Fig. 3).
4. While one person holds the roll tube, remove the bolt holding the drive head assembly into the
support arm and remove the drive head assembly from the support arm (Fig. 4).
5. Remove the drive head cotter pin being sure to hold onto the drive head assembly and the roll tube as
there will be tension that needs to be released.
Failure to maintain control of the roll tube or the drive head assembly may result in serious injury or
property damage.
6. Slowly rotate the drive head assembly to release tension and then remove the drive head assembly
(Fig. 5).
NOTE: Awnings longer than 6' will also have tension that needs to be released in the idler head assembly
prior to continuing the procedure. To do so, remove the idler head cotter pin and slowly rotate the
roll tube to release tension in the idler head's spring.