Cabling BluTechVision Interactive
(other TV/Audio Equipment)
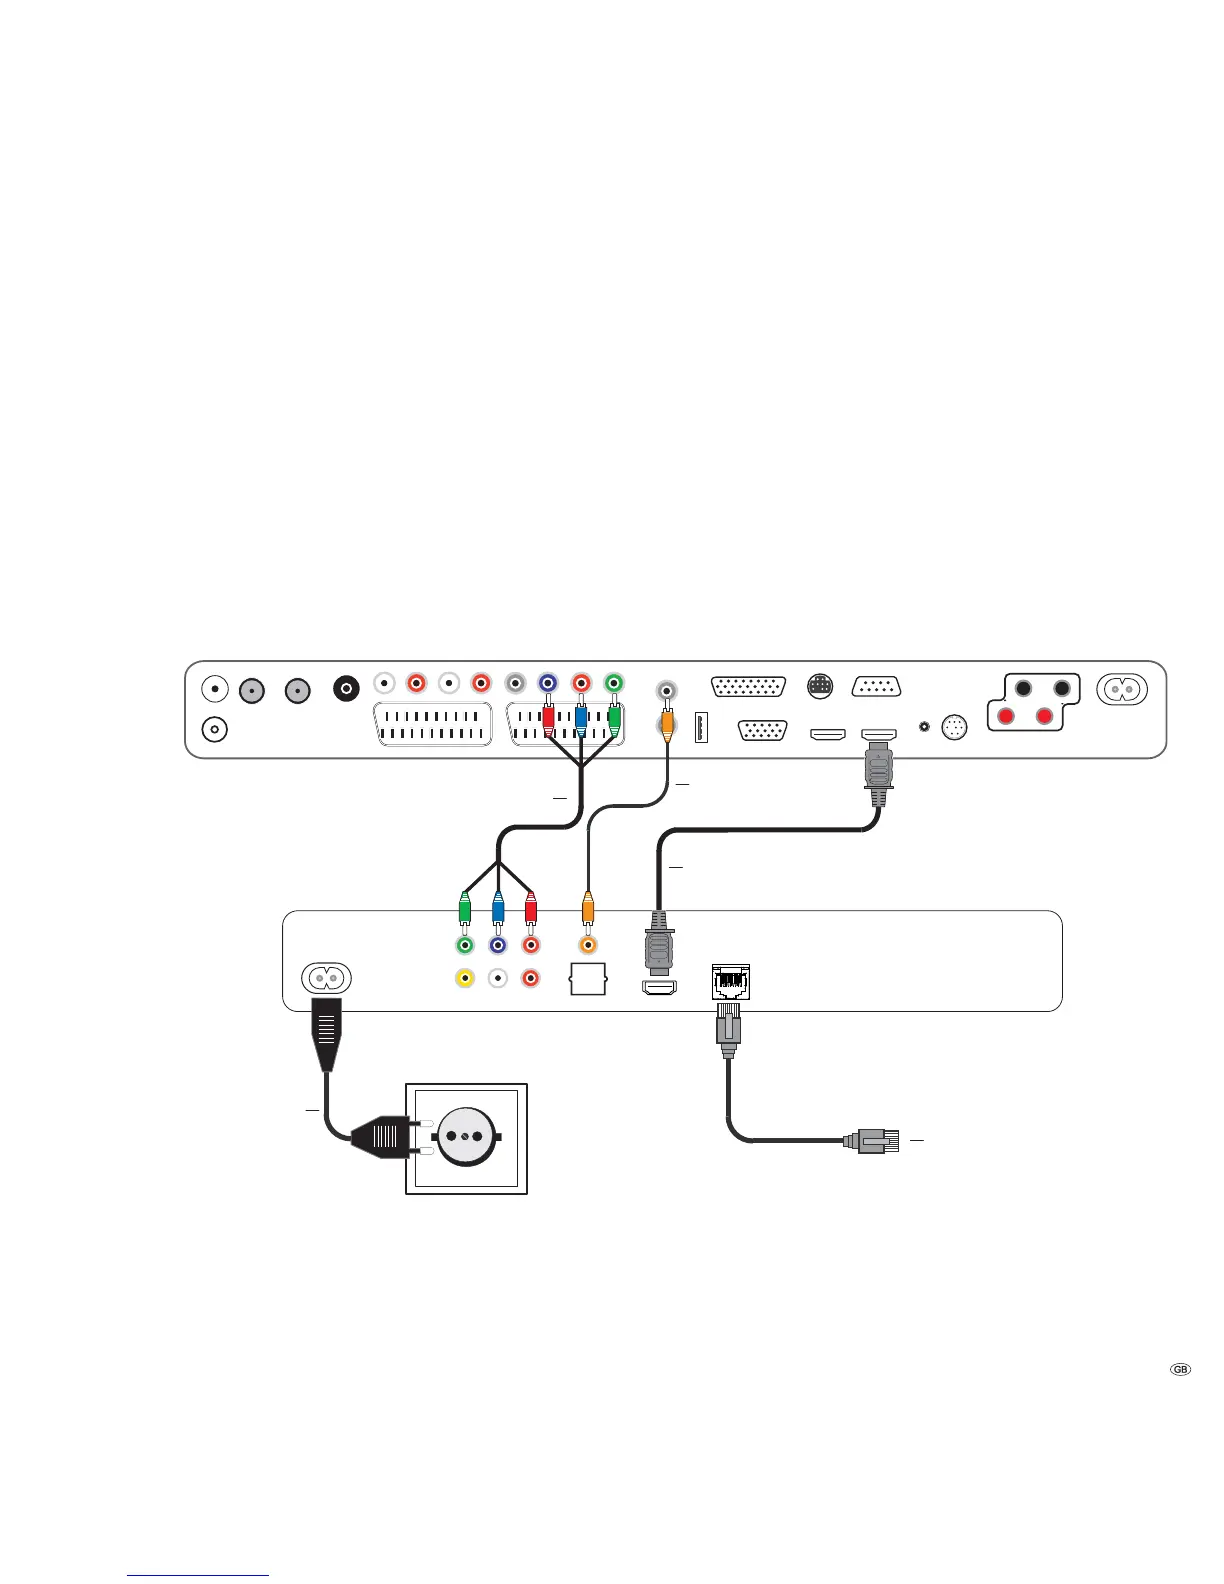
Use the HDMI cable supplied to connect the socket HDMI OUT on the BluTechVision
Interactive with the socket HDMI IN on your TV set.
If your TV set does not have an HDMI IN socket, then connect the three OUTPUT
COMPONENT sockets on the BluTechVision Interactive using three video-
compatible cinch cables to the sockets COMPONENT IN on your TV set.
You can also make a connection to a TV set using a video-compatible cinch cable
via the VIDEO OUT socket.
Using an optional RJ-45 network cable of the BluTechVision Interactive to a
network connection (e.g. Switch or DSL Router) with a connection to the internet.
In order to play the audio of the BluTechVision Interactive using your TV set
(without HDMI) or your audio equipment, you need to make an audio connection
between the audio equipment and the BluTechVision Interactive. It is preferable
to use an optional, digitally compatible audio cinch cable and to connect it to the
DIGITAL AUDIO OUT COAXIAL socket.If your audio equipment has an optical
digital input (TOSLINK), you can also make the connection with an optional fibre-
optic cable using the socket DIGITAL AUDIO OUT OPTICAL.
Alternatively, you can feed your audio equipment with the stereo audio signal
from the BluTechVision Interactive using an optional stereo cinch cable with
the sockets 2CH AUDIO OUT on your BluTechVision Interactive.
Plug the small connector of the mains cable into the socket behind the unit
(page 6) and then plug in the large connector of the mains cable into a 220-240 V
50/60 Hz mains socket.
Connecting up
11 -
TV set
BluTechVision Interactive
Network Cable
Digital Audio
Mains cable
HDMI cable
Component Video Cable