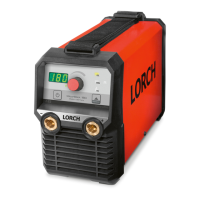
Welding process
909.4119.9-02 - 31 -07.19
19 Secondary parameter / machine congura-
tion button
A short button press is used to activate the
secondary parameter menu.
The machine conguration menu can be
activated from the secondary parameter
menu by pressing for an additional 2 sec.
A short button press ends the respective
menu level.
20 On/O button (2 sec.)
Switches the device on or into Standby
mode.
21 Display units LEDs
Display whether values in the 7-segment
display 31 values are shown in ampere,
percent, Hertz or seconds.
22 7-segment display
shows the current selected.
If the secondary parameters are activated,
the code and the set value are shown alter-
nately.
15 Welding process
15.1 Electrode
Before switch-on, ensure that neither
the electrode holder nor the elec-
trode is touching the welding table,
the workpiece or another electrically-
conductive object, to ensure that you
do not unintentionally ignite arcing on
switch-on. An unintentionally ignited
arc can damage the electrode holder,
the welding table, the workpiece and
the machine
Switch on the system
If necessary, switch the system on by pressing
button 20 for 2 sec.
Keep pressing button 19 until the desired pro-
cess is selected.
The MMA or CEL electrode icon (LED 15 or 16)
lights up.
Use control knob 14 to set the desired welding
current.
Arc ignition
Briey touch the workpiece at the point to be
welded using the electrode and lift the elec-
trode a little.
The arc burns between the workpiece and the
electrode.
Hotstart
In the electrode welding method, a hotstart of
125 % of the set welding current is used for 1
second for ignition. Like the welding current,
the hotstart is limited to a maximum of 180 A.
This can be changed in the secondary param-
eter menu.
Guide values for current intensity
Electrode Ø
[mm]
Recommended
current intensity [A]
1.5 20...40
2.0 35...60
2.5 45...100
3.2 75...140
4.0 130...190
Pulses
Pulsing can be set separately for each process.
Call up the secondary parameters (see “16 Sec-
ondary parameters” on Page 33).
Select the menu item Pulse Option (code "Pu0")
and set this to "on".
The Pulsing LED 18 lights up.
Select the "Secondary energy" secondary pa-
rameter (code "2.E").
Set the desired secondary current value by us-
ing control knob 14. The setting value is based
on % of the main current I1.
Select the "Pulse frequency" secondary param-
eter (code "PuF").
Set the desired pulse frequency by using con-
trol knob 14.
Select the "Pulse cycle duty" secondary param-
eter (code "PuB").

 Loading...